2 июля 2007
2.07.07
0
73K
Прохождение
Здесь будут перечислены только сюжетные миссии. Но не стоит думать, что кампания состоит только из них. Часто для того, чтобы добраться до боя продолжительностью в пять минут и продвинуться дальше, требуется захватить десяток планет, повергнув в жестоких космических боях сотни вражеских кораблей. Но это вам предстоит в подробностях пройти и пережить самим, а здесь мы обсудим ключевые моменты игры…
Империя
Подавляем восстания, уничтожаем мятежников. А как еще наводить порядок в огромной Империи?
Миссия 1. Crush. Kill. Destroy.
Во главе с Дартом Вейдером наводим порядок на мятежной планете. Теоретически его могут убить, практически это возможно, если только он оторвется от остальных сил и будет воевать в одиночку. Истребляем повстанцев вплоть до силового купола, затем проходим чуть ниже и расстреливаем генератор энергии. Теперь можно вернуться к месту бывшего купола и добить выживших.
Миссия 2. The Pirate Menace
Империя расправляется не только с повстанцами. Вот что-то пираты на Илюме расшалились — надо бы навести порядок. Присоединяем к Бобе Фетту по паре корветов и фрегатов и отправляем всю эскадру разбираться. Правда, сначала прилетит только один герой. И первым делом он должен уничтожить сенсоры, которых в системе очень много. Правильно подбрасывая бомбы, ваш пилот сможет уничтожать не только сенсоры, но и охраняющих их истребителей противника. После этого он может вызывать флот и уничтожить космическую станцию. Следующим по списку появится лидер пиратов на большом корабле. И его добиваем.
Миссия 3. Subjugating Geonosis
Усиливаем флот от предыдущей миссии и отправляем его вместе Дартом Вейдером. Космическая станция у противника невысокого уровня, а значит — будет быстро уничтожена. После этого присылаем десант и высаживаемся на планету. С самого начала надо быстро взяться за гражданских и уничтожить все 5 зданий. Потому что они почти постоянно выпускают замену павшим. Очень хорошо здесь подойдут TIE Mauler, которые успешно истребляют пехоту. После этого уничтожить повстанцев совсем просто.
Миссия 4. Attack on Mon Calamari
Перед нами встает задача захватить планету Мон-Каламари. Станция там не очень мощная, главное, уничтожить при помощи бомбардировщиков ее силовую установку. Затем уничтожаем торпедные установки и добываем весь оставшийся флот. Но надеяться, что все пройдет очень просто, не стоит — чуть позже прилетят несколько столичных кораблей повстанцев, поэтому флот туда надо приводить большой. Иначе не справитесь.
Миссия 5. Trouble on Kashyyyk
Хан Соло помогает освобождать вуки на их родной планете. Пусть помогает, а вы не торопитесь, методично уничтожайте домики, производящие новых вуки, и не давайте уже народившимся разрушать тюрьмы. Еще необходимо поливать огнем Соло, как только он появится в поле видимости. Вряд ли вам удастся его убить, но, если его дела будут совсем плохи, он просто скроется с планеты. А без него вуки быстро прекратят сопротивление, и миссия закончится.
Миссия 6. A New Weapon Of War
Итак, в ваших войсках появилось новое оружие — AT-AT. Отправьте Вирса его испытать. Доставка героя на планету пройдет без каких-либо проблем. Да и начало испытаний особых проблем не принесет. А вот потом появятся повстанцы и будут пытаться уничтожить образец боевой машины. Впрочем, многоног легко с ними справляется. Надо только добавить к нему пару подразделений пехотинцев — и не надо будет волноваться за то, что происходит под ногами.
Миссия 7. The Rebel Fortress
Вам надо уничтожить крепость повстанцев. Сначала предстоит космический бой, в котором вам будет оказано серьезное сопротивление. Потом будет наземное сражение, в котором у вас будут Дарт Вейдер и Вирс на своем АТ-АТ. С присущим ему могучим ударом, этот робот отлично разрушает здания противника.
Миссия 8. The Traitorous Moff
И у империи появился предатель. Некто Мофф Каласт обитает в системе повстанцев, и империя решила его уничтожить. Войск там много — до 30 корветов и фрегатов, не считая многих истребителей и бомбардировщиков. Но хитрость не в этом. Предатель обожает убегать с поля битвы. Но к этой миссии в одной из систем у вас возникнет фрегат Interdictor. Обязательно берем его на миссию, включаем его способность и ставим где-нибудь в сторонке, чтобы случайно не зашибли. А тогда уж наш беглец не уйдет.
Миссия 9. An Engagement With The Emperor
Император решил собственноручно наказать непокорных. Миссия достаточно простая. Надо только регулярно уничтожать здания — именно от этого император восстанавливает жизнь. Пехота же противника просто валится снопами от его проявлений Силы.
Миссия 10. Capturing A Princess
Самое время захватить вождя повстанцев — принцессу Лею. Формируем флот, в него обязательно должны войти Star Destroyer и Interdictor. Первый понадобится непосредственно для захвата принцессы, второй — для того чтобы она не ускользнула из системы. Только сначала придется уничтожить пиратов, которые заодно с повстанцами. Но разве это проблема?
Миссия 11. The Destruction of Alderaan
А вот и первое применение Звезды Смерти. Нужно провести ее на Алдераан и уничтожить планету. Достаточно выждать всего 75 секунд, чтобы она полностью зарядилась. Но кроме нее необходимо привести большой флот, чтобы справиться с защитой повстанцев, — там вас будут ждать до 8 столичных кораблей.
Миссия 12. End of the Rebellion
Как пользоваться Звездой Смерти, вы уже знаете. И осталось-то всего уничтожить 5 планет повстанцев. Правда, сопротивление на каждой будет серьезным, да и ионные пушки будут стрелять с земли, но вы справитесь. Надо только взять флот побольше.
Повстанцы
Настало время освобождения от имперских войск, грядет всеобщая свобода…
Миссия 1. Shipyard Diversion
Здесь вам предстоит уничтожить 6 имперских доков. Для этого выделены 4 корвета и герой, который обязательно должен выжить. Хитрость здесь в том, что сами доки уничтожать не обязательно, а нужно стрелять по складам с ресурсами вокруг них. Пойдет цепная реакция и доки взорвутся самостоятельно. Сопротивление противника здесь очень вялое, и ничего особенного он вам не противопоставит.
Миссия 2. Interpreting the Network
R2-D2 должен выкачать данные из имперского хранилища. Но при этом он еще и должен выжить, что куда как сложнее. Для обеспечения этой задачи придаем ему сопровождение из 2 отрядов танков, 3 гранатометчиков и 3 пехотинцев. По прибытии зачищаем точки высадки от противника, делим между ними оставшиеся войска и двигаем нашего хакера к банку данных. Через некоторое время противник узнает о том, что творится в хранилищах, и отправит десант разобраться с этим безобразием. Но мы помним, что высадка десанта — дело долгое. Поэтому за время высадки все десантники будут уничтожены. Далее только дожидаемся окончания кражи данных и провожаем робота в одну из точек высадки.
Миссия 3. Theft of the X-Wing
До сих пор в вашей армии не было ни одного нормального истребителя. И вот повстанцы решают украсть первые образцы у империи. Для этой миссии желательно взять много войск, иначе справиться с противником будет сложно. Очень желательны бомбардировщики на орбите планеты. К турболазерам, стоящим на коротком пути, лучше не ходить вообще, просто перегородив проход танками и гранатометчиками. По длинному пути идти длиннее, но проще. Таким образом проходим на аэродром. По пути можно уничтожить генераторы турболазеров и расстрелять беззащитные пушки. Перед тем как отвести летчиков к месту назначения, отправьте одного воина к месту с 4 незанятыми точками под пушки — сразу после прибытия пилотов на этих точках и вокруг аэродрома будут строиться пушки. На аэродроме их уничтожит сопровождение пилотов, а вот по отдельным четырем пусть наносят удар бомбардировщики. Если хоть один пилот уцелел, то миссия выиграна, а вы стали обладателем новых истребителей.
Миссия 4. Kessel Rescue
Здесь вам нужно остановить 6 шаттлов, не уничтожив их при этом. На задание берем несколько корветов и 5-6 отрядов бомбардировщиков. Корветы пусть отгоняют истребителей противника, а бомбардировщики, пропустив сквозь свой строй шаттлы, бьют по ним из ионного орудия. Оно как раз остановит корабли, не уничтожив их.
Поддержи Стопгейм!

Опять непорядок на границах Империи. И ведь не «далеко, далеко, отсюда не видно», а прямо под боком. Приходится снова формировать эскадры и отправлять их на смертный бой с беспокойными повстанцами. Эх, где мой любимый Star Destroyer?
И у повстанцев те же проблемы. Уж очень их волнуют имперские штурмовики на родных планетах. Хотя нет, уже не волнуют — вышибли. А вот вражеские крейсеры натурально заслоняют солнце. Пора поднимать в космос эскадрильи wing’ов и показывать зарвавшимся врагам, кто здесь хозяин.
Так снова схлестнулись добро и зло в этом мире. Не темная и светлая сторона силы — таким мелочам нет места сейчас. Никто не заметит единичных джедаев и ситхов. В бой идут армии и эскадры. Ваше слово, господа полководцы!
Очень во многих играх есть такие явления, как наземный и космический бой. Разумеется, они «различны меж собой», и межзвездные линкоры никогда не сойдут на грешную землю ради сомнительного удовольствия пострелять по вражеской пехоте. Так же и здесь, хотя какие-нибудь космические бомбардировщики порой опускаются до того, чтобы который раз повзрывать тех, кто и так обитает на покрытой воронками земле. Но сложность и некоторая запутанность игры все равно требуют отдельного рассмотрения войны в космосе и на земле в кампании и одиночных миссиях. Чем мы сейчас и займемся.
Космос, как сила…
Начнем с него и рассмотрим с точки зрения одиночных миссий, оставив кампанию «на сладкое» — в отдельную главу.
Опора любой эскадры — космическая станция. Смысл ее в том, что она в умеренных количествах производит ресурсы и сама себя обороняет. Конечно, против нескольких крейсеров-разрушителей она не устоит, но отбить атаку обнаглевших истребителей вполне способна. С ростом в уровнях (всего 5) станция может плодить все лучшие виды войск. Причем тут игра отличается тем, что несмотря на 20 «мест» под отряды, вы имеете возможность создавать их «про запас» и доставать их по мере необходимости. В какой-то мере это похоже на гнусную шутку, так как подкрепления приходят к месту боевых действий почти мгновенно, а наделать таких «запасных» можно в неограниченных количествах, позволяли бы средства. Также станция производит и всевозможные улучшения кораблей, ускоряя их, усиливая броню, увеличивая атаку.
Экономика войны в космосе держится не на том, что скромно позволяет вам станция. В разных частях карты разбросаны «бесхозные» астероиды, поддающиеся застройке. Создал добывающую станцию — деньги стали притекать быстрее. Построил вторую — ручеек стал еще шире. Есть еще немного денег — поднял уровень своих шахт (максимально может быть третий), причем всех сразу. Нередко после атак противника астероиды уничтожаются, но через некоторое время благополучно восстанавливаются в нейтральном состоянии. Тогда-то их и нужно застраивать, создавая себе приток денег.
Астероиды — не единственное, что болтается в космосе. Застройке поддаются также космические станции, они-то и не дадут противнику спокойно шататься мимо ваших позиций. Перестроить их можно в лазерные или ракетные системы. Я бы рекомендовал первое, так как это позволяет избавиться от истребителей, которые будут толпами носиться мимо ваших позиций. Ракеты полезней против мощных кораблей, но они моментально сотрут хрупкие боевые станции в порошок. Замечу, что станции, подобно астероидам, находятся на заранее предусмотренных местах и после уничтожения восстанавливаются. Также существуют пиратские базы, которые не уничтожаются, а переходят из рук в руки. На них можно закупать нейтральные корабли, хотя смысл этого мне недоступен.
Рассказывать о том, кто есть кто в здешних местах, очень трудно без понимания того, что кто может. А это определяется типом вооружения. Здесь есть лазеры нескольких видов, ионные орудия, ракеты и протонные торпеды. Лазеры представлены легкими скорострельными моделями, отличающимися точностью, и тяжелыми турболазерами, больше подходящими для охоты на крупные объекты. Ионные пушки похожи на турболазеры, но выдают побочный эффект в виде воздействия на электронику вражеских кораблей, снижая их точность (да еще и стреляют далеко).
Ракеты идеально подходят против тяжелых неповоротливых кораблей, так как не подаются противодействию силовых щитов. Протонные торпеды куда мощнее ракет, но они очень тяжелые и медленные. Поэтому какой-нибудь вражеский фрегат легко увернется от торпедной атаки. Зато уж если она попадет… Все это особенно интересно для всех кораблей крупнее истребителя.
Дело в том, что они могут нести на себе много различного вооружения, и это поставит вас перед необходимостью задуматься над тем, как лучше расправиться с этим кораблем. Также все эти пушки имеют вид отдельных ключевых точек крейсера или фрегата, так что для его уничтожения необходимо «погасить» их все. Из не боевых «точек» на кораблях могут встречаться двигатель (при уничтожении резко падает скорость, что позволит чаще попадать в корабль), генератор силового поля (восстанавливает его) и ангар (некоторые корабли могут нести на себе истребители).
Далее корабли делятся на классы: истребители, бомбардировщики, корветы, фрегаты и «столичные корабли». Первые двое — простейшие одноместные машины, воюющие целыми эскадрильями. Только истребители вооружены лазерами, а бомбардировщики — протонными торпедами. Корветы — быстрые подвижные корабли, увешанные легкими лазерами и обладающие хорошими защитными полями. Фрегаты увешаны оружием, а некоторые даже несут в своих ангарах орды истребителей и бомбардировщиков.
Тут есть большой выбор, и разные машины этого класса предназначены для решения разных задач. Наконец, столичные корабли — это очень «раскормленные» фрегаты, которые в кампании можно строить только на отдельных планетах. Есть еще герои, но это настолько специфичные товарищи, что никакой классификации не поддаются.
Это интересно: разница между типами кораблей еще и в том, что эскадрилья истребителей или бомбардировщиков стоит всего 1 очко, корвет — 2, крейсер — 3, столичный корабль — все 4. А на все у вас всего 20 очков (для повстанцев 25).
Смысл же вышеприведенной классификации следующий: здесь все подчиняется правилам широко известной игры «камень-ножницы-бумага». Истребители отлично расправляются с бомбардировщиками, бомбардировщики жестоко расстреливают неповоротливые фрегаты, корветы легко расправляются с любой мелочью, а фрегаты громят боевые станции и, не напрягаясь, давят корветы пачками. Просто? А вот вы создайте свою правильную эскадру и тогда поймете, что это не так…
Империя
Итак, список имперских космических сил.
Probe Droid. Разведчик, применимый только в кампании. Нужен для того, чтобы узнать, что же такого противник собрал в какой-то системе. Моментально уничтожается, но информация от него еще некоторое время поступает.
Tie Fighter. Истребитель от империи. Семь штук в отряде. Вооружен легким лазером и в основном применим против вражеских бомбардировщиков и старых истребителей повстанцев. Очень боится вражеских корветов.
Tie Bomber. В эскадрилье 4 бомбардировщика, вооруженных протонными торпедами. Уязвим для истребителей и корветов, но зато очень сильно может навредить всем крупным кораблям. В кампании могут спускаться на поверхность и бомбить боевые порядки противника.
Tie Scout. Эти кораблики — модифицированные истребители. У них лучше броня, больше дальность видения и неплохое вооружение. Могут даже кратковременно «подсветить» поле сражения, обнаруживая прячущиеся войска противника. В силу этого им страшны только вражеские истребители. Но… Их всего 3, так что много они не навоюют. Требуют станцию второго уровня.
Tartan Patrol Cruiser. Имперский корвет. Быстрый, маневренный, вооружен 4 лазерами и обладает силовым щитом. Впрочем, лазеры у него «не прописаны», поэтому его достаточно просто уничтожить. Предназначен для борьбы с вражескими истребителями и бомбардировщиками, но сам сильно боится вражеских фрегатов.
Acclamator-class Cruiser. Первый имперский фрегат, производится при втором уровне развития космической станции. Своего рода маленький авианосец, так как на его борту размещаются 4 эскадрильи истребителей и 2 бомбардировщиков. Но одновременно в воздухе находится только по 1 эскадрилье каждого вида. Однако стоит одной из них погибнуть, как из ангаров появится замена. Он и сам по себе неплохо вооружен, имея на борту 2 батареи лазеров, 2 турболазеров, по одной установке ракет и протонных торпед.
Что приятно — силовой генератор у него встроен, это позволяет ему держать силовое поле до самой своей гибели. Его способность делает возможным на короткое время перекачать энергию силовых щитов в оружие, усилив ударную мощь, что полезно в ситуациях, когда противника надо срочно добить. Учтите, что если щиты на нуле, то и пользы от такой перекачки вы получите не больше.
Итак, перед нами — довольно дешевый универсал для низких уровней развития. Acclamator может без проблем воевать с любыми кораблями противника, явно уступая только более тяжелым аналогам типа столичных кораблей. Рекомендую…
Interdictor Cruiser. Специализированный фрегат, появляется на 3 уровне станции. Вооружен 4 лазерами. В качестве «довеска» — генератор силового поля, который можно уничтожить. Есть 2 способности — щит от вражеских ракет (не только для себя, а в некотором радиусе) и возможность запретить противнику уход в гиперпространство. В силу этого обычно подходит только для состояний, где исчезновение противника с поля боя критично. Например, для кампании. Ибо при сходной цене уж очень сильно уступает Acclamator.
Broadside Cruiser. Имперский ракетный корвет, открывающий список кораблей на 4 уровне. Обладает большим списком недостатков — слабой маневренностью и броней, низкой точностью. Стреляет очень мощными ракетами, и основное его достоинство в том, что дальность его выстрелов очень высока, — может бить аж через всю карту.
Ракеты используют эффект объемного взрыва, повреждая всех оказавшихся рядом, — истребители противника просто дохнут. Есть специальное свойство, позволяющее обстреливать какую-то точку на карте, выпуская при этом множество ракет. Лучше всего работает против толпы кораблей. Может использовать тактику против космической станции, когда предварительно «счищается» генератор защитного поля. Тогда 3 таких корвета начинают обстреливать ее как точку на карте, повреждая при этом сразу все критичные точки. В открытую схватку лучше его не выпускать — собьют.
Victory Cruiser. Крейсер, ставший дальнейшим развитием Acclamator. Несет на своем борту 6 эскадрилий истребителей и 3 бомбардировщика, выпуская их в космос в соотношении 2-1. Вооружения вроде бы поменьше, но качеством оно получше — 2 улучшенных батареи турболазеров и одна ионных орудий. Так что он берет свое, сбивая электронику противника. Способность та же — усилить залп за счет щитов. Кроме того, у него много жизни и хорошие энергетические щиты, что позволяет ему бояться только столичного корабля и бомбардировщиков повстанцев.
Star Destroyer. А вот и столичный корабль. Самый гигантский авианосец — в его ангарах 10 истребителей и 5 бомбардировщиков, выпускаемых опять же в соотношении 2:1. Из вооружения 4 батареи турболазеров и 2 ионных орудий. Способность — торможение корабля противника. Если какой-нибудь монстр еще сможет вырваться, то мелкие будут обречены стать мишенью и погибнуть. О чем еще тут говорить — самый мощный корабль флота…
Boba Fett. Первый герой империи, появляется на втором уровне. Летает на скоростном кораблике, зверски расстреливает вражеские истребители и бомбардировщики из скорострельных лазеров. Имеет на борту бомбу, которая при правильном применении уничтожает вражеские истребители целыми эскадрами.
Darth Vader. Летает на своем собственном истребителе в сопровождении обычных. Может позвать к себе в команду летчиков из других эскадрилий. Но сбивают его уж слишком легко.
Captain Piett. Летает на обычном «звездном разрушителе», которому подарил свойство протонного удара, когда наносится большой урон вражескому кораблю. Обычно сначала применяется торможение противника, а затем проводится этот удар.
В космосе же (точнее, на земле, но действует только в космических битвах) есть орудие Hypervelocity gun. Оно просто по вашему приказанию стреляет по кораблям противника, обходя при этом силовое поле. Три выстрела не переживают даже самые мощные корабли противника.
В кампании можно увидеть еще и Звезду Смерти. Сама она занимается только уничтожением планет, но сопровождается парой фрегатов (Acclamator или Victory) и парой корветов.
Повстанцы
А вот и список сил повстанцев.
X-Wing . Истребители в количестве 5 штук. Но они по мощнее имперских и обладают полями, поэтому живут подольше. В схватках между собой в равных количествах выигрывают и боятся только корветов. Умеют складывать крылья, повышая этим скорость полета. В кампании можно иногда встретить Z-95, но это откровенно устаревшие и убогие аппараты.
Y-Wing . Бомбардировщики, и опять с протонными торпедами. Кроме того, несут ионную пушку, которую надо предварительно активизировать. Так что эти бомбардировщики могут и истребителям оказать сопротивление. В эскадрилье — три самолета.
Corellian Corvette. Мощный противоистребительный корвет с 8 лазерами. Имперский аналог превосходит на голову, а вражеские истребители обычно опадают в его окрестностях целыми стаями. Умеет усиливать залп, на время ослабляя щиты.
A-Wing . Этот улучшенный истребитель открывает второй уровень развития станции. В отряде их 5 штук. Менее мощные, но более скоростные и маневренные. Способность — выполнение фигур высшего пилотажа. При этом противник не может попасть в ваших летунов, но очень старательно в них целится.
Nebulon-B Frigate. Гроза вражеских корветов. На нем стоят 2 турболазерных батареи и 2 батареи лазеров. В него тяжело попасть, но крупные корабли все же сумеют его побить. Может перекачать всю энергию на восстановление щитов, при этом он стреляет намного реже. Но необходимо, чтобы щит был хотя бы насколько-то заряжен.
Это интересно: в кампании можно нанимать офицеров для повышения дальности стрельбы. Небулонский фрегат — самый любимый их корабль. Если он есть в составе флота, все командование усядется на один из них.
Corellian Gunship. Фрегат, несущий на себе 2 лазерных и 4 ракетных батареи. Появляется на 3 уровне космической станции. Хорошо работает против вражеских фрегатов, но из-за того, что ракеты летят недалеко, должен быть где-то сразу за первой линией кораблей. Также умеет перекачивать энергию щитов в усиление урона, но конкретно у него она бесполезна из-за малого числа лазеров.
Marauder Missile Cruiser. Четвертый уровень открывает повстанческий ракетный корвет. Полностью соответствует имперскому аналогу. Да и применяется точно так же.
Alliance Assault Frigate. Тяжелый фрегат с хорошей броней. Обладает 2 батареями турболазеров и 2 лазеров. Активно бьет вражеские Acclamator’ы, расправляется с корветами. Для него страшны только бомбардировщики и столичные корабли.
Mon-Calamari Cruiser. Обладает 4 батареями турболазеров, 2 — ионных орудий. Есть мощная защита с возможностью восстанавливать силовое поле за счет снижения мощности огня. На равных с вражескими столичными кораблями, остальных превосходит. Разумеется, боится бомбардировщиков. Но вы же не оставите его одного?
Han Solo/Chewie. Герой повстанцев, летает на легком корвете, рассыпая во все стороны лазерные лучи. Летает с огромной скоростью, и попасть в него очень трудно. Главный враг вражеских истребителей. Умеет включать невидимость и тем самым, как и положено герою, спасается из безнадежных ситуаций.
Sundered Heart. Специально для этого героя Corellian Corvette увешали броней и поставили на него пушки получше. Применение соответствующее. Кроме способности усиливать урон за счет щитов, умеет ослаблять урон противника на некоторой территории. Пусть недолго, но за это время как раз можно все решить.
Red Squadron. Это отряд из 6 X-Wing, во главе которых стоит сам Люк Скайуокер. Разумеется, их вооружили куда как лучшей версией истребителей, чем те, на которых летают обычные летчики. Кроме того, этот отряд умеет делать удачный выстрел, нанося больше урона тем, в кого попадет. Умеет уничтожать Звезду Смерти.
Home One. А этот деятель летает на флагманском корабле адмирала Акбара. Это лучший корабль игры — 4 турболазера и 4 ионных орудия. Мало того, что умеет перекачивать энергию оружия в усиление щитов, так еще и любит объявлять какого-то противника своим личным врагом, и тогда все-все корабли повстанцев сосредоточивают свой огонь на несчастной жертве.
Пушка от повстанцев, Ion Cannon, оригинальней имперской. Она полностью уничтожает силовое поле и повреждает электронику (корабль противника не движется и некоторое время не стреляет). Впрочем, корабли класса Star Destroyer вполне успешно обходят последствия повреждения электроники. Зато это действует на космическую станцию противника, что в одиночной игре или мультиплеере может стать решающим.
Техника космического боя
Общая техника проста — захватить как можно больше астероидов, чтобы ускорить производство. Также неплохо будет укрепить расположенные поблизости от них космические станции, чтобы противник не мог слишком уж легко проскользнуть отрядом-двумя истребителей с целью поломать ваши производственные мощности. Имеет смысл защитить их и чем-нибудь вроде корвета. Просто при использовании больших флотов вам не хватит на все-все, а от прихода эскадры с 3-4 фрегатами флот из пары фрегатов и пары корветов скорее всего не спасет. Тут надо только истребители отгонять, чтобы не наглели.
Освоились? Начинаем использовать основные особенности сторон. Как мы помним, у империи много авианосцев с большим количеством истребителей на борту. Поэтому дожидаемся хотя бы кораблей класса Victoria (лучше Star Destroyer, у них больше истребителей) и отправляемся атаковать противника. В данном случае истребители выступят отвлечением противника, а бомбардировщики попытаются под шумок закинуть несколько торпед в критичные для противника точки. Вместе с запуском первой волны с позиций двинутся и авианосцы, которые должны заняться непосредственным уничтожением космической станции противника и ее защитников. Тут уж врагу будет не до мелочи, которая втихую может натворить кучу дел. Во флот стоит включить и пару-тройку корветов (надо же будет кому-то утихомиривать вражеские бомбардировщики), а в тылу поставить 2-3 ракетных корабля — они очень удачно включатся в общий концерт, когда у противника будет уничтожена силовая защита станции. Если противник очень увлекается ракетами, имперцам поможет Interdictor, который способен отклонять их.
Это важно: обязательно приобретайте офицеров — возможность стрелять дальше, чем противник, еще никому не повредила.
За повстанцев играть несколько сложнее — авианосцы им не положены. Поэтому в их флоте обязательно должны быть 4-5 корветов для борьбы с истребителями и бомбардировщиками противника. Сами истребители они обычно не производят, а вот бомбардировщики используют сразу по 4-5 эскадрилий, чтобы получить от них хотя бы какой-то эффект. На первый план в этом бою выступают мощные фрегаты, опять же, столичные корабли. Помогает только одно — возможность быстро восстановить защиту при помощи способности. Только надо ее использовать правильно, сразу же после включения отводя пострадавший корабль с передней линии в тыл до восстановления способности. Конечно, для ракет и торпед это не имеет значения, но ведь фрегаты ими не вооружают. Поэтому битва за повстанцев — это постоянные маневры фрегатов с целью сохранить их подольше.
Земля у ваших ног
Война на земле стала прямым продолжением космической. Но если в космосе все выглядело вполне приемлемо, то здесь стало немножко абсурдным. Однако — обо всем по порядку.
Каждый из противников получает в свое распоряжение уже готовую базу, ничего строить вам не придется. Набор вполне типичен — пара фабрик для техники, казармы для пехоты, генератор силового поля и электростанции, академия для офицеров, производящая героев. В качестве уникальных строений у империи есть исследовательская станция, а у повстанцев — академия террористов.
Оно и верно, зачем утруждать себя получением знаний, если их можно украсть у противника? А на свободной территории можно обучить товарищей, которые будут мелко пакостить врагу. Так что с основными помещениями у вас проблем не будет — они уже есть. Зато утратив их, обратно восстановить очень сложно, ибо стоит это очень дорого. И иногда стоит положить армию до последнего солдата, но не порушить фабрику, откуда лезут многоноги.
Но это я о том, что построено. А ведь кое-что еще можно создать самому. Начнем с экономики. Она в точности такая же, как и в просторах космоса. То есть для ленивых всегда идет «заранее оговоренный процент» от самой базы. Те же, кого волнует развитие, займутся поиском точек, с которых приходит благодать в виде ускорения притока ресурсов. Кроме них на карте есть точки орудийных башен, точки высадки и нейтральные сооружения.
Точки орудийных башен предназначены для того, чтобы вы строили на них свои оборонительные сооружения. Бывают двух типов. На первом вы получаете возможность восстановить башню, которая замечательно расправляется с танками. Все бы хорошо, но с пехотой у нее как-то не очень. Еще одна проблема в том, что понявшая, в чем дело, пехота часто подходит к подножию башни, в ее мертвую зону, и оттуда безнаказанно ее разрушает. В точках второго типа есть выбор между противопехотными, противотанковыми, зенитными башнями и ремонтными и медицинскими центрами.
Еще можно создать на этом месте дроида-разведчика, но он на месте не сидит и тут же убегает по своим прямым обязанностям. Недостаток всех башен в том, что их можно построить не там, где мы сами хотим, а там, где создатели карты сообразили поставить точку для них. Поэтому часто можно с тоской наблюдать, как пехотинцы деловито расправляются с очередной беззащитной противотанковой башней, стоящей «на отшибе».
Точки высадки — это особенность наземной игры. На карте их довольно много, и, контролируя их, можно высаживать на них подкрепления (а про ограничение численности войск вы не забыли?). Зачем вываливать неторопливых многоногов в своем лагере, когда их можно прислать прямо к базе противника? Обычно вокруг этих точек и плодятся прочие нейтральные сооружения и точки орудийных башен. Только большинство из них не видно из-за тумана войны, поэтому надо исследовать пространство вокруг этих точек на предмет выявления полезных домиков.
Нейтральные сооружения могут быть выражены в виде генераторов силовых щитов и всевозможных заводов. Вам совсем не помешают несколько боевых машинок (пусть и слабеньких), не проходящих ни по каким нормам.
Вот с такими соображениями вам и предстоит начать изучение того, что есть у обеих сторон.
Империя
Stormtroopers . Пехота. Просто пушечное мясо. 2 отряда по 9 человек. Основное применение — захват контрольных точек и ожидание подхода более приличных войск. Благо войска, чья основная обязанность не избиение пехоты, мучаются с ними долго. Боятся гаубиц и вражеских инфильтраторов. Зато хорошо уничтожают вражеских гранатометчиков. Могут обстреливать территорию из гранатометов, но это извращение фантазии разработчиков так и не сподвигло меня на идеи, как его использовать.
Scout Bike. Пара хитрых мотоциклов, предназначенных для борьбы с вражеской артиллерией. Для расправы с ней они применяют взрывчатку, а неустрашимость в этом деле объясняется тем, что наши наездники успевают проскочить мимо залпов артиллерии. Зато та не успевает так же быстро уехать с места закладки мины. Однако уязвимы для любых танков, что делает их необходимость сомнительной. Будучи сбитым с мотоцикла, становится обычным пехотинцем.
AT-ST. Обычные двуножники, производятся в количестве четырех штук на отряд. Одинаково средненько воюют как против пехоты, так и против танков. Достоинство всего одно — быстро производятся. Однако их часто включают в гарнизоны, поэтому в ваших войсках они все же найдут свое место. Умеют наносить удар по указанной точке при помощи ракет, но это довольно экзотическая способность.
Tie Mauler. Противопехотный танк, который уничтожает пехоту целой кучей способов — расстреливает из лазеров, укатывает ее гусеницами, использует способность взрыва, предварительно заехав в толпу наступающей пехоты. Часто последнее единственный метод хоть что-то сделать — уж больно на нем тонкая броня. В отряде 5 штук.
2-M Repulsor Tank. Танк на воздушной подушке и с силовым полем. Отлично справляется с любыми танками противника, так как для этого и предназначен. Может усилить выстрел за счет силового поля. Если противник замучил вас своими легкими танками — вызывайте именно эту фантастическую четверку.
SPMA-T. Гаубица, двигается медленно и хорошо работает только в разложенном состоянии. Тогда она далеко и больно стреляет — пехота вымирает целыми отрядами, а техника получает большие повреждения. Но в этом виде появляется мертвая зона, в которой противник может творить, что захочет. В походном варианте стреляет из слабенького лазера. В отряде их всего 3. Своя техника и пехота от ее попаданий почему-то не страдают.
Это интересно: залпы гаубиц демаскируют их в тумане войны.
AT-AT. Легендарная четырехногая машина, вооруженная 4 лазерами. Замечательно подходит для борьбы с техникой и зданиями. Кроме этого, в своем брюхе несет две девятки пехоты, которые может обновлять по мере их гибели (прямо как тараканы плодятся). Готов воевать с чем угодно, однако очень плохо относится к вражеским «летунам», у которых есть против него специальная атака с запутыванием ног. Правда, может им адекватно ответить — стрелять по ним умеет. Может топтать пехоту, но зато пехота, прорвавшаяся ему под брюхо, чувствует себя так же, как лиса в курятнике.
AT-AA. Зенитка, предназначенная для борьбы со всевозможными вражескими летунами. Просто ездит и стреляет (может и по наземной технике, хотя и хуже).
Mara Jade. Первый герой империи очень успешно истребляет вражескую пехоту из своего автомата. Еще у нее есть взрывчатка, которую она может кинуть в технику. Кроме этого она умеет убалтывать вражеские войска (пехоту), переводя их под контроль империи. Так что — девушка видная и интересная, рекомендую к использованию.
Boba Fett. На земле не настолько убедителен, как в космосе. При необходимости поливает врагов из огнемета и умеет перемещаться на большие расстояния при помощи своего реактивного ранца. В остальном же не сильно отличается от обычной пехоты.
Darth Vader. Несмотря на то, что на вид это обычный пехотинец, уничтожить этого героя очень сложно. Пехотное вооружение его почти не берет. Зато сам он умеет разбрасывать пехоту в стороны или уничтожать выбранные им для этого машины противника. Очень мощный и полезный герой.
The Emperor. Палпатин еще более мощный боец, который не только умеет постоять за себя, но и может сильно побить вражескую пехоту молниями или убедить любые вражеские войска присоединиться к своей армии.
Colonel Maximilian Veers. Это в первую очередь хозяйственник. Производство роботов AT-AT и AT-ST с его присутствии стоит дешевле на 25%. А его личный AT-AT может наносить мощный удар противнику, который тот уже, скорее всего, не запомнит (помрет, бедняжка).
Повстанцы
Rebel Trooper. Опять же, обычная пехота. Отличаются от имперцев только тем, что у них не девятки, а пятерки. И хотя пятерок три, но они слабее за счет общего количества.. В остальном — то же самое.
PLEX Trooper. Гранатометчики, гроза вражеских танков и зданий. Очень вредные товарищи, особенно учитывая то, что танки очень плохо стреляют по пехоте. Выходят 2 отрядами по три бойца. Тоже умеют стрелять по какой-то точке.
T2-B Hovertank. Легкий танк с несколькими лазерами. Быстрая и маневренная машина, задача которого — уничтожение вражеской легкой бронетехники, неплохо отстреливает вражескую пехоту. Сам боится тяжелых имперских машин типа AT-AT. В подразделении насчитывается 5 танков. Есть способность, при включении которой танк отправляется на поиски приключений, отстреливая всех встречных противников.
MPTL-2A. Ракетная установка. Бьет по местности залпом. При попадании наносит меньше урона, чем имперская гаубица, но это компенсируется тем, что она накрывает своим огнем большую территорию. Для начала стрельбы обязательно должна остановиться и разложиться. В отряде 2 гаубицы, к ним прилагаются 2 робота-разведчика для увеличения поля зрения гаубиц.
T4-B Tank. Тяжелый танк повстанцев, рассчитанный на борьбу с аналогичными машинами противника. Хотя AT-AT он все же уступает. Неплохо сражается с любыми родами войск противника (достается и пехоте). При использовании способности начинает стрелять ракетами, нанося большой урон зданиям и пушкам. В отряде 3 танка.
AirSpeeder . Быстро летающая машинка. Сам по себе обычно ничего особо вредного сотворить не может. Но и попасть в него очень тяжело. Если применять их толпой, то они даже не замечают вражеские зенитные пушки. Очень полезны в союзе с бомбардировщиками — тогда те бомбят именно то, что вам нужно. Есть спецспособность по спутыванию ног у AT-AT. Часто они просто спутывают ноги этим гигантам и не дают им передвигаться, что очень полезно — машины ничего не делают, но место в общем количестве войск занимают. Однако в 10% случаев им удается уронить противника, и тот немедленно гибнет. По ним могут стрелять все, но войска, не относящиеся к зенитным, надо специально отряжать на это дело, указывая им цель. Их всего 3 машины в отряде.
Infiltrator . Боец со снайперской винтовкой и взрывчаткой с магнитной присоской. Огромный радиус обзора сочетается с возможностью уничтожать вражеского солдата одним выстрелом. Да и танкам не поздоровится, когда к ним прикрепят взрывчатку. Исхода битвы не решает, но может помочь. В отряде всего 2 бойца.
R2-D2. Этот товарищ вообще не воюет (первый герой повстанцев). Да он и вообще ничего не стоит. Его назначение в том, что он умеет брать под свой контроль вражеские пушки и между делом чинить свои.
Han Solo/Chewie. Эта неразлучная парочка и на земле бьется вместе. Оба они умеют быстро убегать от противника (они не очень-то сильные бойцы и хорошо справляются только с пехотой). Чуи также проявляет себя, как великолепный угонщик, утаскивая любую технику у имперцев. А Соло кидает себе под ноги электромагнитную гранату, которая выключает технику и башни в некотором радиусе. Тут уж главное — не теряться и быстро уничтожать все, что стоит на месте. Друзья отлично действуют вместе и против вражеской техники: один тормозит, второй угоняет.
Kyle Katarn. Но должен же быть и джедай? Вот он. Владеет снайперским пистолетом, сваливая вражеских пехотинцев на немыслимых расстояниях. Когда начинает пахнуть жареным — быстро убегает. Вторая способность — бросить взрывчатку. Она хорошо работает против техники. Разумеется, лучше всего этого снайпера использовать против пехоты.
Obi-Wan Kenobi. Нет, Катарн все-таки неправильный джедай. А вот Кеноби… Отбивает лазерные лучи мечом, лечит пехоту в определенном радиусе, выдает какому-либо отряду или танку неуязвимость. Как и прочие обладатели Силы, когда он атакует пушку, та перестает стрелять. Для правильного использования ему необходима пехота. Только тогда он сможет показать себя в полном блеске.
Техника наземного боя
Любая наземная битва ставит своей целью захват точек высадки. Поэтому первой идет пехота, у которой есть возможность прибирать эти точки к рукам. И только потом, за их спинами, двигается техника, цель которой — поддержка атакующей пехоты. Часто правильнее иметь большую часть техники в резерве (в стадии заказа), когда можно сначала посмотреть, что высадит противник, и только потом ответить ему наиболее правильно.
Правда, в ситуации, когда у врага есть ракетные установки или гаубицы, он может уничтожить вашу пехоту одним залпом и тут же отобрать точку, так и не дав на ней высадиться. Да и сам процесс высадки небезопасен — проходит она долго, и войска противника, оказавшиеся поблизости от десанта, успевают безнаказанно его поуродовать, пока тот приводит себя в чувство после приземления.
Надо ли создавать пушки? Надо. И в первую очередь противопехотные. А то уж больно эти маленькие человечки мешают жизни и дальнейшему развитию. Пушки же будут хоть чуть-чуть притормаживать бодрые прорывы пехоты. Не менее полезны офицеры. Вроде бы они добавляют самую малость к дальности видения, но именно этой малости может хватить для того, чтобы начать раньше стрелять.
В одной давней-давней кампании…
А вот теперь мы займемся кампанией. Во-первых, она сильно отличается экономикой. Деньги поступают с планет, их можно увеличить либо количеством планет, либо постройкой шахт на них. Деньги поступают со всех планет сразу в конце дня и целиком приходят в общую казну. На эти деньги можно строить всевозможные здания на планетах (а кто будет создавать вам флоты и армии?) и создавать армады своих войск. Каждая планета характеризуется тем, сколько на ней можно построить зданий и какой максимальный уровень может быть у ее орбитальной станции.
Это важно потому, что при обороне здания и станция порождают «гарнизонные войска», позволяющие при «торможении» у противника удерживать численность ваших сил на прежнем уровне. Ведь гарнизоны, как бы они ни были плохи сами по себе, регулярно восстанавливаются после гибели. И даже муравьи могут таким образом задавить количеством. Тем более, что особенность кампании в том, что наступающий воюет именно тем количеством солдат, что взял с собой перед атакой. Поручили атаковать планету всего двум отрядам AT-ST — будьте готовы к тому, что ничего не добьетесь.
Это важно: размер вашей армии ограничивается тем, сколько у вас планет.
Кроме количества возможных зданий (обычно они все же строятся в определенной последовательности, так что построить фабрику тяжелого вооружения вперед казарм не получится), планеты характеризуются уровнем производства денег, климатом и различными улучшениями к производству.
Климат важен только во время наземных сражений на планетах: дождь вдвое снижает точность лазеров, а песчаная буря — во столько же раз ухудшает вероятность попадания ракет; снег снижает дальность зрения, а вулканы очень плохо воздействуют на пехоту (дохнет она, иными словами). Улучшения же могут быть самыми различными — от увеличения притока денег до снижения затрат на какой-то избранный тип войск.
Как вы уже знаете, во время битв производить ничего не получится. Но защитники получают в свое распоряжение гарнизонные войска, а нападающие не ограничены в количестве войск, которых они могут захватить на битву на планете или в космосе. И хотя все равно действуют жесткие ограничения по тому, сколько войск может одновременно участвовать в сражении, никто не запрещает притащить больше разрешенного и время от времени вытаскивать их из резерва.
В кампании же действуют такие товарищи, как Bountyhunter и Smuggler. Вторые занимаются тем, что перетаскивают 50% денег от указанной планеты в вашу пользу. Зато первые прибывают на целевую планету и убивают вражеских офицеров, грабителей или даже своих коллег. Особенно полезно изничтожение офицеров, что даст вашим космическим и наземным войскам некоторое преимущество в том, что противник, вероятно, будет во время боя видеть куда ближе, чем вы.
Несмотря на то, что в бой можно послать сразу и наземную, и космическую армии, пехота и танки в космосе ничего полезного сделать не смогут. Поэтому и посылать их надо вторым эшелоном, иначе армия будет совершенно бесполезно разгромлена.
Это интересно: в кампании есть герои, которые влияют только на экономику, удешевляя производство. Иногда очень полезно перетаскивать их с планеты на планету, чтобы получать еще более дешевые войска.
Прохождение
Здесь будут перечислены только сюжетные миссии. Но не стоит думать, что кампания состоит только из них. Часто для того, чтобы добраться до боя продолжительностью в пять минут и продвинуться дальше, требуется захватить десяток планет, повергнув в жестоких космических боях сотни вражеских кораблей. Но это вам предстоит в подробностях пройти и пережить самим, а здесь мы обсудим ключевые моменты игры…
Империя
Подавляем восстания, уничтожаем мятежников. А как еще наводить порядок в огромной Империи?
Миссия 1. Crush. Kill. Destroy.
Во главе с Дартом Вейдером наводим порядок на мятежной планете. Теоретически его могут убить, практически это возможно, если только он оторвется от остальных сил и будет воевать в одиночку. Истребляем повстанцев вплоть до силового купола, затем проходим чуть ниже и расстреливаем генератор энергии. Теперь можно вернуться к месту бывшего купола и добить выживших.
Миссия 2. The Pirate Menace
Империя расправляется не только с повстанцами. Вот что-то пираты на Илюме расшалились — надо бы навести порядок. Присоединяем к Бобе Фетту по паре корветов и фрегатов и отправляем всю эскадру разбираться. Правда, сначала прилетит только один герой. И первым делом он должен уничтожить сенсоры, которых в системе очень много. Правильно подбрасывая бомбы, ваш пилот сможет уничтожать не только сенсоры, но и охраняющих их истребителей противника. После этого он может вызывать флот и уничтожить космическую станцию. Следующим по списку появится лидер пиратов на большом корабле. И его добиваем.
Миссия 3. Subjugating Geonosis
Усиливаем флот от предыдущей миссии и отправляем его вместе Дартом Вейдером. Космическая станция у противника невысокого уровня, а значит — будет быстро уничтожена. После этого присылаем десант и высаживаемся на планету. С самого начала надо быстро взяться за гражданских и уничтожить все 5 зданий. Потому что они почти постоянно выпускают замену павшим. Очень хорошо здесь подойдут TIE Mauler, которые успешно истребляют пехоту. После этого уничтожить повстанцев совсем просто.
Миссия 4. Attack on Mon Calamari
Перед нами встает задача захватить планету Мон-Каламари. Станция там не очень мощная, главное, уничтожить при помощи бомбардировщиков ее силовую установку. Затем уничтожаем торпедные установки и добываем весь оставшийся флот. Но надеяться, что все пройдет очень просто, не стоит — чуть позже прилетят несколько столичных кораблей повстанцев, поэтому флот туда надо приводить большой. Иначе не справитесь.
Миссия 5. Trouble on Kashyyyk
Хан Соло помогает освобождать вуки на их родной планете. Пусть помогает, а вы не торопитесь, методично уничтожайте домики, производящие новых вуки, и не давайте уже народившимся разрушать тюрьмы. Еще необходимо поливать огнем Соло, как только он появится в поле видимости. Вряд ли вам удастся его убить, но, если его дела будут совсем плохи, он просто скроется с планеты. А без него вуки быстро прекратят сопротивление, и миссия закончится.
Миссия 6. A New Weapon Of War
Итак, в ваших войсках появилось новое оружие — AT-AT. Отправьте Вирса его испытать. Доставка героя на планету пройдет без каких-либо проблем. Да и начало испытаний особых проблем не принесет. А вот потом появятся повстанцы и будут пытаться уничтожить образец боевой машины. Впрочем, многоног легко с ними справляется. Надо только добавить к нему пару подразделений пехотинцев — и не надо будет волноваться за то, что происходит под ногами.
Миссия 7. The Rebel Fortress
Вам надо уничтожить крепость повстанцев. Сначала предстоит космический бой, в котором вам будет оказано серьезное сопротивление. Потом будет наземное сражение, в котором у вас будут Дарт Вейдер и Вирс на своем АТ-АТ. С присущим ему могучим ударом, этот робот отлично разрушает здания противника.
Миссия 8. The Traitorous Moff
И у империи появился предатель. Некто Мофф Каласт обитает в системе повстанцев, и империя решила его уничтожить. Войск там много — до 30 корветов и фрегатов, не считая многих истребителей и бомбардировщиков. Но хитрость не в этом. Предатель обожает убегать с поля битвы. Но к этой миссии в одной из систем у вас возникнет фрегат Interdictor. Обязательно берем его на миссию, включаем его способность и ставим где-нибудь в сторонке, чтобы случайно не зашибли. А тогда уж наш беглец не уйдет.
Миссия 9. An Engagement With The Emperor
Император решил собственноручно наказать непокорных. Миссия достаточно простая. Надо только регулярно уничтожать здания — именно от этого император восстанавливает жизнь. Пехота же противника просто валится снопами от его проявлений Силы.
Миссия 10. Capturing A Princess
Самое время захватить вождя повстанцев — принцессу Лею. Формируем флот, в него обязательно должны войти Star Destroyer и Interdictor. Первый понадобится непосредственно для захвата принцессы, второй — для того чтобы она не ускользнула из системы. Только сначала придется уничтожить пиратов, которые заодно с повстанцами. Но разве это проблема?
Миссия 11. The Destruction of Alderaan
А вот и первое применение Звезды Смерти. Нужно провести ее на Алдераан и уничтожить планету. Достаточно выждать всего 75 секунд, чтобы она полностью зарядилась. Но кроме нее необходимо привести большой флот, чтобы справиться с защитой повстанцев, — там вас будут ждать до 8 столичных кораблей.
Миссия 12. End of the Rebellion
Как пользоваться Звездой Смерти, вы уже знаете. И осталось-то всего уничтожить 5 планет повстанцев. Правда, сопротивление на каждой будет серьезным, да и ионные пушки будут стрелять с земли, но вы справитесь. Надо только взять флот побольше.
Повстанцы
Настало время освобождения от имперских войск, грядет всеобщая свобода…
Миссия 1. Shipyard Diversion
Здесь вам предстоит уничтожить 6 имперских доков. Для этого выделены 4 корвета и герой, который обязательно должен выжить. Хитрость здесь в том, что сами доки уничтожать не обязательно, а нужно стрелять по складам с ресурсами вокруг них. Пойдет цепная реакция и доки взорвутся самостоятельно. Сопротивление противника здесь очень вялое, и ничего особенного он вам не противопоставит.
Миссия 2. Interpreting the Network
R2-D2 должен выкачать данные из имперского хранилища. Но при этом он еще и должен выжить, что куда как сложнее. Для обеспечения этой задачи придаем ему сопровождение из 2 отрядов танков, 3 гранатометчиков и 3 пехотинцев. По прибытии зачищаем точки высадки от противника, делим между ними оставшиеся войска и двигаем нашего хакера к банку данных. Через некоторое время противник узнает о том, что творится в хранилищах, и отправит десант разобраться с этим безобразием. Но мы помним, что высадка десанта — дело долгое. Поэтому за время высадки все десантники будут уничтожены. Далее только дожидаемся окончания кражи данных и провожаем робота в одну из точек высадки.
Миссия 3. Theft of the X-Wing
До сих пор в вашей армии не было ни одного нормального истребителя. И вот повстанцы решают украсть первые образцы у империи. Для этой миссии желательно взять много войск, иначе справиться с противником будет сложно. Очень желательны бомбардировщики на орбите планеты. К турболазерам, стоящим на коротком пути, лучше не ходить вообще, просто перегородив проход танками и гранатометчиками. По длинному пути идти длиннее, но проще. Таким образом проходим на аэродром. По пути можно уничтожить генераторы турболазеров и расстрелять беззащитные пушки. Перед тем как отвести летчиков к месту назначения, отправьте одного воина к месту с 4 незанятыми точками под пушки — сразу после прибытия пилотов на этих точках и вокруг аэродрома будут строиться пушки. На аэродроме их уничтожит сопровождение пилотов, а вот по отдельным четырем пусть наносят удар бомбардировщики. Если хоть один пилот уцелел, то миссия выиграна, а вы стали обладателем новых истребителей.
Миссия 4. Kessel Rescue
Здесь вам нужно остановить 6 шаттлов, не уничтожив их при этом. На задание берем несколько корветов и 5-6 отрядов бомбардировщиков. Корветы пусть отгоняют истребителей противника, а бомбардировщики, пропустив сквозь свой строй шаттлы, бьют по ним из ионного орудия. Оно как раз остановит корабли, не уничтожив их.
Миссия 5. Stealing From the Rich
Еще одно воровство у имперцев. Отправляем R2-D2 на одну из планет империи и заставляем его красть технологии (у планет есть специальные ячейки для спецопераций). Для того чтобы миссию засчитали, нужно украсть немного, но лучше делать это до упора, пока технологии у врага не кончатся.
Миссия 6. Imperial Liberation
Здесь вам предстоит освободить планету вуки от имперского засилья. Для начала надо уничтожить 5 тюрем, в которых томятся вуки. Причем после разгрома очередной тюрьмы к вам присоединятся несколько бывших узников. Сюда надо брать полный набор войск, включая артиллерию, танки и бомбардировщики — противника здесь тоже будет немало, так что придется потрудиться. Да и тюрьму-то уничтожить совсем не просто.
Миссия 7. Highest Bidder
На эту миссию надо прихватить побольше фрегатов, им будет с кем сражаться. Здесь имперцы сцепились с пиратом и включили способности Interdictor, чтобы тот не сбежал. Для начала быстро уничтожаем тяжелые имперские фрегаты, которые направились к нам и тут же летим к «тормозам», стоящим плотной группой в центре. К этому моменту к ним должен подлететь и пират. Сначала обязательно расстреливаем его и только потом оставшиеся имперские корабли. Все, путь наружу свободен. Корветы здесь почти бесполезны — мелких кораблей у противника нет. А вот бомбардировщики бы не помешали.
Миссия 8. Rescue the Millenium Falcon
Хан Соло доигрался и был пленен имперцами. Конечно, можно устроить всеобщее побоище, но достаточно 5-6 эскадрилий бомбардировщиков. Всего-то надо — отключить притягивающий луч имперского корабля, и «Тысячелетний сокол» спокойно улетит.
Миссия 9. Needle in a Haystack
По системе разбросаны ящики, и в одном из них лежит EMP-система. У вас есть только один «Тысячелетний сокол», который может исследовать эти ящики. Надо полетать около ящика, чтобы сканирование было засчитано. С истребителями противника ваш кораблик справится, а вот от остальных надо уходить, победить их не получится. Когда искомый предмет будет найден, миссия будет выиграна.
Миссия 10. Borrowed Time
Вам надо сопроводить 6 транспортов и постараться, чтобы хотя бы один из них уцелел. Флот на этой миссии должен быть большой — сражаться придется много. Все корабли противника уже находятся на экране, просто они постепенно «оживают» и ползут к вам. Можно взять бомбардировщики и обстреливать корабли, которые еще не активизировались.
By: Matthew Rorie
Design: Randall Montanari
The fortunes of LucasArts over the years have been pretty interesting. While they used to be renowned for their classic adventure games and great fighter simulations, around the time the Star Wars prequel films starting coming out, they began cranking out sub-par Star Wars games almost exclusively. Games like Force Commander, Galactic Battlegrounds, Rebellion, and Obi-Wan for the Xbox just never lived up to the standards of quality set by LucasArts’ previous titles.
Over the last couple of years, though, LucasArts has turned the ship around by focusing on producing better-quality titles. Games like Knights of the Old Republic, Republic Commando, and Mercenaries were all superb games in their own way. And although the RTS genre has always been an unlucky one for the Star Wars license, Star Wars: Empire At War aims to continue the recent tradition of excellence for the license, and definitely seems capable of doing so.
In Empire At War, you’ll take on the role of either the Galactic Empire or the Rebel Alliance, and guide your faction across multiple planets, fighting both on ground and in space, in an effort to restore peace and/or order to the galaxy. GameSpot’s Game Guide is here to help you in your mission, with a complete walkthrough of the game’s two campaigns, a rundown on all the units and heroes, some general tips, and a guide to each of the planets in the game.
General Tips
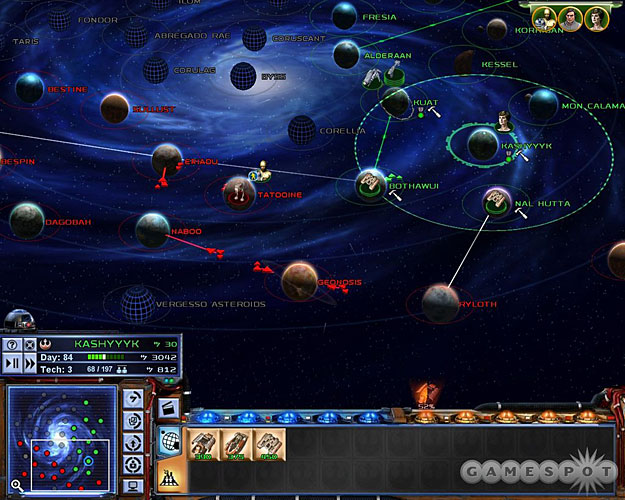
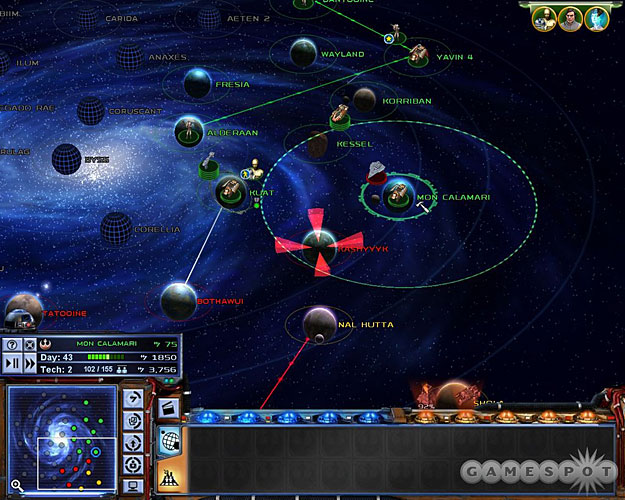
Galactic Map
One of the keys to success on the Galactic Map is to consolidate your planetary holdings so that you’re not facing attack from too many directions at the same time. Generally speaking, you’re going to want to tackle any enemy planets that are cut off from the rest of your enemy’s territory before making a strike at the heart of their empire. Planets that are cut off might not be undefended, though, so be sure to send a spy or a Probe Droid to check things out before recklessly committing a huge army to battle. Sometimes the planet might have a large stack of space units waiting on it; unable to move without attacking one of your planets, they’re usually more than happy to defend their system to the death.
As the battle lines shape, up, though, you’ll often find that two or three systems wind up being the points of intersection between you and your enemy. Defending these units and preparing your forces for an assault is one of the key things to learn about managing the galactic map. Here are some pointers to get you started.
Exploit Your Hinterlands
One aspect of the computer opponents that you can take advantage of in Empire At War are their apparent inability to attack your rear planets. If they manage to win a space battle at one of your planets that neighbors their territory, but get rebuffed in their ground attack, they’ll usually just keep their space units parked above the planet while waiting for another army to come along. One way to exploit this courtesy is to completely empty most of your rearguard planets of troops and ships; if your opponent will never attack it, then you can concentrate all of your forces on the border worlds, and simply use your planets further back as pure mining facilities. Some of them will be useful to you as production factories, as well, especially when it comes time to build units like artillery or the AT-AT, which take a long time to produce; you can build your armies more quickly by constructing multiple units on many different planets at once, then moving them up to the border as they’re constructed. If you’ve got a well-protected planet that you know isn’t going to be attacked by your opponents, however, feel free to fill it up with mining facilities and forget about it.
By the same token, you don’t really need to build a maximum-strength starbase at each of your planets, especially those in the rear. If you have a planet that’s just behind your borders, then feel free to build it up to the point where it can build your powerful space units, but most of your planets in the backwater parts of the galaxies shouldn’t need a starbase at all, and probably won’t need any production facilities on the ground, either, besides a bunch of mining facilities. You can give them a level one or a level two starbase, if you like, since those aren’t very expensive and will help in an emergency, but the later stages are a bit cost-prohibitive, especially if you’re also trying to build up your forces to attack your opponents. The main benefit of having larger space stations is that your population cap becomes larger, but later in the game (the single-player campaigns, at any rate), this isn’t such a big deal, as you’ll have a population cap of hundreds of units.
Hold The Line
Sometimes all you need in a galactic campaign is a little time to earn some money and build up your forces. When you’ve spread out a bit from the starting point and have a good little line of planets that border your enemy’s territory, it becomes important to prevent them from entering your territory and capturing your planets. Generally, though, if you plan ahead and fortify the planets that border your enemy, then you should be able to make it through most scenarios without ever getting a planet captured by your opponent, given a little time.
Oddly enough, the key to defending planets doesn’t revolve around building up space stations and large fleets. Instead, we only have one word to say to you: shield generators. While most RTS games give players the opportunity to defend their territory, the inclusion of shield generators and turbolasers on planets makes it exceedingly easy to go on the defensive in Empire At War, especially considering the computer’s often unintelligent AI in ground battles and its apparent inability to move a space fleet past one of your occupied planets. You’ll often want to build either a barracks or a factory of some sort on the planet, as well, to obtain garrison units as well as in-combat upgrades. (You can see more about shield generators in our Ground Battle Strategies section below.)
In any case, your best bet when attempting to marshall your reserves is to just have your planets that border your enemy’s planets to have a shield generator, a turbolaser, some factories or barracks, and as many units as can fit on the planet. Artillery units are ideal for garrisonning a shielded planet.
Space Battle Strategies
Don’t Forget The Turrets
While turret-building is a common feature of land battles, there are also build points for turrets in space, as well. They show up on the map as large grey dots, and appear somewhat cylindrical when viewed on the screen. If you claim one of these spots for yourself (by moving a fighter or a bomber near it), you’ll be able to build either a laser cannon or a missile turret. Laser cannons are great anti-fighter and anti-bomber units, while missile turrets work best when firing on enemy capital ships.
Unfortunately, turrets are probably still more useful on the ground than in space. Most of the time, space turrets are in the middle of the map, and it seems as though your opponent will often reach them before you do in the beginning phase of a map. What’s more, they take quite a bit longer to construct than ground turrets do, so if you get into a firefight in the general area of the turret, it’ll often be targeted and knocked out before it can even be fully built.
In skirmish mode, however, space turrets can be a great help, since there are platforms near many of the mining facilities on most maps. A simple laser turret can be a helpful (albeit expensive) safeguard against enemy fighters attempting to take over a mining facility.
Target The Hardpoints
One of the cooler aspects of Empire At War is the way in which you can target individual systems on the game’s larger ships. Most capital ships have many individual systems, such as engine, shield generators, turbolaser batteries, and so on. When you attack one of these ships, you’ll be able to target a specific system to attack. If you click on the ship in general without attacking a hardpoint (as the systems are referred to), your units will pick one to go after. If you have a large number of units attacking the same ship, though, they’ll often pick different subsystems to hit, which is suboptimal; ideally you’ll have all of your ships targeting the same subsystem to knock it out, then going after subsequent ones in turn.
It might be confusing to see all of the possible targets on a ship, though, so we’ll say it straight: most of the time you’re going to want to take out either the hangar or the shield generator before you take out anything else. Only Imperial ships have hangars, but they’re greatly annoying, in that they’ll issue fighters and bombers constantly. As the old fighter and bomber wings are destroyed, more will come out of the hangar… but if you knock it out, they won’t be able to issue forth, and thus you’ll essentially be killing them before they ever come into existence. This is even more important in the case of space stations, which have no upper limit to the number of squadrons they can pump out. While Star Destroyers will eventually run out of TIE Fighters, space stations will continually pump out the squadrons. Since stations take so long to kill, it’s usually worth your while to take out the hangar before hitting anything else, or at least prioritizing it somewhat.
Another good target for your fire are the shield generators on capital ships. If you can take down the shield generators for a ship, their shields will instantly drop and will be prevented from recharging over time, as they normally would. Of course, the whole point of shields is that they prevent you from actually hitting the ship itself, so if you don’t want to have to drop the shields with normal fire, you should have your bombers work on the shield generators. Bombs from Y-Wings and TIE Bombers pass through shields to impact hardpoints directly, so they’re ideal for dropping the shields and allowing the rest of your units to do their thing.
Ground Battle Strategies
Shield Generators!
When you start a defensive battle on a planet where you have shield generators, the first thing you’ll want to do is withdraw all of your units to the area covered by the shield. Then, if you have the cash, pay the 900 credits to upgrade your shield generator so that it repels all types of projectiles. By default, it’ll repel laser fire and bombing runs, which is great, but if your opponents come at you with rockets, you’re going to wish you had shelled out for the upgrade. When you get an idea of the direction from which your opponents will be attacking, move your artillery units within striking range of the edge of the shield, and put smaller vehicles or artillery units in front of the artillery to protect. Just keep in mind that the shield isn’t perfect; if your units are standing too close to the edge, they can still take damage, even if it looks like they’re protected. This is especially true when your enemy drops a bombing run on the edge of the shield, or attack you with anti-air units.
Now, some planets, perhaps even most of them, will put your power generators outside the radius of your shield, so they’ll be vulnerable to enemy fire, and if the generators get destroyed, then your shields will drop. The enemy AI isn’t necessarily smart enough to head straight for your power generators, though, so in many cases they’ll still try charging through the shields and head for their doom. Their dooooom!
RAID?!?!!
Although it’s not immediately obvious what the Rebellion’s «Raid» ability is for, if you play around with it a little bit, you should find it to be quite handy. Basically, a raid allows you to make a very small stack of ground units and land them on an enemy planet without having to attack the enemy ships in orbit, meaning that you can immediately start a ground battle by dragging the stack of units to the «Raid» slot on the enemy planet. You’ll know whether or not your stack is small enough by looking at it on the galactic map. Raid stacks will appear with a small star by them.
But when we say a «small stack», we mean small: you can only take three units or so into the fight, which means that you’ll have to clear the entire map with just those units, and no backup, and no bombing runs. Your success will largely depend on your tactical abilities and the enemies that you’re going up against; if your enemy has turbolasers and five AT-ATs on the planet, it’s going to be exceedingly difficult to take it with just three units, but that’s actually a fairly rare occurance; when fighting against the computer, you can often expect them to have fairly light garrisons. On some planets, like Kashyyyk and Mon Calamari, you can also rely on the friendly units that spawn out of the indigenous population for help. Anyway, our general favorite raid group consists of an MPTL-A artillery unit, a T-4B tank, and a group of Infantry or Infiltrators with which to capture build pads.
Dealing With Defenses

As we mentioned earlier, some of the best defenses you can have in a ground battle are turbolasers and a shield generator. So what do you do when you’re attacking an enemy that has both of those structures available to them? You go straight for the power generator, of course. The power generator gives power to both the shield generator and the turbolaser batteries (as well as some other structures, such as the Magnapulse Cannon); when it’s destroyed, all of those structures will lose power and thus become nonfunctional.
But how to take down the power generator? Well, if you’re lucky, you’re attacking your opponent on a planet that has the power generator located outside the shield radius. If this is the case, then you can try to locate them, then call down a bombing run on top of them. A single bombing run should be enough to pound a power generator into submission. If you don’t have any available, well, you’ll have to get there somehow and blow it up the old-fashioned way.
If the power generator is inaccessible or hidden underneath the shield generator, then you’ll have to find more creative ways to bypass turbolasers and shields. Turbolasers are primarily anti-vehicle units, so if you need to get past one, it’s usually best to just rush it with infantry and fire from point-blank range. Turbolasers can’t fire at any unit within a few feet of its base, so if you crowd around it, your infantry should be able to take it down with a little blaster fire. If you have any shielded vehicles, like a 2-M or a T-2B, then they may also be able to rush the turbolaser, especially if you don’t mind if one of them gets destroyed. Artillery units can obviously also be used to take down turbolasers from afar.
Dealing with a shield generator is a bit more mystifying. In order to get underneath a shield, you have to physically pass through it. The computer isn’t always on the ball about protecting the edges of its shield generator, so you’ll have an easier time of it than they usually will. It helps to head through first with shielded vehicles, then follow those up with your artillery units; when you’re under the shield, deploy the artillery and start creeping up towards the shield generator. Proper tactical combat ability will see you win the day, and when the shield generators are down, you can shift into a defensive position and use your bombing runs to damage any buildings that are producing garrison units.
Note that the Rebels can also often deal with shield generators by quickly landing some Speeders at the beginning of a fight and flying them in to attack the generators directly. The computer, at least, will usually build anti-air turrets near their base, but these take time to come up, so if you move quickly you can often take down the shield generator or power generator before your Speeders are threatened by any ground units. Of course, if your opponent starts out with AT-AA units, then this won’t work, but it’s worth a shot!
Rebel Alliance Campaign
The Alliance campaign is arguably a bit more difficult than the Imperial campaign. You’re going to be more pressed for cash than you probably will be in the Imperial campaign, due to having fewer planets under your control, and that problem will likely be further compounded by the fact that you have to construct and pay for X-Wings and Y-Wings (where the Empire would normally get them included with the cost of their frigates and Star Destroyers). If you’re up for a challenge, though, the Alliance campaign can definitely offer that.
Prelude: Kuat
Objectives
- Destroy the six Imperial Shipyards.
- The Sundered Heart must survive.
The first mission for the Rebels take place at Kuat. They need to get the Tyranny, an Imperial-class Star Destroyer, away from another system, so in order to lure it away from its post, they’re staging a diversionary raid on the shipyards at Kuat, led by Captain Antilles and a small fleet of speedy Corellian Corvettes.
This mission is something of a cakewalk, really, as the shipyards are lightly defended and are surrounded by convenient gasoline-filled barrels. Well, we guess technically they’re called «Orbital Resource Containers», but the idea is the same as you might be familiar with from any given FPS: you shoot the container, it blows up, everything around it blows up, etc. You can’t be hurt by the explosions, so just target the containers and let them do the hard work of destroying the shipyards.
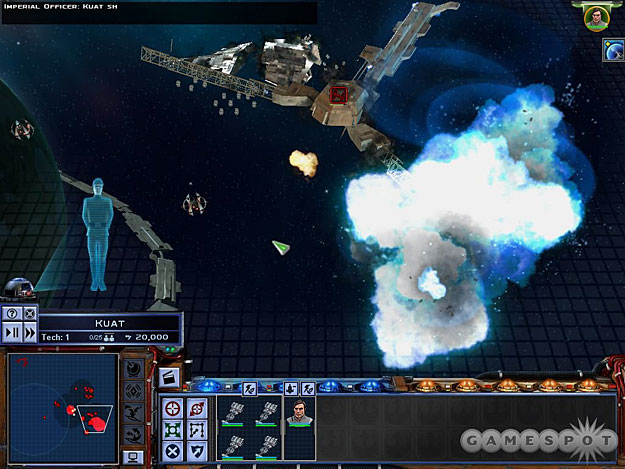
Your only real threat here will come in the form of enemy Tartan Patrol Cruisers, but with five ships, you should be able to deal with anything that gets in your way. The stationary laser cannons are likewise mostly unthreatening. Push your way through the six shipyards to finish the mission.
Mission One: Interpreting The Network
Objectives
- Take R2-D2 with a ground force to Wayland and have him steal codes from the Imperial Network.
Now that you’re on the Galactic Map, feel free to consolidate your systems and build up your forces a bit. You’re still in the technological Stone Age compared to where you’ll eventually wind up being, but at least Yavin can construct T-2B vehicles for you, and if you upgrade your systems to level two starbases, you’ll be able to build more Corellian Corvettes. Kuat should hopefully be almost undefended (scout it with C-3PO before moving there), so if you build some troops to attack the ground forces there, you should be able to add it to your stash of planets before you even head out to Wayland.
When you’re ready to complete your mission, though, bring a large stack of ground forces to Wayland, including C-3PO, and land them.
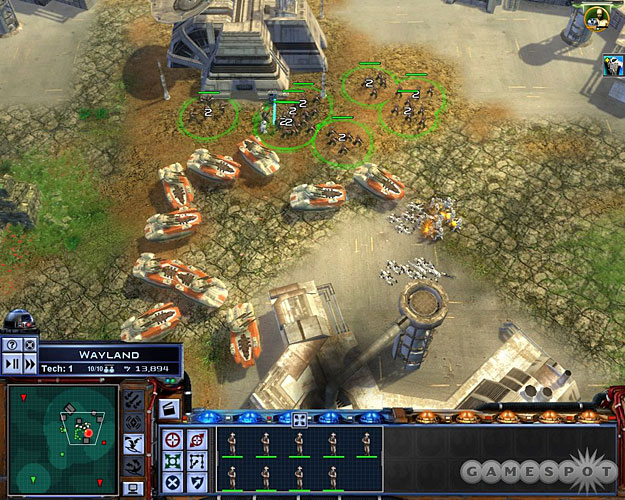
Luckily for you, you’re going to have a large population cap on Wayland; ten full units. Use the space to bring down a roughly equal number of T-2B’s, Infantry units, and Plex Soldiers; you’re going to need all of them to win. The easiest way to proceed will be to make separate groups for each type of unit. You can do this by selecting all of your T-2B’s, for instance by double-clicking on one of them, and then typing CTRL-1 to assign them all to first squad. Repeat this with the other unit types by hitting CTRL-2, CTRL-3, and use CTRL-4 for C-3PO and R2D2. With these commands inputted, you’ll be able to hit the 1, 2, 3, or 4 keys to quickly switch between unit types.
Move your T-2B’s up the forest passage and destroy the turret there, but keep your Plex Soldiers at hand to let them deal with the AT-ST’s that are residing in the main enemy base. You can clear out the base pretty easily, but just make sure that your T-2B’s lead the charge; there’s an anti-infantry turret in the base that will rip through your troops if you get them too close to it.
When you’ve cleared out the base, be sure to head to the east a bit and destroy the other anti-infantry turret there. You can build your own turrets on these spots by moving one of your infantry units near it, then right-clicking on the buildpad when you’ve taken control of it. Try building anti-vehicle turrets on the pads to the south and the east; the one in the middle of the base should probably be either a Bacta Tank or a repair arm for your T-2B’s.
When R2 and C3PO move towards the uplink station and start working on changing the codes, the Imperials will land more units and attack, first from the south, then from the west, then from the southeast. With your speedy T-2B’s, you shouldn’t have a problem intercepting their attacks and rebuffing them; just be sure to manage your units. Keep your Plex Soldiers firing on the AT-ST’s and your infantry units focused on the Stormtroopers.
The last wave of enemies will feature some TIE Maulers, which move quickly and which can self-destruct, so try to park a few Plex Soldiers near C3PO before the last wave commences. If you can blow up the units before they reach C3PO, then you won’t have to worry about the damage from their self-destruction.
When all of the units are dead, you’ve won! Get C3PO and R2D2 back to your landing zone, you’ll take off again, with your mission accomplished.
Mission Two: Theft of the X-Wing
Objectives
- Take a ground assault force to Fresia and steal the X-Wing prototypes.
- Ground Battle: Escort the pilots to the X-Wings.
- At least one pilot must survive.
- Destroy the Power Generator.
Not much changes on the galactic map between the previous mission and this one, but you can take over Wayland, and probably Korriban as well, if you haven’t already. When you’re ready to move out to Fresia, though, build up another stack of ground units and move them over there. No need to bring C3PO along this time. Since there aren’t any space units in orbit around Fresia, however, bring along some Y-Wings to take advantage of their bombing run capabilities during ground battles.
When you hit the ground, you’ll find that you have a maximum unit capacity of five units, not including the small squad of pilots that you’re given control of. Your ultimate goal here is to reach the X-Wings on the eastern edge of the map, and bring at least one of the pilots to them so that you can steal the fighters and finally have a ship capable of taking on the dreaded TIE Fighter. Unfortunately, the X-Wings are guarded by Turbolaser Batteries, which will rip apart your T-2Bs if they get too close. To eliminate that threat, you’ll have to deal with the main generator, which supplies power to the turbolasers.
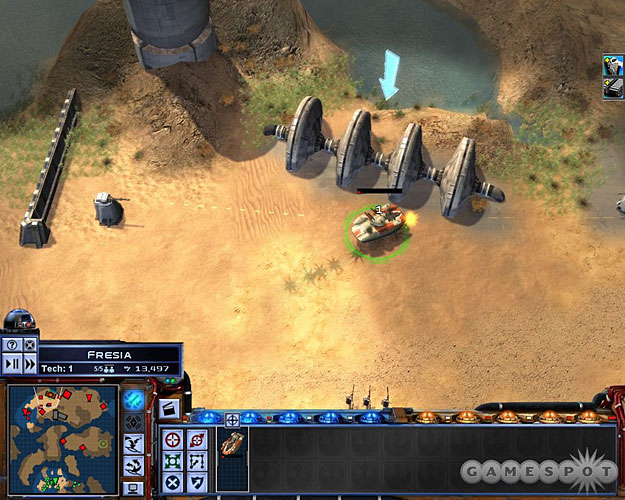
There’s an easy way to do this, and a hard way. The easy way is to bring down a lot of units at your initial starting point, including more T-2B’s. When you’ve hit the population cap, and have waited for a bombing run to become available, you can easily take out the power generator by selecting a single T-2B and running it quickly up the western part of the map, past the second reinforcement point, and up near the generator. In order to call in a bombing run, you have to be able to actually see your target, so if you get the T-2B next to the power generator, you’ll be able to bring down your Y-Wings. The T-2B will be destroyed, of course, but it’ll be worth it. With the generators destroyed, you can move the rest of your troops up to the northeast, keeping the pilots protected, then eventually moving them into the X-Wing pen and taking them out.
Alternately, if you can’t drop any bombs, then you’ll have to take your troops up the western side of the map, avoiding the turbolasers, and then take over the reinforcement point before slogging your way through the enemy base and destroying everything you see.
Regardless, when you reach the X-Wings, you’ll learn of anti-air turrets popping up all over the place. The four nearest the X-Wings will be destroyed easily, assuming you still have enough units alive, but the four in the center of the map are going to be more difficult to take out. If you do have bombing runs, the easiest way to hit them is to just drop a bombing run right on top of them. They are anti-air turrets, so they’ll shoot down your Y-Wings, but they won’t be able to stop the bombs from falling, and at least a couple of the turrets will get taken out. If you can defend your position long enough to wait for another bombing run, then that should finish them off and win the mission for you.
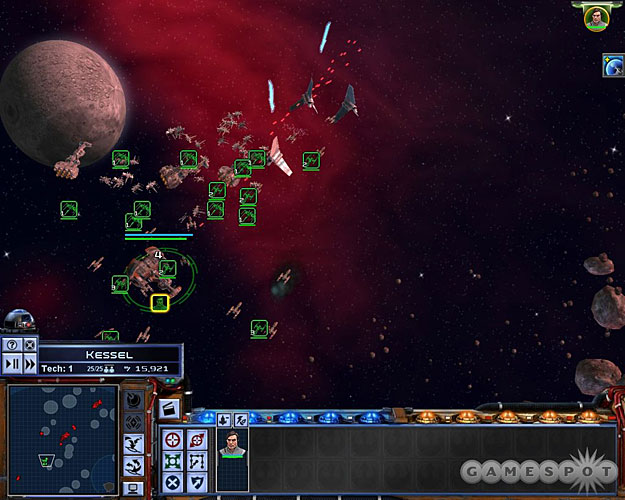
Mission Three: Kessel Rescue
Objectives
- Use the Y-Wing Bomber’s Ion Cannon special ability to immobilize the convoy’s shuttles, then rescue the prisoners with the Sundered Heart.
Ignore Mon Mothma here; go ahead and land on Fresia to take it over. You just wiped out the Empire there, so why not convert it to your cause?
So apparently the Empire is transporting the scientists on Fresia that were helping you out to Kessel. They’re doomed for a life in the spice mines if you can’t free them! Luckily for you, you can disable their engines with your Y-Wings, then pick up the scientists with Antilles’ ship.
The basic process here isn’t too difficult. Make one large group of X-Wings and Corellian Corvettes, at least three groups of Y-Wings, and keep the Sundered Heart in its own little group. The X-Wings and Corvettes should engage any fighters or Acclamators that come your way, while each of your Y-Wing groups will target one of the shuttles (they come in groups of three). The Sundered Heart can approach the incapacitated shuttles and pick up the passengers without too many problems.
After you nab the first three shuttles, you’ll get a message warning you of two Imperial Star Destroyers that are on their way into the system. Don’t worry about it, though; you should be able to nab the remaining three shuttles with time to spare. The key thing here is to split up your Y-Wings into groups of two and three; if you have them all charging their Ion Cannons at one ship, it’ll take them a while for their cannons to recharge, so you’ll probably wind up losing one or two of them.
Regardless, when you get all six of them taken care of, you’ll win the mission and will be able to move on.
Mission Four: Stealing From The Rich
Objectives
- Drag the droids onto the Steal action on an Imperial planet to steal technology.
For some reason, your ships leave Kessel after the battle; head straight back and take it over with ground troops. You have new technology now, including third-level Space Stations, Nebulon-B Frigates, and Officer Academies. Take a look at your options and build what you like, using Mon Mothma to defray the costs, especially on the Nebulon’s and the new space stations.
When you’re ready to steal some tech, drag C-3PO onto Mon Calamari and plop him into the Steal icon. You’ll be able to buy any of the technologies that are available there; we recommend starting with either the Marauder Cruiser or the Heavy Factory. You’ll be able to buy them all eventually, though, so don’t worry too much about what your choices are.
Mission Five: Imperial Liberation
Objectives
- Send a ground assault force to Kashyyyk and assist the crusader in freeing as many Wookiees as possible.
- Ground Battle: Destroy five Imperial prisons.
- Han Solo must survive.
It’ll take a while after C-3PO steals his technology before you’ll be able to take on another real mission; there’s a lot of talking involved. Anyway, the galaxy will open up a bit, revealing more systems to be taken, including Mon Calamari and Bothawui and more systems to the south. Be sure that Mon Calamari is under your control, as well as Kuat. Before you attack Kashyyyk, these two systems are going to be your primary points of contact with the Empire, but if you defend them well, you should be able to hold them to the south and take advantage of this time to steal more technology and build up your fleets a bit.
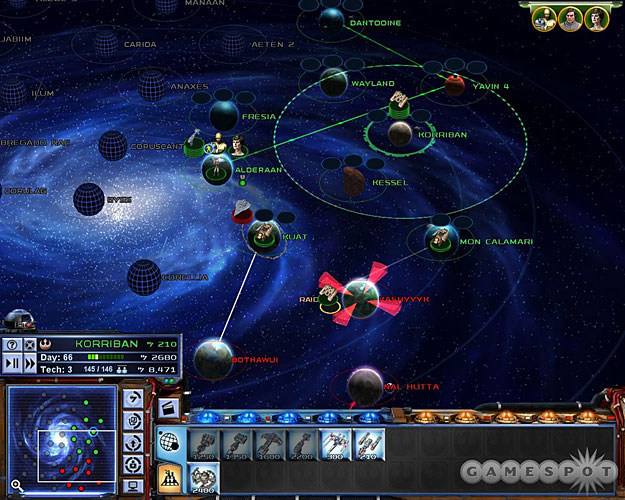
After you take over Mon Calamari, quickly plop down at least one artillery unit there and build a shield generator to protect your troops. It’s very difficult for the Empire to win ground battles here if you have a shield generator, since there’s only one entrance to your base to defend which is surrounded by buildpads. You’ll also have a huge number of sacrificial Mon Calamari to use to defend the area. So if you can build a shield generator and fill the planet with troops, you should be able to win any ground battles here with ease. Don’t bother making a space station here yet; just let them attack you if they wish. Kuat is where your fleet should be stationed; if it’s large enough, the Empire won’t bother to attack.
During these maneuvers, keep stealing with C-3PO until you can’t steal anything else. You’ll get up to an Assault Frigate, at least, which will help you take down the Victory-class Star Destroyers that will be popping up in the Imperial fleets from time to time. When you’re ready to attack Kashyyyk, scout it out with C-3PO, send in a fleet to attack it, then bring down some ground troops to meet up with Han.
Now, if you wait too long before moving on Kashyyyk, the Empire will take control of it and likely outfit it with a large space station and fleet. If this occurs, you’ll have to attempt a raid. You can indeed win this battle with a small group of soldiers; we attempted it with a set of Plex Soldiers, a MPTL-2A, and a T4-B Tank. It’s difficult to do with a small group like this, but not impossible.
Ground Battle
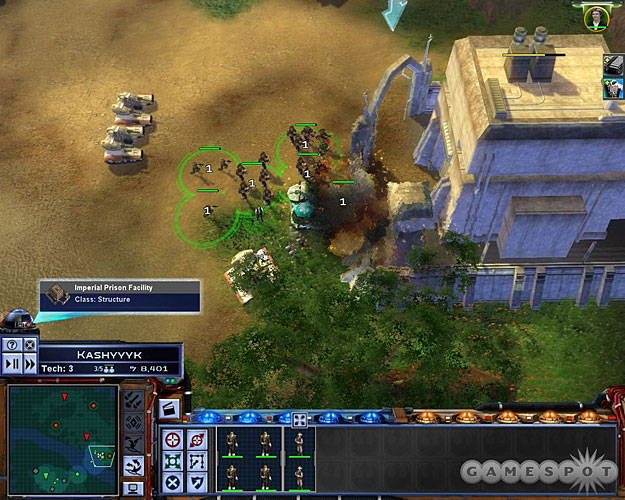
All right, your goal here is to destroy five of the Imperial prisons on the planet. They’re hardened structures, but not unkillable. In addition to whatever units you brought along, you should also have a small squadron of infantry. Deploy your artillery as soon as you begin the match, though, and use their spotter units to kill off the nearby Stormtroopers. With that done, you can move your T-4B’s up and around the corner to destroy the anti-infantry turret, and then bring all of your troops around to start smashing one of the prisons. Your vehicles are important to keep alive, so build a repair station near the prison and use it to heal up your T-4B’s, which should be close to the river so that they take the fire of any units that approach your position. (Note that Han can also destroy prisons with bombs, if you move him into the archway with the floating arrow above them.)
When you’ve killed both of the prisons, you’ll have gained a few Wookiees for your army. If they’re unarmed, move them towards the nearby Wookiee structure to get them some bowcasters, and group them up with your infantry. At the very least, they’ll make for good cannon fodder.
Move across the river, using the artillery to destroy the infantry there, then destroy the prison there, and build a bacta tank nearby to heal any of your infantry units that might need it. Continue this process of scouting the area around the prisons for turrets with your sensor pings, then moving up your infantry and other units as appropriate to destroy the structure itself. The Empire doesn’t have an infinite number of vehicles to work with here, so you should be able to wear them down over time if you heal your units back up when they get damaged and proceed cautiously.
When you destroy all five Imperial Prisons, you’ll win the battle and take control of Kashyyyk. If you managed to capture it during a raid, you’ll also have the bonus of destroying whatever space station the Imperials had constructed.
Mission Six: Highest Bidder
Objectives
- Build a fleet and escort Captain Antilles to Atzerri to recover the stolen data.
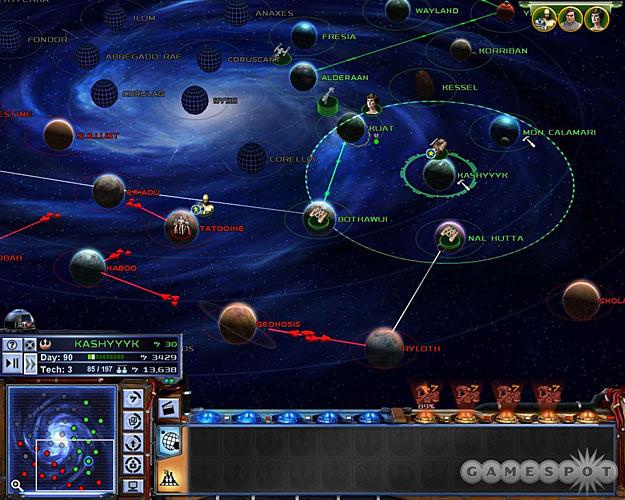
It’s during this mission that your galactic map starts to get complicated. The Empire will quickly establish themselves throughout the southern end of the galaxy, leaving you with a mighty large number of planets to overtake before you can reach Atzerri. If you’re going through methodically, which is probably a wise idea, start building up your fleet and try to establish yourself on Kashyyyk. No need to build a space station or large space fleet there, particularly; keep Kuat as your space headquarters, but build a shield generator and turbolasers on Kashyyyk, as well as perhaps a Light Factory. During ground battles, you’ll have dozens of Wookiees on your side, so that should be enough to pound any enemy forces that attempt to attack you there.
From Kashyyyk, you’ll probably want to take out Bothawui before heading down to Nal Hutta. The Empire can jump from Bothawui to Kashyyyk, so taking Nal Hutta first will open you to attack on three planets, which is difficult to defend against. Again, the process isn’t horrifically complicated; take over a planet, by raiding it if necessary, then immediately build a shield generator and turbolasers, if you can afford them, and then probably a light factory would be best for at-risk planets. With these systems in place, you can often defend a planet with just three or four units, if properly managed in combat.
Anyway, the first few planets you want to take out are, in this order: Kashyyyk, Bothawui, Nal Hutta, Ryloth, and then Shola. Ryloth and Bothawui can be your impenetrable ground bases; if you build them up as outlined above, then you should be able to repel any ground assaults from the Empire. It won’t matter if they park their fleets above the planet; just let them sit there and wait until you have a large enough fleet to take them down. As mentioned, they won’t penetrate any further into your territory.
When you’re ready to sweep out, build up your troops and start working your way through the rest of the available galaxy. It’d be best to control all available planets before hitting Atzerri with your fleet, obviously, but if you can smash their one or two large collections of ships, that should be a bit easier to manage, as they don’t seem to be willing to rebuild them overmuch, leaving a bunch of relatively underdefended planets for you to autoresolve your way through.
Space Battle
When you hit Atzerri space, you’re going to find the pirate you’re looking for…as well as a full Imperial fleet that has come along for the same little prize. They’re going to have an Imperial-class Star Destroyer, as well as a couple of Victories, so this fight can be difficult, but it’s not impossible, especially with the huge fleet you should have by now. If you bring along Marauders, you’ll hopefully have a few of them, and they can actually do a surprisingly good job at weakening the ISD. If you have Y-Wings, they can also, of course, smash its shield generator and hangar to further dismantle its defenses before attacking it with your Frigates.
Your primary goal here, though, is to disable the pirate ship by attacking it, then getting the Sundered Heart on top of it before the Imperials can reach it. The ship can move in some odd ways, so be sure to quicksave your game before you really start pursuing it. The Imperials will be firing on it, as well, and if they disable it, you’ll still be able to claim it for your own, so be sure to use Antilles’ Boost Engine Power ability to get on top of it before they reach it.
When the coast is relatively clear, bring in any reinforcements you need to finish off the Star Destroyers, then go after the Interdictors which are preventing you from entering hyperspace. Polishing them off will complete the mission.
Mission Seven: Rescue the Millennium Falcon
Objectives
- Take a fleet to Corellia and rescue Han Solo.
It’s unclear what kind of trouble Han’s in, but he’s got attention of the Imperial kind, and if you want him to help you out in the future, you might as well rescue him now. Take your fleet to Corellia, but instead of sending the whole stack, break off just your Y-Wings and send only those.
Space Battle
When you reach Corellia, your Y-Wings will be facing off against three Imperial Star Destroyers, including one which has the Millenium Falcon caught in a tractor beam. Freeing it couldn’t be easier; just task all of your Y-Wings on the tractor beam, and they’ll run along and bust it! It seems to be somewhat weakened for this mission, so sending all of your Y-Wings is probably overkill, but hey; it couldn’t hurt. All you really probably need is three or four, however.
After you break the Falcon free from the tractor beam, you’ll automatically win the mission.
Mission Eight: Needle in a Haystack
Objectives
- Take Han Solo to Vergasso, find the cargo container bound for the research facility, and attach the EMP device to it.
Apparently one of the cargo containers in the Vergasso asteroids is going to be sent off to the research facility where the Death Star is being worked on, so the Alliance is going to take the time to try and send Grand Moff Tarkin a little pleasant. The plan is to have Han Solo fly in, avoid detection as best he can, and scan the various crates in the area to see which one is headed for the research facility, then plant an EMP device on it.
When you hit the system, you’ll obviously only have the Millennium Falcon as your sole unit, so go ahead and make a stack of it and start scanning the cargo containers. The key thing to remember here is to stay out of trouble; while the Falcon can take on the TIEs fairly well, there are a couple of groups of Tartan Patrol Cruisers that will lay the smack down on it if they get too close. Watch for them on your map, and try to stay away from them as best you can. You’ll definitely want to make your rotation around the map in a counterclockwise fashion, since that’s the same direction in which the enemy ships travel. If you notice a group of Tartans following you, you may want to try hiding in one of the nebula fields until they pass by; this will only work if you’re not currently firing on anyone, but you should also try to be in the middle of the nebula to ensure that they don’t spot you.
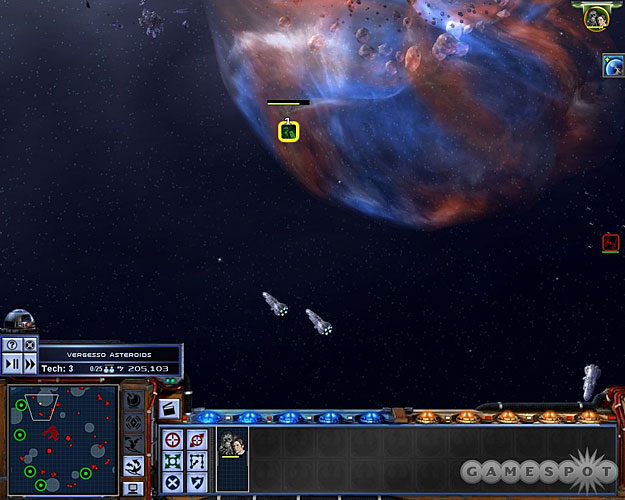
Note that Boba Fett will eventually appear and make a beeline for you. He’s a tough cookie, especially if you’re also getting hit by other ships at the same time. However, one trick you can take advantage of is to lure him into a nebula field, where both of your ships’ shields will be knocked out. With your Invulnerability power, though, you should be able to withstand all the damage he dishes out for ten seconds or so, allowing you to polish him off and get back to scanning.
There doesn’t seem to be a particular crate that’s always the one you were looking for; most of the time, you’ll have to scan all but two or three of them until you find the one that you’re looking for. You shouldn’t have any severe problems with this, unless you get pounded by a group of Tartans. With your Invulnerability power, though, and your speedy little ship, the worst thing that can happen is that you’ll have to run for a bit.
When you find the crate that’s heading for the station, you’ll automatically win the mission and move on.
Mission Nine: Borrowed Time
Objectives
- Escort the fleet to Corulag and protect the shuttles while the soldiers search for information.
You’ve tracked the container to Corulag, where it’ll shortly explode and shut down the Imperial space station there. Your goal now is to find more information on the Imperial superweapon, so you’ll have to board the station and find the data before the EMP wears off.
Tip: Keep in mind that, after the next couple of missions are over (and they’ll go quickly), the systems Taris, Corulag, Coruscant, Anaxes, Aeten 2, and Abregado Rae will all either be controlled by the Empire or pirates. So you may want to beef up your shield generators and garrisons on bordering planets before you complete the tenth mission. Also, there’ll probably be a large space battle at Corellia, so you may want to build up the space station there as high as it’ll go, and add an Ion Cannon to your ground repertoire. You’ll need a sizable fleet to defeat them, so build some ships now if you need to!
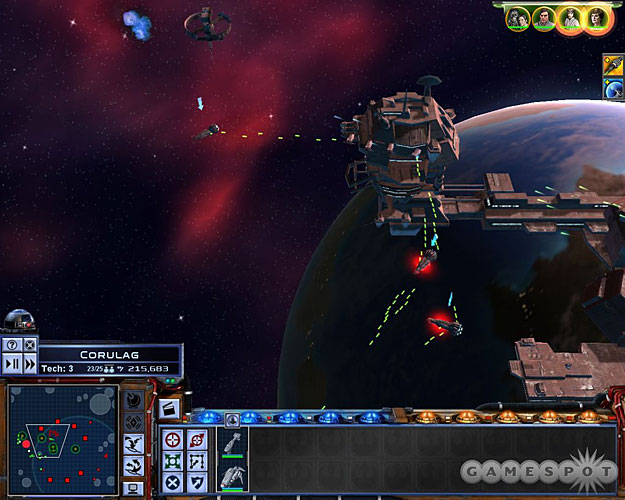
Bring all the ships you can muster with you to Corulag, but if you have any Marauders on your stack, you might want to leave them behind; they tend to focus on the space station here, but your objective is to search it, not destroy it. Taking them away will free up room for another Assault Frigate, as well.
Anyway, at the beginning of the round, your four shuttles will automatically dock with the station here and start their search; your goal is to protect them from the ships in the system until they get the information they need and can retreat. Thus, all you really want to do is move all of your other ships so that they take up positions directly next to the shuttles, and then…protect them. That’s pretty much all there is to it! The ships in the system will «wake up» from the EMP effects over time; you probably won’t be able to destroy all the ships in one wave before you can move on to the next, but it won’t matter, as you just need to survive and keep the enemy ships from firing on your shuttles. Bring in new ships as needed to replace any that get destroyed, and you should polish the mission off without too many problems.
Mission Ten: Carida
Objectives
- Guide Han and Chewie through Carida to retrieve the plans for the Mon Calamari Star Cruiser.
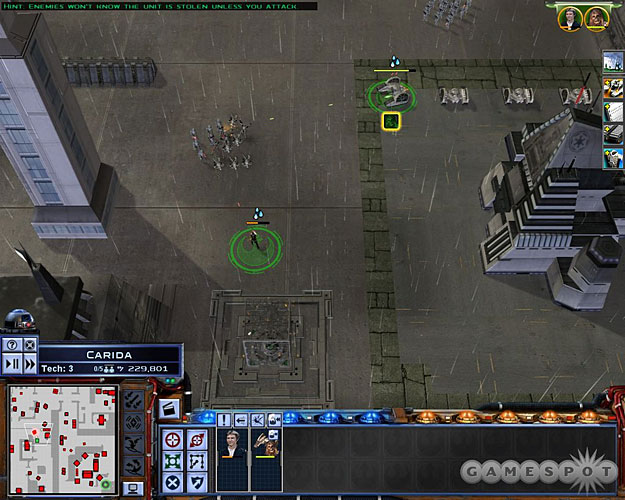
Note that, after the Borrowed Time mission gets completed, you’ll go through a longish conversation with Mon Mothma that will result in you automatically being sent to Carida with Han and Chewie. You won’t be able to play around on the Galactic Map very much before it begins, so…well, that’s just a warning!
Anyway, when you land on Carida, it’ll be just Han and Chewie doing their thing; you won’t have any other units to work with. If either of them die, it’ll be game over, so take good care of them! Luckily, they’re both pretty hardy, and you will have the opportunity to build a bacta tank or two along the way, so you should be able to stay alive if you proceed cautiously. Combined, the two of them can take down quite a few Stormtroopers without dying, so feel free to go to work.
After killing the first two squads near your start point, have Han sprint toward the two anti-infantry turrets nearby and EMP them so that he and Chewie can run on. Around the corner from them are more infantry units, as well as a build pad, so quickly get them to the build pad and construct a Bacta Tank. (You can run most of this mission at double-speed, as a note. It definitely helps speed things up.) When you heal yourself up again, you can start working on the remaining soldiers in the area, either by running up to them and firing at them with Han & Chewie, or nabbing one of the nearby TIE Maulers and running them down, which is just plain fun.
After you’ve cleared out most of the soldiers in the area, as well as the anti-infantry turret to the west, have Chewie hop into the AT-AT here and start attacking the AT-STs nearby. With them out of the way, move Han down into the lower corridor that runs north-south along the length of the map. He can draw the fire of any of the AT-STs and infantry squads that come north, while he and Chewie (in the AT-AT, still) take them down. If Han ever comes close to death, activate his Sprint mode to get him back to the Bacta Tank as quickly as possible.
When you’ve killed off all of the enemies roaming up and down the central corridor, move off to the east a bit and bring the AT-AT along to find the main generator. Blow the generators to shut down all of the turbolasers.
Tip: Keep in mind that your AT-AT can stomp Stormtrooper units if it walks over them, just like a TIE Mauler. This is especially easy to do when playing at double speed.
Return to the central corridor at this point and use the AT-AT to destroy the three turrets there. At this point, you may want to just ditch it, since you’ll mostly be facing infantry from now on, which it doesn’t do well against, but it may come in handy later on; if you do decide to ditch it, quicksave beforehand and reload if it becomes problematic.
Anyway, with Han and Chewie out and about, head south, killing infantry as you go, making periodic return trips to the bacta tanks to refresh their health. (At double speed, this shouldn’t take long.) Be sure that you’ve killed all of the infantry near the storage depot, and that Han and Chewie are at full strength, before you hit up the storage depot.
With the information in hand, you’ll be told to hit up a pair of shuttles to the north to escape the planet. The caveat is that four AT-STs, three Stormtrooper squads, and a pair of Scout troopers will all spawn and start heading for you as soon as you have the info. The Scout Troopers will hit first, so quickly eliminate them, then click on the shuttles that are your ultimate goal and book it! It’s not worth trying to fight the Stormtroopers or the AT-STs. (If you have the AT-AT, you can probably live through the fights, however.) Instead, if you just run for the exit, you should have enough health to make it to the shuttles without taking lethal damage, especially if you use the Sprint ability to burst past the infantry units as they fire on you. If the Empire has rebuilt an anti-infantry turret, then you may have to have Chewie hop into one of the 2-M Repulsor Tanks near the storage depot and have him take the lead against the AT-STs and the turret.
Regardless, when you make it to the shuttles, you’ll finally be able to build Mon Calamari Star Cruisers, at Kuat at least. You won’t have much time to do so before the Imperials start coming at you, but at least you’ll have the option!
Mission Eleven: The Defense of Mon Calamari
Objectives
- Defeat the Imperial Fleet before it reaches Mon Calamari.
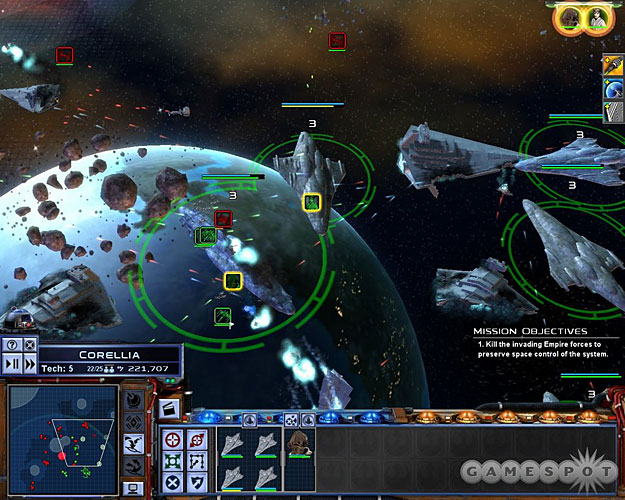
With over half the galaxy in your possession, the game becomes a bit more open at this point, with a long line of planets available for attack by the Empire. Instead of going after any of the obvious weak points, though, they’re going to go straight for the main prize and push through your huge line to get to Mon Calamari. They’ll be bringing a large fleet of ships (around 45 units worth, on medium difficulty) from Coruscant to try and retake the fish-people. If you’ve conquered all possible systems before this mission unlocks more of them, they’ll likely head straight to Corellia with the fleet.
Luckily for you, Commander Ackbar and four Mon Calamari Cruisers will spawn at Mon Calamari a few moments after you get this mission. If you move them to Corellia as soon as they appear, they should get there before the Imperial fleet moves in, which will be helpful, since the Imperial fleet will have a few Imperial-class Star Destroyers along for the ride.
Beyond that, this is a fairly straightforward fight; they’ll come, you’ll beat them, you win the mission. If you have a large enough fleet, this shouldn’t be a problem; if not, you might have to hold back and wait for them to get closer to Mon Calamari before engaging them.
Mission Twelve: The Final Battle
- Confront the Death Star in a tactical battle that includes Red Squadron. If Red Squadron survives the battle, Luke can destroy the Death Star and win the game.
Soon after defeating the fleet, you’ll suffer a large setback, as Alderaan is destroyed by the Death Star. (This is apparently done automatically, but if you have a fleet there, that might force you into a fight.) There’s not much you can do about, so say goodbye to Bail Organa. The Death Star will then likely immediately head for Kuat and blow it up as well. For us, at least, it paused at Kuat long enough for us to get the mission update listed above before continuing on its path to the south along the trade routes.
You can’t destroy it, initially, making for some annoyingly unskippable battles as it attacks your systems with space stations in orbit around them. Instead, bring your entire fleet up to Kessel and wait there until Mon Mothma talks about «our valiant pilots» and notes the reappearance of Han Solo. At this point, both Han Solo and Red Squadron will appear at Yavin IV. Bring them into your fleet at Kessel, or wherever it is, and set off after the Death Star. Red Squadron has to be in your fleet in order to destroy the Death Star; if you engage it without that particular unit, you can still «win» the space battles, but it will always destroy the planets underneath regardless. Note that if you attack the Death Star at a system it’s already blown up, it will automatically spawn a level-five space station and a small fleet, even though it appears all by itself on the galactic map.
Anyway, the whole event is somewhat anticlimactic in the end: all you need to do to destroy the Death Star is win a tactical battle at the system it’s at while Red Squadron is in your fleet. If you have a 200-unit size fleet, then your victory is all but assured; just attack the Death Star at a system it’s just destroyed, keep Red Squadron away from all of the enemies, and keep bringing in Mon Calamari Star Cruisers until you’ve destroyed the enemy space station and all of the ships. The Death Star, oddly enough, isn’t accompanied by a large fleet, so you won’t have to destroy a billion Star Destroyers to blow it up. (But then again, Tarkin is pretty cocky in general, so supposedly he didn’t see the need.) When you win a fight around the Death Star, and Red Squadron survives, then the Death Star will automatically be destroyed, and you win the game. Hooray!
Imperial Campaign
The Galactic Empire campaign in Empire At War is pretty fun, although it’s not overwhelmingly challenging, at least on the medium difficult. Although your units are generally more expensive than those of the Alliance, you’re going to have lots and lots of cash to spend, so you should be able to build up extensive fleets and armies with which to crush your foes.
Some tips to keep in mind when you play as the Empire:
1: Be careful not to leave important planets undefended; you’ll want to have a small garrison at all your important planets to ensure that the Rebels can’t sneak a small group of units past your fleet and land on the planet. If they do so when you don’t have any units there, you may wind up losing the planet despite having a massive fleet in orbit around it. When you reach the tech level that allows you to build defensive shields and Turbolasers on your planet, you should be able to ease off the garrison manning a bit. Keep in mind that the Rebellion won’t attempt to penetrate too far into your territory, so just keep the planets within one jump of any Rebel-controlled planets defended. Planets in the hinterlands can be left empty without repercussion.
2: If you’re coming to the Empire after playing as the Rebels, you may get confused by the lack of TIE Fighters and Bombers in the build queue. No need to worry; these units are built into your capital ships, and will automatically disembark when you enter a space battle.
3: Use Vader as best you can. He’s immensely powerful on the ground, almost to the point of invulnerability, but he can still be taken out if you let him get overwhelmed or if he gets too close to enemy artillery. In space, he’s one of the best anti-fighter units around, and he can heal himself by bringing back more wingmen when they get destroyed. He can still be killed if you make him take on a frigate or something foolish like that, though, so be careful when using him. Don’t worry too much if he gets taken out; he’ll slowly regenerate over time and respawn within a couple of galactic days.
So, without further ado, let’s get cracking…
Prelude: Thyferra
Objectives
- Slay the Rebel scum and burn their buildings to the ground.
- Lord Vader must survive.
- Destroy the communications array.
- Destroy the Rebel Power Generator.
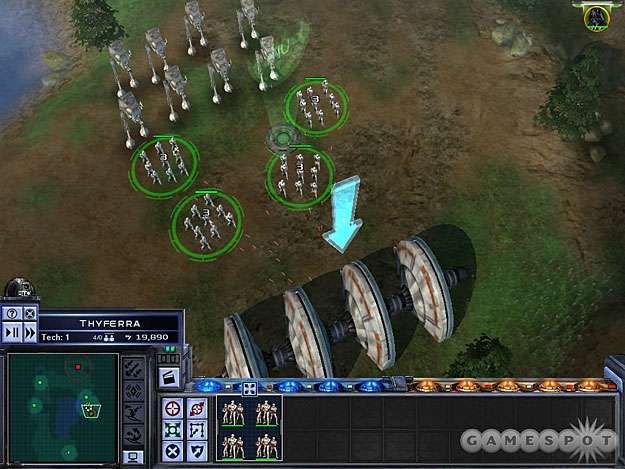
Nothing too severe here. Get used to putting Vader into a squad of his own (by selecting him and pressing CTRL-1, you’ll be able to immediately jump to him by pressing 1 again at any time afterwards). Do the same to make groups of your AT-STs and Stormtroopers, then start proceeding to the north. As we mentioned before, Vader is almost unkillable here, so keep him in front of your army to draw the enemy fire while your other troops follow up and kill off anyone that they see. Be cautious of anti-infantry turrets, though; they won’t do much to Vader or your AT-STs, but they can rip through your stormtroopers.
After destroying the communications array, sweep to the east, avoiding the shield to the north, and destroy the forces that prevent you from gaining access to the power generator. When it goes down, you’ll get a huge amount of reinforcements, far more than you’ll actually need to destroy the rest of the buildings. Lead with Vader and your armored troops to take out the anti-infantry turrets, then move your forces in en masse and destroy the buildings to win the map.
Mission One: Crush. Kill. Destroy.
Objectives
- Build a ground assault force and recapture Fondor.
- The local humans are allied with our enemies. Destroying them and their structures will go a long way toward helping our cause.
- Destroy all Rebellion land forces and structures to win.
Before you head out to Fondor, start working on building up the rest of the planets under your control. You’ll probably want all of them to have barracks and light factories, at the least, but when you have extra space, feel free to load them up with mining facilities. You can always sell them later when more buildings are available to you. Coruscant, especially, will be an important galactic hub for you, so keep it well defended with a strong garrison. Build an officer academy on its surface and use it to make at least one fleet officer and one field officer. They’ll be handy to have during battles.
When you’re ready to attack Fondor, build up a stack of units, with Vader in the lead, and land them on the surface of the planet. (Be sure to have at least one Acclamator in orbit, though; you’ll find the bombing runs they’re capable of to be quite handy.) Bring down Vader first and let him capture the two build pads near your starting point. The initial danger here is from the respawning infantry from the rebellious building nearby, so you’ll probably want to build one anti-infantry turret and one repair station for your mechanized units. If you’re planning on performing bombing runs, you may want to just wait for one to become available, then send a scout trooper bike down to the first pair of building and bomb both of them to smithereens. Alternately, you can just fill up the rest of your slots with TIE Maulers; they’ll be handy here because there are so many infantry squads in your way.
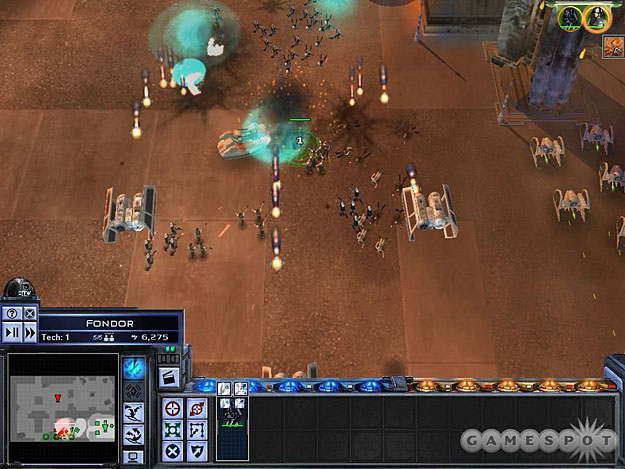
When you reach the westmost spawn point for the rebels, send Vader north to capture the northern reinforcement point. With that in hand, you’ll be able to bring down a sizable army. (There’s nothing you really need to worry about in the passageway to the west, so you can avoid it if you wish; just be sure to destroy all of the spawning points.) It’s best to just bring down as many Maulers as you can; their speed and firepower will overrun any infantry in your way, and in large enough groups they can take down the anti-vehicle turrets that you’ll be seeing with minimal losses. With a large group of them, sweep to the east, destroy the Rebel buildings, and you’ll win the map.
Mission Two: The Pirate Menace
Objectives
- Build a probe droid and send it to Ilum.
- Build a fleet and escort Boba Fett to Ilum.
- Destroy all the pirate sensor pods.
- Boba Fett must survive.
- Bring in reinforcements and destroy the pirate space station to flush out their leader.
- Attack the pirate leader until he submits. Do not let him escape.
Feel free to take your time with building the probe droid; they’re easy to build, but you may want to finish building space stations at your other planets before sending the droid to Ilum. When you do probe the system, you’ll reveal pirate forces, and you’ll automatically contact Boba Fett to help you destroy the defenses so that the larger Imperial fleet can attack the space station there. Build up a force consisting of at least three Acclamators and four Tartan Patrol Cruisers before attacking the system if you want to have a full suite of ships in the battle. It’ll be overkill, but hey — use ’em if you got em. Don’t forget to put a Fleet Commander up there, as well.
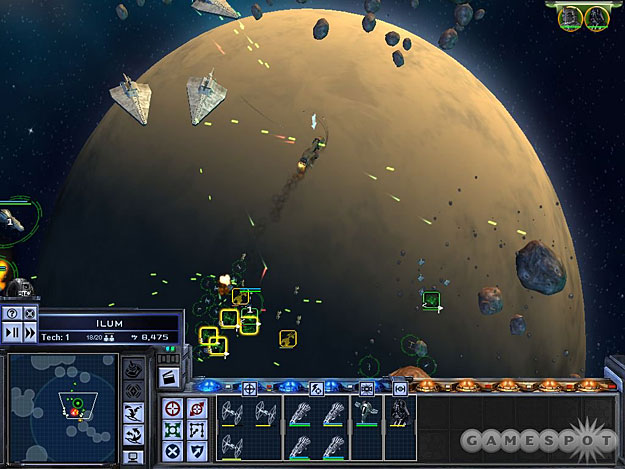
When you reach Ilum, you’ll have to use Boba Fett to destroy a number of sensor pods on the perimeter of the pirate space station. To do so, just attack them; when the ships come out to engage you, drop your seismic charge and take them out. This is kind of similar to a Scout Trooper’s detonator attack; you’ll drop it in the spot where you are, so try to wait until they’re flying at you and drop it so that they pass right over it as it blows up. Even if you don’t take them out, you should be able to finish them off with Slave 1 without too many problems.
When all of the pods have been destroyed, bring in as many ships as you need to max out your population numbers, then start the assault on the space station. Group together Boba Fett, the TIE Fighters, and your Tartans into one large anti-fighter group, while your TIE Bombers and Acclamators form their own groups. The Acclamators can take down any larger ships in the area, while the Bombers would be best suited towards making an attack on the space station and knocking out the hangar on it, to prevent it from launching more ships. With the combined might of your fleet, you should be able to destroy the base without taking significant losses.
The pirate leader will pop out of the base when you destroy it and make a run for the edge of the asteroid field. You need to take him down before he can jump, so ignore the fighters and concentrate all your firepower on his ship.
Mission Three: Subjugating Geonosis
Objectives
- Build a fleet and escort Darth Vader to Geonosis.
- Space Battle: Quash the Rebel space station.
- Lord Vader must survive.
- Land Battle: Destroy any Geonosian structures you see for a bonus.
- Destroy all Rebellion land forces and structures to win.
Galactic Map
Immediately after you win the battle for Ilum, land troops to conquer the planet and start building it up. It’ll be a backwater for the moment, so feel free to load it up with mining facilities.
Now that the previous quest is over, you’ll have the opportunity to expand your empire a bit. Taris, Bestine, and Corulag are all controlled by pirates, while Endor and Byss are seemingly empty. (You’ll want to check them out with Probe Droids before sending forces out, however.) You can quickly take over Byss by landing troops on it, but Endor will be off-limits until you get through Corulag and Bestine. The pirates are much less likely to make aggressive movements against underdefended systems, though, so feel free to build up a huge army and leave nearby systems undefended while you amass your troops. You can gain a large amount of cash by opening up the trade route between Coruscant and Endor, so that should probably be your first priority. Capturing Bestine will also be helpful due to the fact that it’ll knock 20% off of your Acclamator production costs. Note that Eriadu is a short jump away from Coruscant, though; keep it well defended, or the Rebels will take it over when you’re not looking.
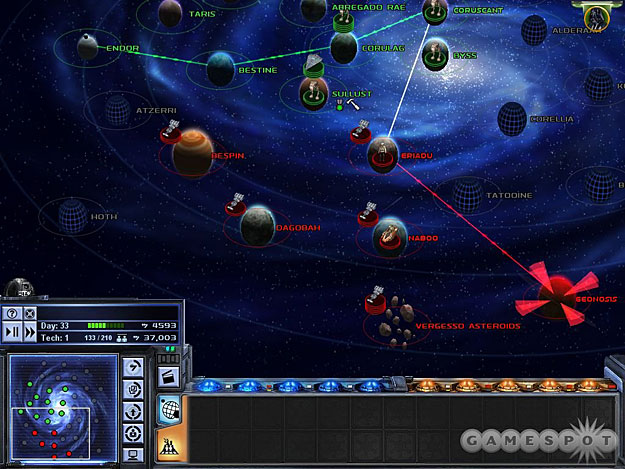
While routing the pirates, note that the rebel base at Sullust will be able to reach either Bestine or Corulag in one jump; you’ll need to keep both planets garrisoned while working your way down the chain of trade routes, and you’ll want to have small fleets in the air to back up your space stations as well. When you’ve eliminated all of the pirate bases, though, you’ll be able to focus on taking down the Rebels. Start with Sullust, obviously. Bind your fleets and armies at Bestine and Corulag into two large groups, go in with the fleet first, then follow up with the army to take the planet itself. After building up a space station, you’ll be much better able to defend your space against the rebels, since they’ll only be able to attack you via Sullust or Coruscant, both of which should be well defended indeed.
Space Battle
If you can build up a big enough fleet and army, you should be able to sweep through most of their systems without much resistance. The Rebels will usually have one large space fleet; they may even attack you with it at some point. If you can whittle it down, then you may see other large fleets around, but these are smaller than they seem; the Rebels seem to keep a lot of ground units in space, so if you attack with a large force, you’ll find that you’ll often be taking on a couple of Corellian Corvettes and two dozen transports, so you should be able to auto-resolve your way through most of the Rebel-controlled systems here. Keep moving forward until you reach Geonosis, then bring Vader in and take the skies. You may have a tough fight here — be especially wary of the missile-launching ship that you’ll encounter as you make your way to the space station — but if you bring in a large enough fleet, you should be able to overwhelm the defenders and take down the space station.
Land Battle
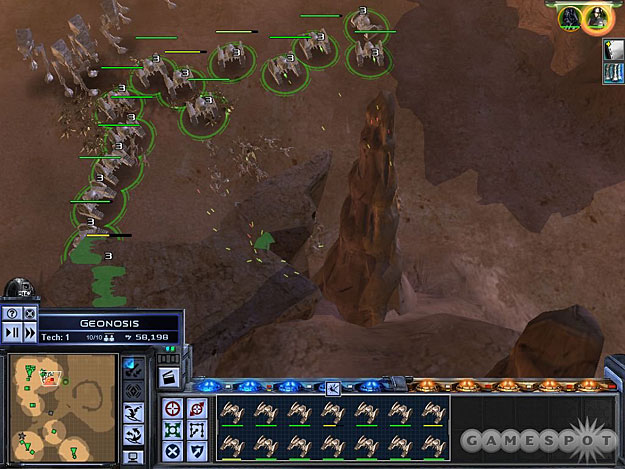
After landing your troops, go ahead and bring down a bunch of TIE Maulers, as well as Darth Vader, of course. The Geonosians have seemingly gone over to the side of the Rebellion, so you’ll have to…convince them of the error of their ways. Use Vader to scout out the nearby structures and have your armor destroy them while Vader fends off the incoming infantry units; when that’s done, head west to the deployment spot and capture it to bring down more troops.
This battle is pretty similar to the battle on Fondor, but the Geonosians seem to be pretty weak in combat, so don’t hesitate to crush them with your Maulers. Their structures are also fairly weak, so sweep to the east to grab that first deploy point, then head north to grab the second. With an army ten units strong, you should be able to amass a sizable force. For a speedy victory, load up on Maulers, and build numerous repair stations when you find build pads. If you rush into battle, you can safely retreat when they start taking damage.
Take out the structures on the small hill first when you start attacking the Rebel encampment. When they’ve been destroyed, sweep around to the north to put the torch to any remaining buildings and polish off the map.
Mission Four: Attack on Mon Calamari
Objectives
- Take Control of Mon Calamari space.
- Space Battle: Crush the Rebel scum and their Space Station.
- Eliminate all Mon Calamari capital ships.
Galactic Map
After your trip to Geonosis, your tech level will be bumped up a bit, allowing you to build level three Space Stations, Victory-Class Star Destroyers, and Shield Generators, as well as sundry other items, such as artillery units and 2-M Repulsor Tanks. Go ahead and upgrade your valuable planets, keeping in mind that Coruscant and Geonosis are going to be on the frontlines here. Actually, if you immediately attack Kuat, you should be able to take it over without too much of a hassle, allowing you to use it as your frontline planet in the eastern part of the galaxy.
After taking Kuat, you’ll probably want to work your way into Ryloth and Nal Hutta before dealing with Kessel; it and Korriban are both controlled by pirates, so the Rebels won’t really be threatening you from that direction. After all the available planets are under your control, amass your forces and head to Mon Calamari.
Space Battle
When you enter Mon Calamari space, you’ll have a lengthy flight to reach the space station. Keep your Broadside Cruisers to the rear and use them to fire away at distant enemies; they can do a number on enemy capital ships, or the shields of the space station, depending on your preference. If you manage to get your troops in close to the station, try setting up your bombers for a bombing run on its hangar.
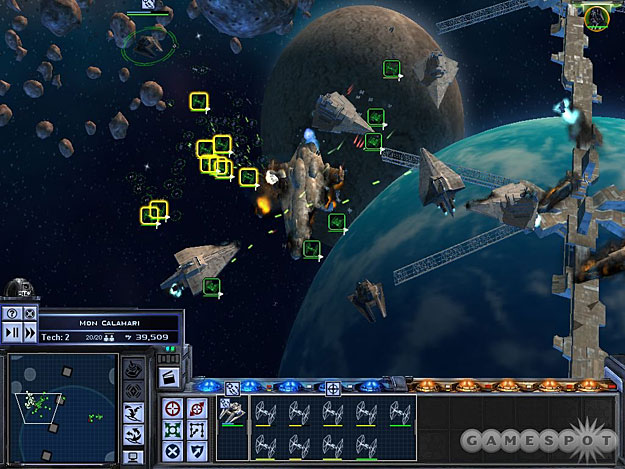
Shortly after you engage the space station, you’ll be surprised to see two Mon Calamari Star Cruisers warp into the system. They’ll be way back towards the edge of the screen, near where you first warped in yourself, so they shouldn’t be an immediate threat to your forces, although they’ll likely destroy your Broadsides if they didn’t move overmuch. Don’t worry about them immediately; continue your efforts against the space station until it’s destroyed, since you don’t want to be fighting a battle on two fronts.
When the station is down for the count, you’ll likely not have to worry too much about any more enemy fighters, so feel free to send your Tartan Cruisers at the Star Cruisers in a suicide run, and use the population room to bring in more Victories and Acclamators. There’s nothing particularly mysterious about taking down the Star Cruisers; they’re more powerful than any of the ships that you have, but there are only two of them, whereas you should be able to bring in almost as many ships as you need to take them down. That’s pretty much what you’ll have to do, so just keep shuffling in reinforcements as your ships get destroyed, and concentrate all your firepower on one of the ships until it goes down, before moving on to the next.
When both Mon Calamari Cruisers are destroyed, you’ll take control of the planet and its resources. No immediate upgrade in technology is evident, but hey — now you have your own race of fish people to lord over.
Mission Five: Trouble on Kashyyyk
Objectives
- Stop the Wookiee uprising on Kashyyyk.
- Planet Battle: Protect the Imperial prisons.
- Stop Han Solo from freeing the Wookiees.
When you bring your forces to Kashyyyk, your goal will be to find and stop Han Solo before he can destroy all of the Imperial prisons on the surface of the planet. If you act quickly, you should be able to achieve your goal within a matter of minutes. Be sure to have a fleet in place above the planet for bombing runs before you land.
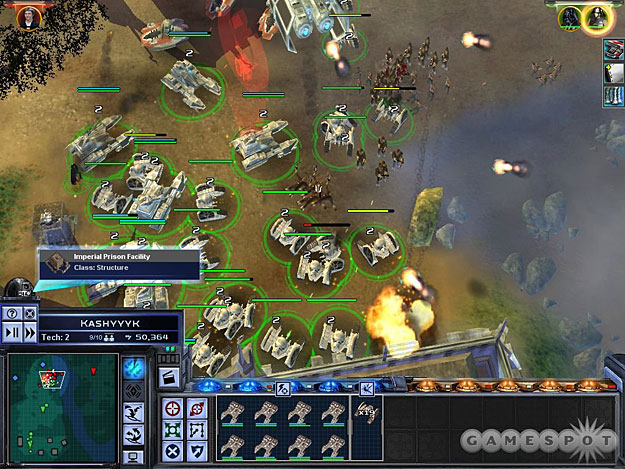
After you start the mission, you’ll find that you have enough room to bring down plenty of reinforcements; there’s a population cap of 10 units here, so go ahead and swarm the ground with an army of mechanized creations. TIE Maulers are speedy and will make quick work of the Wookiees that you’ll be encountering; 2-M Repulsor Tanks will make good teammates for the TIEs, due to their shielding and ability to quickly take down the T-2Bs that the Rebels will be throwing at you. Make one huge group of these units and one for Vader, as well, and that should be about all you need.
There are four or five prisons on the planet, but Han will probably take out two of them before you can move too far from your initial landing zone. After they’ve been blown, though, he’ll seemingly always cross the river in the middle of the map at its northernmost edge, and start attacking the prison there. If you mass your troops near the prison there, you’ll be able to intercept the army of Wookiees as they cross over. Shortly afterwards, Han should make his appearance and head towards the prison. His little EMP blast will disable most of your forces, but Vader should be able to wander over to him and start chopping away regardless. What’s better is the fact that you should have a bombing run available by the time he approaches this prison, and dropping a bomb on him from above is pretty much a surefire way to kill him.
You don’t have to protect all of the prisons here, obviously. Han is your primary target; when you drop a bomb on him or kill him by any other means, he’ll retreat into the woods and the mission will be over. You should outnumber him greatly, so even if your bombing run misses the target, you should still be able to pin him down with Maulers (after his EMP burst gets used) and finish him off.
Mission Six: A New Weapon Of War
Objectives
- Escort Veers to Carida and help him test out the AT-AT Prototype.
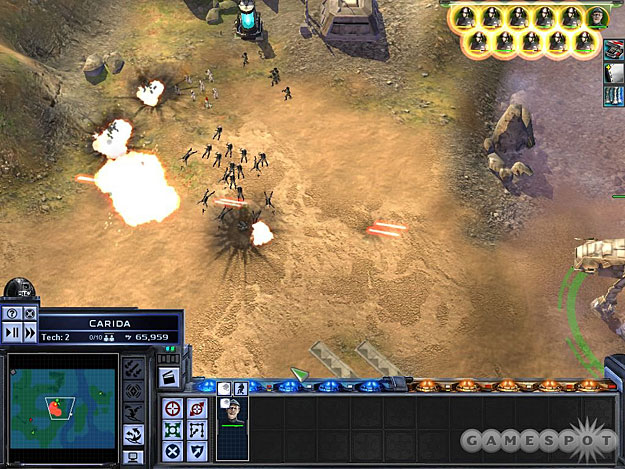
Now it’s time to have a little fun with your new toys! General Veers is on board to help show off the AT-AT prototype, and although you’re not going to immediately get to build a huge number of the mechanical monstrosities to aid your ground forces, you’ll still have the pleasure of taking on a few helpless targets with the terrible towers of titanic…toughness. Yeah.
Anyway, get Veers to Carida, and the land battle will automatically begin. Your first task will be to use the AT-AT to destroy a few unmanned vehicles that are scattered around the battlefield. They offer no resistance, so this should just be a matter of clicking on them. Tough, huh? When you’re ready to move on, move towards the flashing beacon. (You can use the time speed-up button to speed things up a bit if you’re annoyed by the slow movement rate of the AT-AT.)
As you move along, you’ll have to take down a squad of prisoners; use the Deploy Stormtroopers command to reinforce your Field Commanders. The AT-AT isn’t very good at hitting small targets like soldiers, so you’ll need the help to take them out.
As you move towards the easternmost island here, Rebels will land and begin assaulting the entire map. With your AT-AT, and the Stormtroopers that you can continually drop, you should be able to easily overwhelm them, but the main problem that arises will be one of scale; when the Rebel repulsor tanks get too close to your AT-AT, it’ll be unable to fire on them. You’ll have to walk it away from them (using the time adjustor to speed up the process), then pivot it around and wipe them out. Most of the enemy vehicles won’t be able to stand up to your AT-AT’s fire, so just blast them. On the build pads near your bunkers, try building either Bacta Tanks to let your Stormtroopers and Field Commanders to heal themselves, or anti-Vehicle turrets to wipe out any vehicles that your AT-AT isn’t in position to hit.
When you’ve destroyed all of the Rebel forces, the mission will end. Now it’s time to find out where the attack originated from, and wipe out the Rebel scum.
Mission Seven: The Rebel Fortress
Objectives
- Take Control of Jabiim.
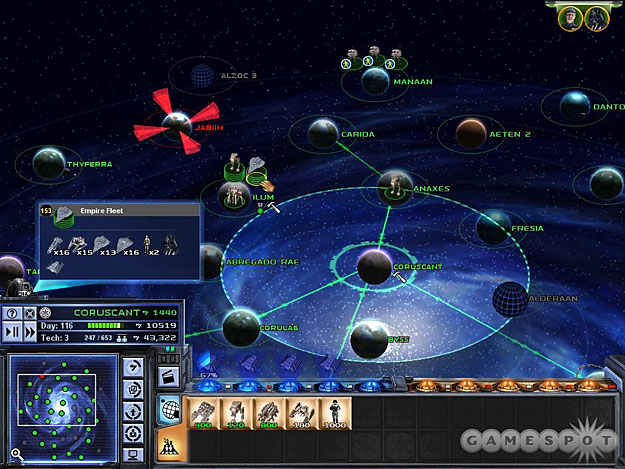
Well, that didn’t take long: you quickly establish that Jabiim is the epicenter of the new dystopia. As soon as you wrap things up on Carida, you’ll find that the Rebel infestation becomes well known on a number of worlds around its location, so you’ll have to move quickly to build up your garrisons on those planets and establish fleet presences in the skies to prevent any attacks. You do have the ability to build level four space stations, though, so quickly build them on all of your northern bases to further boost your defensive capabilities. As noted, you can’t build AT-ATs yet, but you will have General Veers to add to your main ground-attack army.
You’re going to have plenty of planets to conquer before you head out to Jabiim, though. You may face an attack at Carida immediately, so be ready for it; otherwise, the Alliance may build up their forces and assault you at Korriban. Be sure both of those planets are defended. It’s best to keep a small fleet at Korriban to protect it, while building up a larger fleet to the west and attacking from the direction of Anaxes. You should have an almost incredible amount of money coming your way by this point, so materiel shouldn’t be a problem; if worst comes to worst, just build huge fleets and auto-resolve your way through the fights.
After you’ve cleaned out the infestation in the east, leaving only Yavin IV (hmm…wonder if it’ll pop up later in the game?), get ready for your assault on Jabiim. Take note of the planet’s conditions: no repulsorlift vehicles will work here, so your 2-M Repulsor Tanks and your Scout Troopers won’t be capable of deploying to the surface.
Space Battle
Once you have the available planets under your control, you’ll be able to build up your fleet at leisure, so there’s no excuse for losing this battle; just bring a huge stack of ships to Jabiim and rout the Rebels posthaste. They will likely have an Ion Cannon on the surface that’ll pound your capital ships, but there’s nothing you can do about it except take the blows. Just be sure to move your flagship (whichever ship has your fleet commanders in it) a bit to the rear, behind your other capital ships to prevent it from getting destroyed.
Land Battle
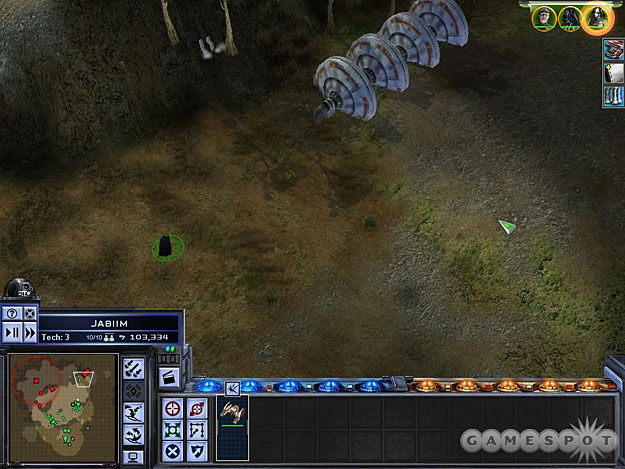
The land battle here can be somewhat frustrating, even if your victory is almost inevitable. You won’t have any scout speeders to line up your bombing runs, and there are going to be huge hordes of infantry enemies spamming your location at the beginning of the fight, due to the infinitely-spawning houses scattered around the area. To defend your location, drop a couple squads worth of SPMA-T artillery units and have them deploy immediately. If you drop Veers down as well, his line of sight will be enough to let your artillery kill any infantry that happen to get close to your location.
While that’s going on, use Vader and some TIE Maulers to move out onto the build pads near the metallic area of the map, and make anti-infantry turrets where possible. When things have stabilized a bit, use a mixed group of Maulers and AT-STs to hunt down and destroy any human dwellings in the area to prevent them from spawning.
The power generator for the Rebels is located in the northeastern corner of the map, far afield of their shield radius. It should be lightly defended, so roll in with your troops and destroy it before sweeping into the base. The enemy’s Light Factory is near the center of the map, and the whole central area of the map is littered with turrets, so use either Veers or your SPMA’s to clear the area before sweeping through and destroying the structures for the win.
Mission Eight: The Traitorous Moff
Objectives
- Locate and defeat Moff Kalast.
- Space Battle: Destroy all Rebel ships and space stations.
- Find and defeat Moff Kalast.
Moff Kalast is apparently responsible for giving over the Imperial secrets to the Rebellion — it’s time to make him pay. He’s located down at Atzerri, near Bestine and Bespin, but he has a rather sizable fleet to work with, so you probably won’t want to just march in and attack him. Build up your own fleet while parking them at Bestine, and be sure that the neighboring systems all have garrisons; Kalast can and will land small groups of troops, bypassing your fleets, if you leave them undefended.
Space Battle
When you reach Atzerri, you’ll find an unpleasant surprise: Kalast is in possession of an Imperial Star Destroyer. Luckily for you, he’ll jump out of the system as soon as the battle begins, leaving his Rebel allies to be slaughtered. Yup, sounds like an Imperial officer to us…
Anyway, when you begin your fight, you’re going to find that there are plenty of ships to destroy. You can expect around 25 Corellian Corvettes and/or Gunship, five Nebulon-B Frigates, 10 missile ships, and a host of X-wing and Y-wing squadrons; they won’t all appear at once, of course, but will continually regenerate any ships that are lost.
Unfortunately, there’s a huge asteroid field between your starting position and the enemy space station. If you don’t want your capital ships to take damage, you’ll have to kind of scoot around to the south and do an end-around to bypass the asteroids. This can take a while, and at least one of your capital ships will get tagged by the Ion Cannon on the surface and get left behind. You can try to charge through the asteroids, if you wish, but you’ll be damaged, as mentioned.
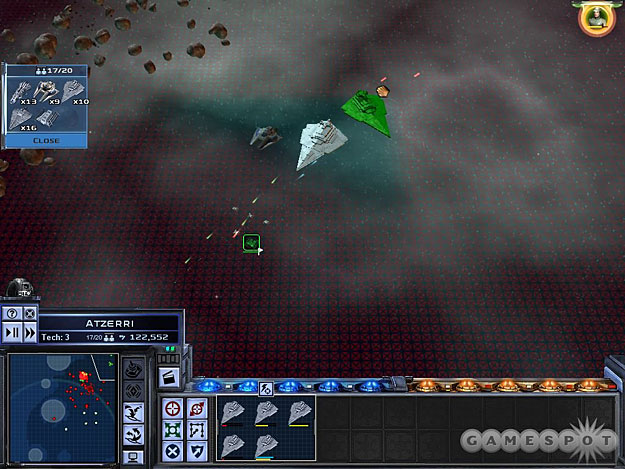
When you’re in position to the south of the space station, it might be worth your while to concentrate your firepower on the space station’s hangar bay; otherwise, it’ll keep spitting out Y-Wings and X-Wings until well into the battle. Other than that, this is pretty much just a brute-force battle; you’ll have to continually summon in Acclamators and Victories to wear down the huge number of Corellian ships that the rebels put up against you. If you want to launch a little surprise attack, scout out the northeastern corner of the map, near where the Rebel shuttles are likely going to hide. There’s a small section of the map that’s available for reinforcements, if you can get your eyes on it (or ping it with a TIE Scout). Sending a Victory into the rear of the enemy forces will help draw their fire away from the main portion of your fleet, and will likely let you take out a couple of their missile ships before they have a chance to react.
Galactic Map
When you finish off the Rebels, send troops down to pacify Azterri and take it over. Moff Kalast will have headed straight for Coruscant, surprisingly enough, and will bring a small Rebel fleet with him. (His choice of system may shift if you have ships in orbit around Coruscant.) To counteract his hyperspacical ways, though, you’ll be provided with an Inderdictor Cruiser. Add it to your fleet and attack!
During your combat with Moff Kalast, use the Interdictor’s ability to generate a gravity well; this will prevent Kalast’s ISD from jumping into hyperspace. Of course, you’ll have to protect your Interdictor during this combat; if it gets destroyed, there won’t be anything to prevent Kalast from blasting his way out of Dodge. As soon as combat starts, activate the gravity well, then move your other capital ships forward a bit to ensure that they’re in front of the Interdictor.
From there, this is a pretty straightforward combat. The ISD obviously has more firepower than any of your ships, but you’re going to win when you knock its health down low enough, so the rest of the Rebel forces don’t really matter all that much. Focus your firepower on Kalast, get his shields low, then go to work on his systems until you finally win the battle.
Mission Nine: An Engagement With The Emperor
Objectives
- Escort the Emperor to Bothawui and help him show the Bothans the error of their ways.
- Planetary Battle: Emperor Palpatine must survive.
- Destroy all of the Bothans and their structures.
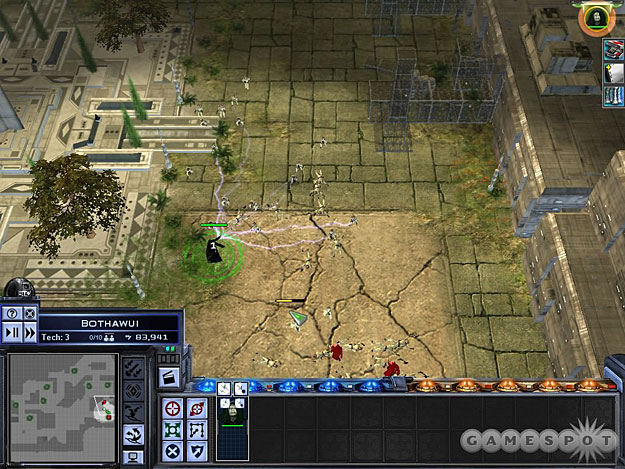
Well, now that you know who’s been leaking information to the Rebellion, the Emperor uncharacteristically decides to take matters into his own hands, and heads to Bothawui to deal with the Bothans personally. There’s no need to build up a huge land force here; the Emperor will head down to the planet alone. Be sure to have some space units in orbit before sending him down.
When you hit the planet surface, you should find yourself engaged in something of a cakewalk. The Emperor is probably even harder for the enemies to kill than Vader is, mostly thanks to his passive ability to steal health from nearby infantry and add it to his own; as soon as he gets hit, he should be able to immediately regenerate his health. So, yeah, three cheers for god mode!
Anyway, your goal here is to destroy the buildings that will continually spit out Bothans. You can fool around with the Emperor’s powers to either kill the Bothans, or convert them to your side, but all you really need to do is task him on a building and let him go crazy. It’ll take him a while to destroy the buildings, so you may want to flip on the doubletime toggle to speed things up. As mentioned, he essentially can’t die here, so there’s no need to really protect him.
You don’t need to take out every building in the area; after finishing off half of them or so, you’ll automatically end the mission. You may encounter a small space battle after the mission ends, though; thus our warning about including space units on the planet before attempting the ground mission.
Mission Ten: Capturing A Princess
Objectives
- Build a fleet and escort Vader to Tatooine to capture Princess Leia. You’ll need at least one Imperial Star Destroyer to use its tractor beam on her ship.
- Space Battle: Save at least one Interdictor.
- Destroy the Pirates and their space station.
- Lord Vader must survive.
- Hide your fleet in the nebulas.
- Wait until the Princess receives the data transmission.
After some…persuasion, the Bothans revealed to the Emperor that Princess Leia Organa would be arriving in orbit around Tatooine to receive the transmission regarding the technical specifications of the Death Star. You’ll have to capture her! Before you head out, though, you’ll need to have at least one Imperial Star Destroyer in your fleet. You can build them at Sullust, Fondor, Kuat, and Mon Calamari, so start cranking out a few of them to add to your forces. You can also build fifth-level space stations, as well as Heavy Factories for the production of AT-AT’s and AT-AA’s.
Take a little time to upgrade your planets and get a few Star Destroyers. You won’t be facing any attacks from Tatooine, so feel free to switch on the sped-up time toggle to build everything more quickly. You’ll also want to make sure that you have some Interdictors in your fleet before you attack at Tatooine.
Space Battle
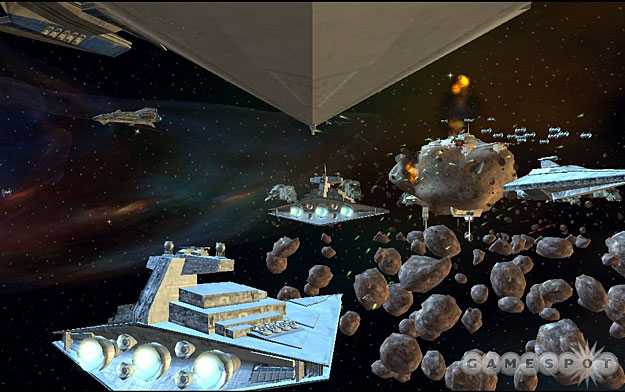
When you arrive at Tatooine, you’ll have to take out a fleet of space pirates that have entered the system. Nothing especially difficult here, just a few frigates. They’ll be attacking some of your Interdictors that were apparently in the system without an escort; just quickly move them behind your capital ships, and you should be able to destroy the pirates without much difficulty. When you attack the space station, though, you may want to keep your ISD behind the front lines; if the enemies lock onto it and attack it, you may lose the launch bay, or even the tractor beam, which would be a Bad Thing.
After the space station and the nearby frigates are destroyed, you’ll have to move your fleet into the nebulas scattered around the map to avoid detection by the incoming Rebels. You’ll be able to tell when you’re hidden by looking at your ships; they’ll appear translucent instead of solid. Be sure to move your Interdictors over to where your Star Destroyer is hiding; they’ll be the first thing the Rebels will attack, so you’ll need to protect them well.
After the X-Wings jump into the system, wait for Tantive IV to appear as well; this is the ship that the Princess is on. You’ll have to stay in the nebula until she receives the transmission; only then will you be clear to leave the nebula and engage! You’ll have to move incredibly quickly, and get your Interdictors out of the nebulas so that they can engage their interdiction fields; you only have around ten seconds to move them and activate the fields. Any longer, and your precious prey will warp away and avoid capture.

So far as Tantive IV goes, it’ll be tough to capture, due to the fact that it’s quicker than your Star Destroyers. If you can keep enemy ships off of your Interdictors, or if you have more Interdictors waiting to deploy, then you should be able to just make a suicide run towards the Mon Calamari cruiser. After you’ve cleared enough population space to bring in another Star Destroyer, warp it in directly to where the Tantive IV is and lock it down with your tractor beam. When that’s done, you’ll automatically win the fight.
Mission Eleven: The Destruction of Alderaan
Objectives
- Escort the Death Star to Alderaan.
Now that the ultimate power in the universe is under your control, it’s time to start using your power for the greater good. You’re going to start by destroying Alderaan and slaughtering billions of innocents in a fit of pique. Hooray for the Empire!
Space Battle
Although it’s difficult to really lose the battle of Alderaan, if you want to have a good time, you’re going to want to bring a fleet with at least four Imperial Star Destroyers in it, and use that to escort the Death Star to Alderaan. When you get there, you’ll automatically start a space battle.
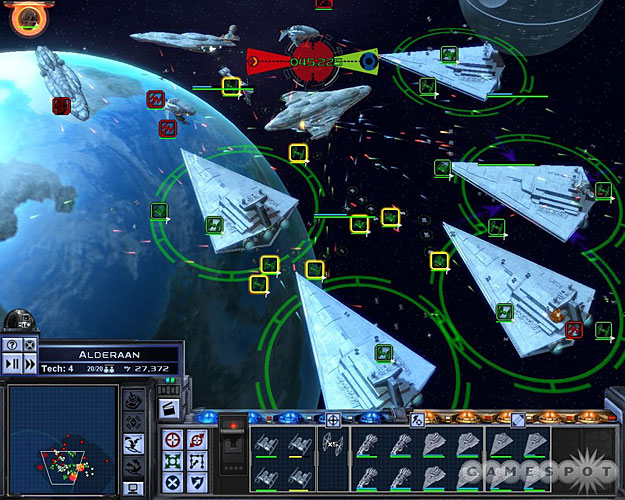
The bad news is that the Death Star can’t be controlled by itself; it pretty much just sits there on its own, a passive observer, until it launches its attack with a Tyson-esque rage. In order to destroy Alderaan, though, it needs to be protected; this entails engaging the numerous Mon Calamari Star Destroyers that will engage your fleet. You don’t need to win the battle or anything; just stay in the fight until the Death Star is prepared to fire.
What’s interesting is that your initial forces apparently don’t count towards the 20-unit population cap, so you should be able to immediately bring in a number of new ships, if you wish to. There’s nothing quite like pounding Home One with eight capital ships.
Regardless, all you need to do is to not die. Since the Death Star’s timer is only 75 seconds long, you should essentially automatically win this battle; once the Death Star destroys Alderaan (you have to flip the switch that appears near your unit bar), you return to the galactic map.
Mission Twelve: End of the Rebellion
Objectives
- Destroy Alzoc III, Polus, Shola, Hoth, and Yavin IV.
The Emperor has tracked down the remnants of the Rebellion to five remaining strongholds. With your massive fleet, you’ll have to bring the Death Star to each planet and destroy it, as you did Alderaan. Given the Death Star’s painfully slow movement rate, you’ll want to spend most of your time here in double-speed mode. Heck, that’s probably true even for the space battles — unlike the conflict at Alderaan, you won’t automatically win these when the planet blows up; you’ll still have to hunt down and destroy all of the Rebel space forces.
And that’s…pretty much all you need to do. The Rebels will have a sizable fleet at each of the planets, but they won’t have a large number of Mon Calamari Cruisers hanging around; it’ll be the usual surfluous number of Corellian Corvettes and Nebulon-B Frigates, for the most part. But if you’ve been investing your cash wisely, you should be able to build a truly massive fleet, something around 400 or 500 population units large, all in one huge stack. You shouldn’t need to, it’s just pretty cool to have an unstoppable force of Star Destroyers escorting the Death Star around.
Each of the planets you attack will have an Ion Cannon, as well as a level five space station, so none of these battles will be easy, necessarily (although the Ion Cannon obviously goes away when you blow the planet), but still: you can bring along as large of a fleet as you need to to each of these engagements, so there really shouldn’t be anything stopping you from crushing everything in your way. Be sure to garrison the planets near the Rebel strongholds, though, as it’ll probably take you over a week of galactic time to get the Death Star to each of the planets. We never got attacked by any of the planets, ourselves, but if you’re playing on Hard difficulty, they may decide to resist the inevitable and lash out at your properties, so be ready for it. A set of energy shields and turbolaser cannons, paired with a few artillery units, should make most of your planets impregnable.
When the fifth planet has been destroyed, you’ll have finally eliminated all remnants of the Rebellion. Maybe Han and Chewie are still out there somewhere, and maybe the droids are running around on Tatooine, and maybe Luke and Obi-Wan are preparing in secret to restore order to the galaxy, but for now: you win. Hooray evil!
Ground Units
Galactic Empire
2-M Repulsor Tank
Strong Against: T2-B Tank, MPTL-2A, Anti-Infantry Turret
Weak Against: T4-B Tank, Plex Soldier
Like the Rebellion’s T2-B tank, the 2-M Repulsor is a hovering vehicle that can move fairly speedily, and packs shields to supplement its armor. It’s primarily intended to be an anti-vehicle unit, and fulfills this role quite well, especially when used in large groups, but it can also be decent as a purely defensive unit, solely because its shields can protect it from a decent amount of low-level blaster fire and prevent them from ever taking damage. The computer, especially, seems to be quite fond of infantry units, so you can definitely park some 2-M’s in their path to prevent them from moving on. The 2-M is borderline incompetent when firing at infantry, though, so this will result in something of a stalemate unless you roll up some Maulers to finish the job.
AT-AA
Strong Against:
Weak Against: T4-B Tank, MPTL-2A
The AT-AA is your anti-aircraft unit, and one of the most advanced ground units in the game for the Empire. And by «advanced» we mean that it’ll take a long time before you can actually research and build it, not that you’ll actually be using it all that much. As the name implies, this unit is responsible for shooting down enemy air units; in this case, that means it’s capable of taking down Y-Wings as they fly over unprotected ground, as well as Speeder units that are attempting to lasso your AT-ATs. Since AT-AA’s are so specialized, they can rip through any air units with relative ease. Even though they can attack ground units, though, they’re quite poor at doing so, so they’ll be easy pickings for your opponents vehicles if they get into range. They are, however, useful when taking on enemy infantry units, thanks to the splash damage effect of their fire.
AT-AA’s are fairly slow, as well, and if you want to fully prevent a bombing run, you’ll need to be in the path of the bombers before they start dropping the bombs. If your AT-AT units are right at the epicenter of the bombing run area, they’ll still shoot down the Y-Wings, but not before they manage to drop most of their bombs. Unfortunately, since bombing runs can start from any corner of the map, it can be difficult to really place your AT-AA’s to prevent bombing runs.
AT-AT
Strong Against: Turrets,
Weak Against: Airspeeder, Plex Soldiers
Special Abilities: Focus Firepower, Deploy Stormtroopers
Ah, the mighty All-Terrain Armored Transport. Although expensive, bulky, and slow, the AT-AT is going to be the mightiest vehicle on any battleground it happens to hit, and are well worth deploying. Using them well will be difficult, but can definitely shift the balance of power.
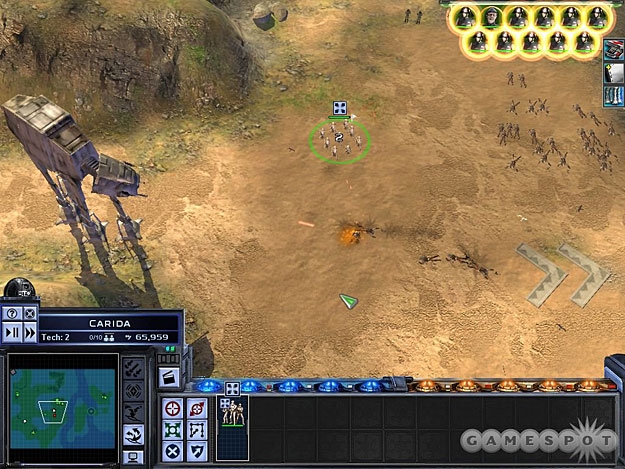
The key things to remember about AT-ATs are, again, that they’re quite slow, and that they can’t fire at units that get up close and personal. They’re also quite poor at dealing with infantry units that they encounter; their laser fire just doesn’t really hurt infantry all that much. Given enough time, they can kill a squadron of soldiers, but it’ll take a long time, and on planets where the Rebels can generate a large number of friendly units, such as Mon Calamari or Kashyyyk, you can expect them to swamp your AT-ATs with their infantry units. They won’t individually do a lot of damage (and if you park your AT-AT by a repair structure, it should be fine), but over time, they’ll wear it down. Of course, one of the AT-AT’s special abilities is to spit out a small squad of nine Stormtroopers from its belly, precisely to defend it from such threats. You can only spit out two nine-person squads, though, so use them carefully.
The main strength of the AT-AT is that it can fire from a very long range for a vehicle and has exceptional firepower. It doesn’t have the same range as artillery units, but it can definitely take out, for example, an anti-vehicle turret from well beyond the turret’s effective range. On top of that, its Focus Firepower can actually take its laser fire and turn it into something of an area-of-effect weapon, utterly demolishing anything it’s targeting, as well as any nearby units in a straight line from the AT-AT.
The weaknesses of the AT-AT are that it can’t pivot very quickly, so if a unit comes up from behind it, it’ll be defenseless. They also can’t fire at units that are very close to their feet, but then again, they can crush both infantry and light vehicles by walking over them.
AT-ST
Strong Against: Turrets
Weak Against: T2-B Tank, T4-B Tank, Plex Soldiers
The AT-ST is something of a necessary evil for the Empire. While it’s not particularly great at killing things, it’s a hardy little unit that can take a beating and let your other units get into position for the kill. Unfortunately, their weak firepower makes it difficult for them to contribute much in a fight, especially when dealing with those pesky infantry.
SPMA-T
Strong Against:
Weak Against: T2-B Tank, T4-B Tank, Plex Soldiers
It’s artillery! What more can you really say about the SPMA-T. It’s the Imperial version of the Rebellion’s MPTL-2A, although with a few differences. Like the MPTL, the SPMA is an expensive and very slow-moving vehicle, has to stop and deploy its cannon before it can fire, and is unable to take much damage before it falls apart in a heap of scrap. Luckily, though, when you do deploy the SPMA, it’ll be able to fire on enemy units well before they come in range, and will usually finish them off before they manage to get close enough to be a threat, unless they’re in a large group; it obviously has more firepower than any other ground unit in the game, so one or two shots is all it’ll take before most enemy units go down for the count.
SPMAs are difficult to use offensively, mostly because of their slow movement, but they’re an integral part of any good defensive strategy, and when you’re attempting to hold a planet from enemy invaders, they’re going to be worth their weight in gold, and should be able to kill many attackers. This is especially true when defending from inside a shield generator; you can park your artillery units near the edge of the shield (but not too close, and hopefully with some weaker units between them and the edge), and let them fire on the enemy units as they approach. Since enemy units have to slow down when passing through shields, they’ll be sitting ducks for your artillery pieces and should get ripped to shreds.
It appears that SPMA fire is classified as laser, so they will plunk off an non-upgraded energy shield with no effect. This would also seem to make them vulnerable to the accuracy penalty in rain, but we haven’t noticed this specifically.
TIE Mauler
Strong Against: Rebel Infantry Weak Against: T2-B Tank, T4-B Tank, Plex Soldiers
The TIE Mauler is the Empire’s not-so-elite anti-infantry unit, capable of ripping through flesh and blood lickity split. There’s not much to say about it; it’s a cheap unit that moves quickly and can be used to ambush incoming troops. It’s also one of the few units that’s actually capable of running over infantry enemies, allowing you to kill them without even bothering to stop and fire.
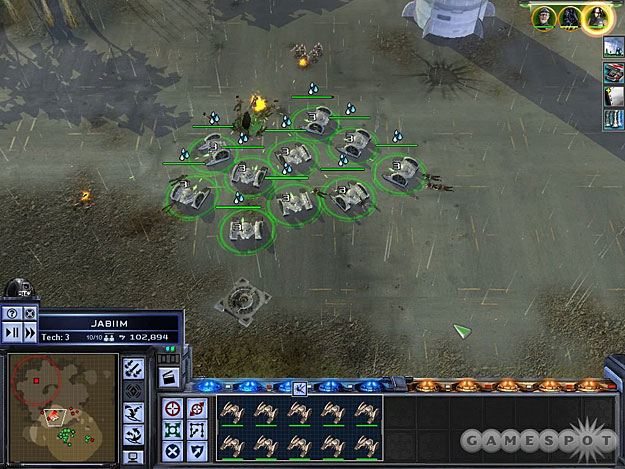
Unfortunately, the Mauler’s cheapness and utility against infantry obviously have to be balanced by something, so they possess fairly weak armor, and will fall quickly to sustained fire, especially from enemy vehicles. Still, though, they come five to a squad, so they’re an excellent unit to bring down en masse and use in one huge army to overrun enemy positions, especially when playing against the computer. You’ll lose plenty of them, but they’re cheap enough to easily replace, and they’re just plain faster than other units, allowing you to get through battles more quickly than you would if you had to wait for an AT-AT to tromp around.
Stormtrooper
Strong Against: Rebel Infantry
Weak Against: MPTL-2A, Infiltrator
The Empire doesn’t really seem to need Stormtroopers as much as the Rebellion does. While Stormtroopers are fine units for the money, especially in a defensive capacity, they’re not going to be overly powerful units. When you need to take out Rebel infantry, you’re probably going to want to just drop down a squad of TIE Maulers and let them do the dirty work.
One use of Stormtroopers, however, is to position them as makeshift defensive outposts with their Cover ability. They’ll take only a small amount of damage from incoming fire, and the Rebellion has few units capable of really steamrolling infantry. Unless they hit you with artillery or Infantry sniping, your Troopers should be able to hold the line against anything incoming for at least a minute, or until you manage to roll your other units nearby to the rescue. Of course, if your opponent is smart, they’ll just ignore your units and run around them…
Scout Trooper
Strong Against: MPTL-2A
Weak Against: T2-B Tank, T4-B Tank
The Scout Trooper is one of the few units for the Empire that can quickly reconnoiter an area. It’s not nearly as good as the little scout droids that the Rebels get as a part of their MPTL-2A artillery — in order for the Scout Trooper to spot an area, it’ll have to actually, physically go there. Meaning that if you want to use a Scout to line up a bombing run on your opponent’s buildings, you’ll have to move it back behind their lines and hope that it manages to reach its destination before getting blown up.
Thanks to the speed of their speeders, the Scouts can usually make a trip like this without a problem, but they will take damage from every unit that sees them during their flight, and will usually wind up dying on the return trip, depending on what units are in their way. So they’re essentially suicide scouts, in practice, but still, that’s all you need them to be most of the time.
If you’re interested in using them offensively, Scouts do have the capability to drop small bombs with their special attack. These bombs aren’t exceptionally damaging, but they can knock out infantry if you place them close enough. They work best against MPTL-2A artillery units, though, especially since they usually can’t move fast enough to get out of range of the bomb radius before it detonates, and seem to take an especially large amount of damage from the bombs.
Rebel Alliance
MPTL-2A Artillery
Strong Against: Turrets, AT-AA, Stormtrooper
Weak Against: 2-M Repulsor, AT-AT, Scout Trooper
The MPTL-2A is the Rebellion’s form of long-range artillery. It’s mechanically almost identical to the SPMA-T, save for the fact that it fires a rocket barrage instead of lasers. Helpfully enough, though, rocket fire is impacted by sandstorm conditions instead of rain, and since rain is much more prevalent on the worlds of Empire At War, you won’t have many problems from the weather.
Another cool little bonus you’ll get here are from the inclusion of a pair of sensor droids. These droids can’t kill anything on their own, but if you take advantage of their Sensor Ping ability, you’ll be able to momentarily get an eye on the enemy base, allowing you to send a bombing run straight down their throats without sacrificing units to scout it out. And that’s just plain cool.
T-2B Repulsor Tank
Strong Against: Artillery, Anti-Infantry Turrets
Weak Against: Large vehicles, Anti-Vehicle Turrets
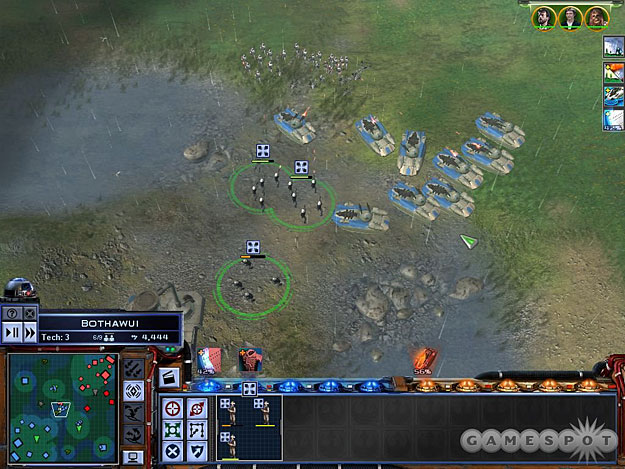
The T-2B isn’t quite as effective as the Imperial 2-M Repulsor tank in terms of taking down enemy vehicles, but it is perhaps slightly more effective at killing infantry when attacking en masse. Beyond that, there’s not much to say: its shielding will protect it from most fire from infantry units, making it an excellent front-line unit. If you run into anti-vehicle units, you can bring your T-2B’s back to the rear to let their shielding recharge before resuming the attack.
T4-B Tank
Strong Against: SPMA-T, AT-ST, TIE Mauler, 2-M Repulsor Tank
Weak Against: AT-AT
The T4-B is the beefiest ground vehicle available to the Rebellion, an adaptable and hearty little tank that can work wonders against most of the Empire’s ground forces. Although it’s unshielded, it has plenty of hit points to work with, and can also switch between rocket fire and laser fire. Laser fire is what you want to use when you’re taking on vehicles, but the rocket fire can be used to cause splash damage on multiple targets, and is pretty helpful when taking on infantry, or when firing at something that’s distant and out of reach. The cool thing about the weapon switching is that it’s instantaneous, and there’s no cooldown time between switches, so if you don’t mind a little micromanagement, you can roll your tanks up while firing rockets, then switch them over to lasers when they get close enough to use them.
T-47 Airspeeder
Strong Against: AT-AT
Weak Against: AT-AA
The Airspeeder is perhaps best known to Star Wars fans as the vehicle that harried the ground assault at Hoth by tripping up AT-ATs with tow cables. In Empire At War, they can obviously fulfill this same function, but they’re also capable of some amusingly tough-to-counter damage to other enemy units.
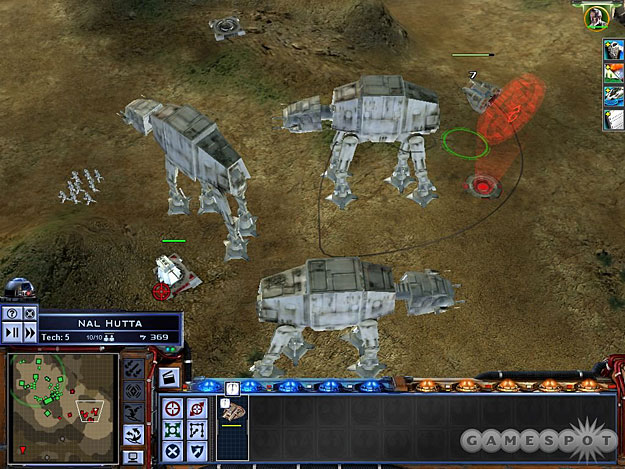
Obviously, though, the Speeders are mostly intended to be used against AT-ATs. Their tow cable attack doesn’t always work exceedingly well, and sometimes seems to just fail outright, but it’s still obviously the most efficient way to proceed against the mechanical monstrosities, since it is essentially an automatic kill when it comes off.
Against other units, though, Speeders can prove to be an annoying threat. Their lasers don’t do a huge amount of damage, but they move quickly and can’t be attacked by many ground units, so sometimes you can just send them over to the enemy base and have them launch an attack against their shield generator or factories with little care for their own well-being. If your enemy has an AT-AA or an anti-air turret, then this will be a suicide run, but if they don’t, then they’ll have a hell of a time bringing the Speeders down.
Infiltrator
Strong Against: Stormtrooper
Weak Against: TIE Mauler
The Infiltrator unit is an elite Rebel ranger, capable of sniping away at enemy infantry or throwing Thermal Detonators onto enemy vehicles to destroy them as well. While it’s tough to justify spending one population on such a small number of units (each squad only has two soldiers), they are excellent at sniping away at infantry from a long distance, or running forward to capture reinforcement points or buildpads. They move much more quickly than most units do, but if they get caught by a TIE Mauler, you can kiss them goodbye.
Rebel Infantry
Strong Against: Stormtrooper
Weak Against: Stormtrooper, TIE Mauler
The base infantry unit for the Rebel are their small squads of soldiers. While they’re nothing special, they can take a good amount of damage thanks to their Cover ability. They’re not going to be killing much of anything by themselves, but they can confuse enemy units while remaining bunkered up or simply standing in their way.
Plex Soldiers
Strong Against: Vehicles
Weak Against: Stormtrooper, TIE Mauler
Only the Rebellion gets Plex Soldiers. When you deploy Plex Soldiers, you’ll gain two squads of three rocket-launcher-wielding soldiers apiece. Plex Soldiers are strong against almost any type of vehicle, but have the usual weaknesses of infantry units, so keep them away from TIE Maulers and artillery units if you’re at all fond of their continued lives.
Space Units
Galactic Empire
The Empire actually gets a smaller population cap than does the Rebellion during space battle. While the Rebellion gets a 25-unit cap, the Empire is going to have to work with a 20-unit cap. This, of course, is because the Empire doesn’t have to build fighters or bombers, like the Rebellion does. Instead, these units are automatically stowed on board the Empire’s capital ships and frigates, and are automatically discharged into space at the beginning of a fight. All of the capital ships and frigates have multiple wings stowed away, but won’t discharge them all at once; instead, they’ll usually spit out one wing of fighters and one wing of bombers, and only replace them when the wings are completely destroyed. Of course, if they run out of wings, or if the hangars on your ships get destroyed, you won’t be able to bring in any more fighter wings, at least not until you bring in a whole new capital ship.
Note that, like ship damage, the number of TIEs on board a capital ship is refreshed at the beginning of each battle. If an Imperial Star Destroyer discharges all of its TIE Fighters during one battle, but survives the fight, it’ll have all of the fighters again at the start of its next engagement.
Acclamator Cruiser
Strong Against: Corellian Corvette, Marauder Missile Cruiser
Weak Against: Mon Calamari Star Cruiser, Y-Wing, Assault Frigate
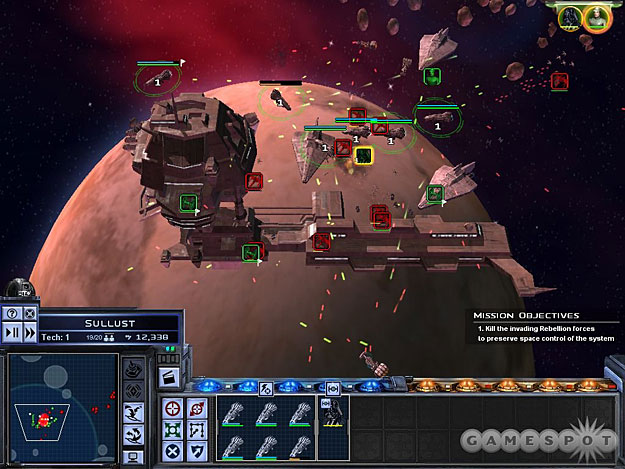
The Acclamator Cruiser is the ground-floor ship for the Empire, kind of a baby Imperial Star Destroyer. It’s technically classified as a frigate, but it’s fairly bulky for a ship of that class. It packs four TIE Fighter squadrons and two TIE Bomber squadrons. It’ll serve you well in the early missions of the game, but gets outclassed later on by the bigger ships.
Broadside-Class Cruiser
Strong Against: X-Wing, Y-Wing, Space Stations
Weak Against: Mon Calamari Cruiser, Assault Frigate, Corellian Gunship
The Broadside-class cruiser is essentially space-bound artillery, capable of firing missiles from an astonishingly long distance. These missiles are slow-moving and not very accurate, but the cumulative effect of their damage can be substantial, especially if they can keep up their firing for a minute or two. As mentioned, they work well against fighters and bombers, but they can damage almost anything given enough time. They’re perhaps best used against space stations, which they can be tasked on from a mile away; their missiles will damage multiple systems simultaneously, so the space station won’t necessarily be impaired immediately, but when your capital ships finish off the defenders, they’ll have a much easier time polishing off the space station as well.
Imperial Star Destroyer
Strong Against: Corellian Corvette, Corellian Gunship, Assault Frigate, Nebulon-B Frigate
Weak Against: Y-Wing Bomber, Mon Calamari Cruiser
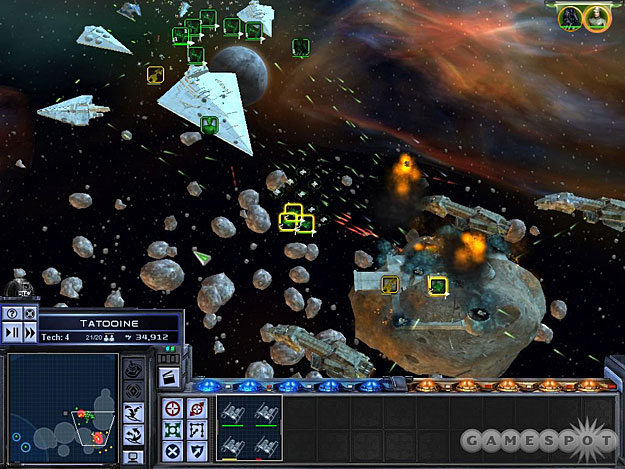
One of the most immediately recognizable ships in all of science fiction, the mighty Imperial Star Destroyer is going to cause massive headaches for your enemies, thanks to its huge number of hardpoints (including four Turbolaser Batteries and two Ion Cannons), and its ability to deploy up to 10 TIE Fighter squads and five TIE Bombers. Its special ability — the tractor beam — isn’t anything exceptional, but can be used to lock weaker ships in range and prevent them from getting away from its fire, which is especially useful when trying to lock down smaller Rebel ships, such as Corvettes or Captain Antilles’ ship, which will often attempt to rush away from you when they start taking fire.
Interdictor Cruiser
Strong Against: Marauder Missile Cruiser
Weak Against: Everything else
The Interdictor isn’t going to be of tremendous use in the singleplayer game, where the computer opponents will generally fight to the death regardless of the hopelessness of the cause. It’s also pretty obviously going to be useless in skirmish mode, especially when you consider the cost of the ship. Its main use is to erect an interdiction field, which prevents any ships in the same combat from escaping into hyperspace before the combat is finished. As mentioned, though, computer enemies will rarely attempt to escape, except in specific missions during the campaign, so unless you’re playing a multiplayer Galactic Conquest game, you probably won’t have too much need for the Interdictor’s gravity well.
The other primary ability of the Interdictor is its missile defense. If you activate its missile shield, all incoming missiles (such as from a Broadside cruiser) will be deflected away from the Interdictor. This can be useful in space skirmishes or multiplayer games to protect your space station from long-range threats, but again, you’re going to be giving up population room and paying a lot of money for a unit with minimal offensive abilities.
Tartan Patrol Cruiser
Strong Against: X-Wing, Y-Wing, A-Wing
Weak Against: Mon Calamari Cruiser, Assault Frigate, Nebulon-B Frigate
Small, maneuverable, and somewhat essential, the Tartan Patrol Cruiser is the Imperial variant on the Rebel’s Corellian Corvette. Armed with multiple laser cannons, these ships can quickly take down enemy fighters and bombers with ease, but will get smashed to bits if they get too close to enemy capital ships.
TIE Bomber
Strong Against: Mon Calamari Cruisers, Assault Frigates
Weak Against: Corellian Corvette, X-Wing, A-Wing, Marauder Cruiser
TIE Bombers are fragile, but necessary ships. Although they don’t possess the ion cannon of their Y-Wing counterparts, their torpedoes can still directly damage hardpoints of shielded structures and ships. Massing them together at the beginning of a fight, then having them sweep from behind your ships when the battle is joined, can be a profitable tactic, especially when you can take down the shield generator of a powerful ship or the hangar of a space station. Bombers aren’t quite as horrifically important for the Empire as they are for the Rebellion, though, due to the fact that most Mon Calamari Star Cruisers have neither shield generators nor hangars, but they’re still useful units, especially when taking on enemy space stations.
TIE Fighter
Strong Against: Z-95 Headhunter, Y-Wing
Weak Against: Corellian Corvette, X-Wing, A-Wing, Marauder Cruiser
TIE Fighters in Empire at War live up to the reputation they’ve gained in the movies as ships that are incredibly numerous, but not particularly threatening. There are plenty of TIE pilots on any given capital ship, and they’re not really all that great at anything, save for engaging enemy fighters and attempting to keep them busy. But they do that well, at least, and since you’ll be getting plenty of fighter squadrons from each of your capital ships, you should be able to use the TIEs as a low-level annoyance against your enemy.
TIE Scout
Strong Against: Y-Wings
Weak Against: Corellian Corvette, X-Wing, A-Wing
TIE Scouts are of dubious utility in most space battles. They’re not powerful in combat, but they can move fairly quickly. Most of the time, though, you’re going to want to use their sensor ping ability to scout out distant corners of the battlefield. This is mostly useful if you have a hypervelocity gun that you want to use on enemy ships, but you can also use it to scout out obscure areas to bring in reinforcements. Sometimes an enemy space station will be far enough from the corner of a battlefield to allow just the smallest possible crack for you to deploy ships into. Pounding an ISD into one of these cracks can let you attack your enemy from two directions and force them to split their defense.
Victory Class Star Destroyer
Strong Against: Corellian Corvette, Corellian Gunship, Marauder Missile Cruiser
Weak Against: Y-Wing, Mon Calamari Star Cruiser
The Victory-Class Star Destroyer is an older model of destroyer, dating back from the days of the Clone War. It’s slightly more expensive than the Acclamator class of ships, but although it (like the Acclamator) is classified as a frigate, it’s much more capable than its smaller counterpart at taking on larger ships, thanks to its trading the laser cannons of the Acclamator for an Ion Cannon that allows it to quickly drop the shields of enemy vessels. It boasts six TIE Fighter squadrons and three TIE Bomber squadrons. Unfortunately these vessels don’t appear to be capable of atmospheric flight, so you won’t be able to recreate the infamous Ghorman Massacre.
Rebel Alliance
The Alliance has some interesting units in its armada of space, and is capable of bringing more units to a fight than the Empire is, with a population cap of 25, as opposed to the Empire’s 20. Of course, this takes into account the fact that the Alliance is required to build X-Wings and Y-Wings and use them as separate units in fights, wheras the Empire gets «free» TIE Bombers and Fighters that are built into their capital ships.
Alliance ships are also usually a bit more defensive in nature than their Imperial counterparts. Where many Imperial ships get the ability to overpower their weapons at the expense of their shields, Alliance ships often get a shield-recharge ability that can be used when they’re on the brink of having their shields drop. It’ll prevent them from doing much damage, but can quickly restore them to fine fettle relatively quickly.
Assault Frigate Mk II
Strong Against: Tartan Patrol Cruiser, Broadside Cruiser, Acclamator Cruiser
Weak Against: Imperial Star Destroyer, TIE Bomber
The Rebellion’s strongest ship besides the Mon Calamari Star Cruiser is the Assault Frigate. While it won’t win any fights with an Imperial Star Destroyer, its armament makes it a near-match for a Victory, and it will of course overpower smaller vessels without too many problems. It even packs a pair of laser cannons to deal with incoming fighters and bombers.
A-Wing
Strong Against: TIE Bomber, TIE Fighter, TIE Scout
Weak Against: Tartan Cruiser
The A-Wing is a fighter craft that’s something of an upgrade over the earlier X-Wing, even if they cost the same. It’s quicker and more nimble than its predescessor, and is capable of taking down TIEs like nobody’s business. The main difference between it and the X-Wing is its lack of s-foils, which allow the X-Wing to occasionally greatly outrun it.
Corellian Corvette
Strong Against: TIE Bomber, TIE Fighter, TIE Scout
Weak Against: Imperial Star Destroyer, Victory Star Destroyer, Acclamator Cruiser
This relatively old style of ship is still quite powerful at the time of the Rebellion, especially when taking on incoming TIEs. Its eight laser cannons aren’t going to make a dent against capital ships, but it can chew through fighters and bombers like a knife through butter. Although technically a knife doesn’t «chew»…
Corellian Gunship
Strong Against: Tartan Patrol Cruiser, Broadside Cruiser
Weak Against: Imperial Star Destroyer, Victory Star Destroyer
This anti-ship version of the Corellian Corvettes trades in most of the laser cannon in favor of missile launchers, allowing it to penetrate shields and directly damage ships or their hardpoints. It’s an interesting design, but the missile design isn’t necessarily useful unless you use it in a large group, especially since it can only really be effective against a couple of ships. You can try to use it against a capital ship, sure, but the missiles aren’t really as powerful as those of a Y-Wing, and you’ll be more vulnerable to turbolaser fire, so you may want to pick a ship that’s a bit more specialized than the Gunship when deciding what to buy.
Marauder Missile Cruiser
Strong Against: TIE Fighter, TIE Bomber, Space Stations
Weak Against: Imperial Star Destroyer, Victory Star Destroyer, Acclamator Cruiser, Interdictor Cruiser
Like the Broadside cruiser, the Marauder fires long-range missiles that can bypass shields and will make quick work of any fighters or bombers that get caught nearby. They also work well against space stations, but you have to be careful, as the Marauder is only lightly armored.
Mon Calamari Cruiser
Strong Against: Imperial Star Destroyer, Victory Star Destroyer, Acclamator Cruiser, Tartan Patrol Cruiser, Broadside Cruiser
Weak Against: TIE Bomber

Arguably the most powerful space-going vessel in the game, the Mon Calamari Star Cruiser is capable of tearing holes in almost anything the Empire can throw at it. It boasts firepower equal to that of an Imperial-Class Star Destroyer in its four turbolaser batteries and two ion cannons, and while it can’t issue forth endless fighters and bombers, it does have the large advantage of not having a shield generator. Oh, there be shields on these ships, mind, they’re just heavily redundant and thus not as vulnerable as those on other ships, so you won’t have to worry about TIE Bombers knocking your shield generators out of commission and leaving you vulnerable.
Nebulon-B Frigate
Strong Against: Tartan Patrol Cruiser
Weak Against: TIE Bombers, Capital Ships
The Nebulon-B is one of the Rebellion’s weakest ships, but it can still be quite useful in early skirmishes. It’s not overwhelmingly powerful, obviously, but can profitably engage Acclamators. Thanks to their shield-boosting powers, they can engage in a firefight, then quickly recharge their shields (so long as they aren’t the sole target of the enemy forces), making them good front-line ships to lead your fleet into battle.
X-Wing
Strong Against: TIE Bomber, TIE Fighter, TIE Scout
Weak Against: Tartan Cruiser, Broadside Cruiser
Ah, the X-Wing. Small, nimble, and fairly powerful, these ships are among the cream of the crop when it comes to fighter capabilities. There’s not much to really say about them; task them on TIE Fighters or Bombers and let them do their thing. Their S-Foil ability, which lets them toggle on extra speed at the cost of power, is tremendously helpful in skirmish and multiplayer battles, since it’ll let you get them over to mining facilities and claim them for yourself well before the enemy can reach them with their TIE Fighters.
Y-Wing
Strong Against: Imperial Star Destroyer, Victory Star Destroyer, Acclamator Cruiser, Interdictor Cruiser
Weak Against: TIEs, Frigates
The Y-Wing is the Rebellion’s faithful bomber unit. In addition to powerful bombs that can bypass enemy shields, they also possess an ion blast attack that can impact enemy shields and disrupt them, causing them to instantaneously decrease in strength.
Z95 Headhunter
Strong Against: TIE Bomber
Weak Against: Tartan Cruiser, TIE Fighter, TIE Scout
The Z-95 almost isn’t worth mentioning, as it’s rarely seen in the game. This precursor to the X-Wing was a speedy ship, but lacked firepower and a hyperdrive. These aren’t even available in the multiplayer game, so far as we can tell, and will only appear for a few space battles at the beginning of the Rebel campaign.
Hero Units
Hero units appear in Star Wars: Empire At War as especially powerful ground or space units. These guys are going to be more expensive than normal (in skirmish and multiplayer), but will be well worth using in the Campaign or Galactic Conquest modes, since they never permanently die. If they get killed in battle, then they’ll simply regenerate over the course of a couple of galactic days.
Some of these units, such as Han Solo and Boba Fett, can be used both in space battles and on the ground, but most of them are restricted to one playing field or the other.
Rebellion Heroes
Mon Mothma
Space/Ground Unit
Special Abilities: Defensive Morale Boost
Mon Mothma was the Chief of State of the Rebel Alliance, taking up the post after Bail Organa, her primary partner in forming and organizing the Alliance, was killed in the destruction of Alderaan. She’s not much for combat, instead focusing on rallying the troops.
As such, she has no peculiar combat abilities, save for the ability to cause a vague «morale boost» in other units while she’s in a battle, which adds to their defense. This is best used in the comfort of space, where she, like a Fleet Commander, will usually take up residence on the biggest ship you have, although she may opt for a shuttle if you don’t bring along a capital ship, in which case you’ll have to protect her from enemy ships. She can be used in ground battles, as well, but she’s incredibly vulnerable, since she just sits in a landing shuttle and can’t move, allowing her to be pegged by enemy bombers or units.
Her primary benefit, however, is the fact that she cuts the purchase price of all units and buildings by 25% on the galactic campaign map. You can expect to shuttle her around quite a bit, since you’ll want to have her wherever you queue up a large number of buildings or units, or have to build a new space station. Keep in mind that you pay for a unit when you add it to the queue, not when it actually starts getting built, so feel free to bring her to a system, queue up four or five units, then shuffle her off to another system and repeat the process there. Since you’ve already technically paid for the units at the first system, you’ll gain her benefit without actually needing her there for the entire construction process.
R2-D2 & C-3PO
Ground Unit
Special Abilities: Control Turret, Repair Vehicle
This not-so-dynamic duo is, like Mon Mothma, not especially competent in ground battles, but can still be useful in certain situations. They have no offensive capabilities while on the ground, but can be used to repair damaged vehicles, and can also hack enemy turrets and convert them to your side. The drawback to this ability is that they have to get fairly close to the turret to use it, which will often leave them open to damage.
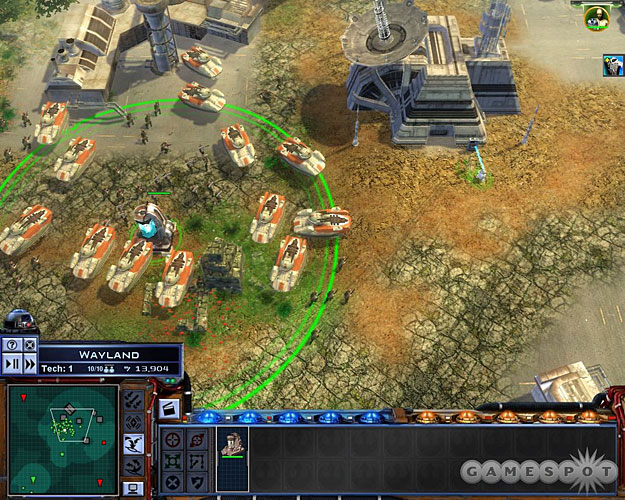
It’s in space, however, that you’ll want to concentrate on using R2 and C3. They’re not capable of doing much in space battles, but they’re great to use as technology thieves (by dragging them to the «Steal» slot on an enemy system), or just as spies. If you park them in a space slot above an enemy system, they’ll be able to see the size of the fleets and garrisons there. While you’ll only be able to see the most powerful unit in either stack, knowing the size should allow you to gauge whether or not an attack would be succesful. Of course, sometimes the computer inflates their stacks with numerous ground units, so you can’t be sure whether you’re going to be facing off against a bunch of ISDs or a bunch of shuttles. Variety is the spice of life, though. Be bold.
Red Squadron
Space Unit
Special Abilities: S-Foils, Lucky Shot
Red Squadron was the designation of the X-Wing squadron at the Battle of Yavin that featured a dream team of fighters, including Luke Skywalker, Wedge Antilles, Jek Porkins, Garven Dreis, and Biggs Darklighter. Its implementation into Empire At War is pretty interesting; although it appears as no more than a group of normal X-Wings, Red Squadron is, of course, a good deal more powerful than normal fighter units, and Luke himself can «use the Force» to make a Lucky Shot every minute or so, which does severe damage to one target of appropriate size. This attack does penetrate shields, so it’s perfect to use on the shield generators of an Imperial Star Destroyer or the hangar bay of a space station.
The members of Red Squadron will get picked off one by one, obviously (with the appropriate sound effects, i.e. «Pull up!» «No, I can hold it together, I can — aghghghghgghh!»), but Luke will always be the last X-Wing standing, allowing you to use Lucky Shot until the unit reaches the bitter end. When he doesn’t have any backup, though, he’ll be a hot target, so he won’t last long if you try to make him Lucky Shot an enemy starbase or something.
Captain Antilles
Space Unit
Special Abilities: Weaken Enemy, Boost Engine Power
Princess Leia’s pilot, Captain Raymus Antilles (no relation to Wedge), pilots the formidable Sundered Heart, a modified Corellian Corvette. It’s obviously of great use against enemy fighters and bombers, but also possesses a handy energy-draining ability that can target a number of ships inside a specific radius, in addition to the standard engine-boosting ability that lets him escape from combat in seconds.
Kyle Katarn
Ground Unit
Special Abilities: Sprint, Thermal Detonator
In a delightful little nod to Star Wars gaming history, Empire at War features an appearance from Kyle Katarn of the Jedi Knight series of games. Given that the game takes place before the destruction of the Death Star, though, this is more of a Dark Forces-era Kyle Katarn, though, before he discovered his Jedi roots and became one with the Force and all that.
As such, Kyle plays more like a commando than anything else. He’s capable of taking down most infantry units with one hit from his blaster, and can also toss a thermal detonator onto buildings and vehicles to destroy them. If you’re trying to hit a vehicle, though, make sure that your target isn’t actively moving, or else you will likely miss your throw and wind up tossing your detonator onto the ground.
Han Solo & Chewbacca
Space/Ground Unit
Special Abilities (Space): Invulnerability
Special Abilities (Ground): Sprint, EMP Burst, Capture Vehicle
Han Solo and Chewbacca are an inseperable pair, and indeed are deployed with both characters as part of the same team.
In space, they pilot the Millenium Falcon, the fastest ship in the galaxy. Actually, it’s slower than an X-Wing with S-Foils activated, but it’s still pretty speedy, and does a good number on enemy fighters, although it’s perhaps not quite as adept at taking down ships as Slave I is. To make up for this, though, it packs an Invulnerability power which renders the ship temporarily immune to damage.
On the ground, you’ll be able to control both Han and Chewbacca individually and separately. As you might expect, they’re both hardy units capable of dealing significant damage to enemy infantry, and they each have abilities capable of countering enemy vehicles, as well. Han, for instance, has his devastating EMP Blast, which will shut down any nearby vehicles or turrets for around 45 seconds when he sets it off. He needs to be in the middle of a group of vehicles to get the most use out of this, but it’s still worthwhile, especially since you can usually Sprint to where the EMP will be most effective before setting it off. Note that this doesn’t actually deal any damage to the vehicles, so you’ll need to follow it up with Plex Soldiers or some other kind of unit capable of actually hurting vehicles if you don’t want them to all just reactivate when the EMP runs out and start pounding you again.
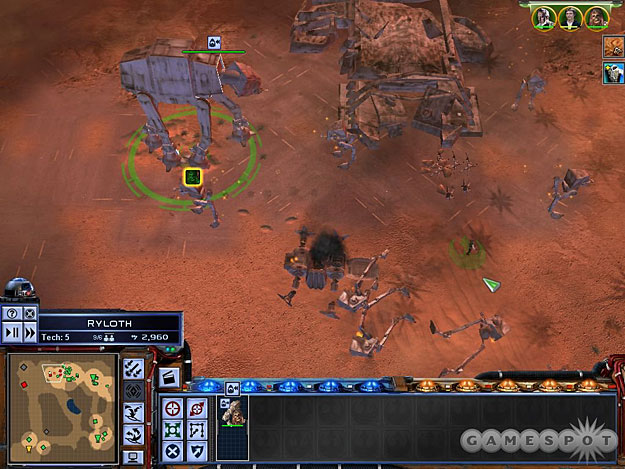
Chewie, for one, has his Capture Vehicle ability, which can be used to take over enemy vehicles and convert them to your cause. When you click on the ability, then click on an enemy vehicle, Chewie will run up to it and hop inside, allowing you to control the vehicle thenceforth. You’ll lose Chewie’s services as a ground unit, but the vehicle that you take over will gain an instant recharge to full health (in the single-player campaign, at least), and if you ever need to, you can just leave the vehicle to regain Chewbacca as a ground unit. If you do, the vehicle will be destroyed. This move sounds incredibly cool, but in reality, it’s probably best used only on AT-ATs, since they’re the only vehicle really worth expending a lot of effort in stealing, or against enemy artillery, which are likewise fairly valuable. If Chewie’s about to get killed, you can also use it as something of an escape vector; just plop him into a vehicle and take off.
Commander Ackbar
Space Unit
Special Abilities: Concentrate Fire, Boost Shield Power
Like Captain Piett and his Star Destroyer, Ackbar commands his own, specially modified Mon Calamari Star Cruiser, called Home One. After the assault on Hoth, Home One would become the mobile headquarters for the Rebellion, but at the time of Empire At War, it presumably hadn’t quite achieved any real notoriety. It’s still a pretty kickin’ ship, though.
In addition to the standard (and incredibly useful) Boost Shield Power ability, Ackbar also has his own special Hunter’s Mark, called Concentrate Fire, which allows his ship and all nearby friendly shipsto target all available firepower on the target. Note that Home One, unlike most other Mon Calamari Cruisers, does have a shield generator, making it more vulnerable to enemy bombing attacks than other Cruisers.
Obi-Wan Kenobi
Ground Unit
Special Abilities (Ground): Force Heal, Force Protect
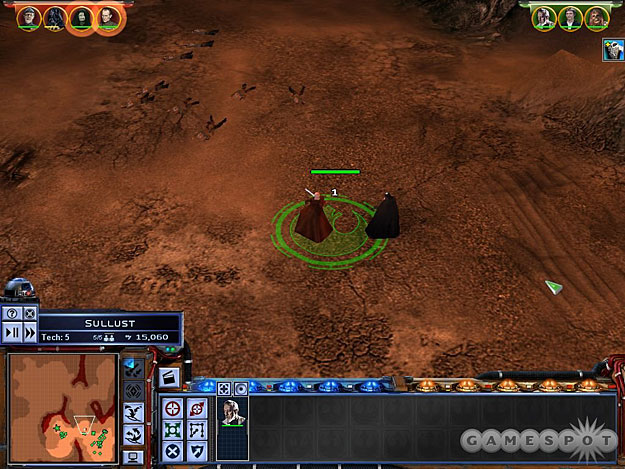
The old General Kenobi is still alive and kicking in the era of Empire at War, and is more than capable of leading your ground troops into battle. He’s not quite as invulnerable as Darth Vader is, being something of an old man at the time of the game, and he will definitely take more damage from regular blaster fire and enemy vehicles. Luckily he has his Force Heal ability, which will heal all of your infantry (and Obi-Wan himself) of a great deal of damage when used. (He also automatically heals all nearby infantry automatically for a small amount every few seconds.) This makes him a stellar unit to use at the head of an infantry army when going up against computer opponents; let them focus on Obi-Wan while your Plex Soldiers rip through their vehicles. If anyone takes any damage, just repeatedly Force Heal to bring them back up to full health, or close to it. Obi-Wan can’t bring units back from the dead, though, so if a squad loses most of its soldiers, it may be best to let them die and free up the population space that they represent.
Force Protect is another little micromanagement tool that experienced RTS players will probably enjoy having at their disposal. If another unit on your side is getting hammered by the enemy forces, you can use Obi-Wan’s Force Protect ability to reduce the damage that it’s taking, hopefully to the point where you can let it escape from the path of danger.
Galactic Empire Heroes
Emperor Palpatine
Ground Unit
Special Abilities: Force Lightning, Force Corrupt
Palpy. The Palpstinator. Yngwie Palpsteen. Palpatine has a lot of nicknames, mostly given to him by his grandkids, but at the end of the day, there’s nothing quite like being called «The Emperor.» And sometimes, when you face a rebellion against your control of the entire galaxy, you just have to get down and dirty and bust a few heads.
Like Mon Mothma, Palpatine will reduce the cost of any construction or units at his current location by 25% when he’s at a system on the galactic map. He doesn’t participate in space battles, but instead focuses on busting out with his lightsaber on the ground. In ground combat, he takes more damage than Vader does, but he’s capable of making most of that back due to his automatic health-leeching ability, which will steal the life from nearby infantry units and add it to his own. In addition, he also gets Force Lightning, which can kill large numbers of units in one shot, and Force Corrupt, which can convert enemy infantry to your side. Corrupted infantry will fight for you as long as they live, but they will slowly drain health over time.
Overall, Palptastic is an incredibly strong unit when used against infantry, but you’ll have to back him up with anti-vehicle units if you except armored resistance.
Darth Vader
Ground Unit/Space Unit
Special Abilities (Ground): Force Crush, Force Push
Special Abilities (Space): Call For Reinforcements
The Emperor’s lapdog is about as powerful a ground unit as you’re going to find in Empire at War, as Darth Vader is capable of absolutely annihilating armies almost single-handedly, especially in the single-player campaign. (He’s probably toned down a bit in the multiplayer game.) He can shrug off basically any infantry damage, including the rockets from Plex Soldiers, and most vehicles are barely capable of damaging him, as well. If you’re looking to take him down when you fight him, you’ll have to either mob him with vehicles, preferably while he’s standing near an anti-infantry turret, or hit him with artillery fire, or drop a bombing run on his head, if possible.
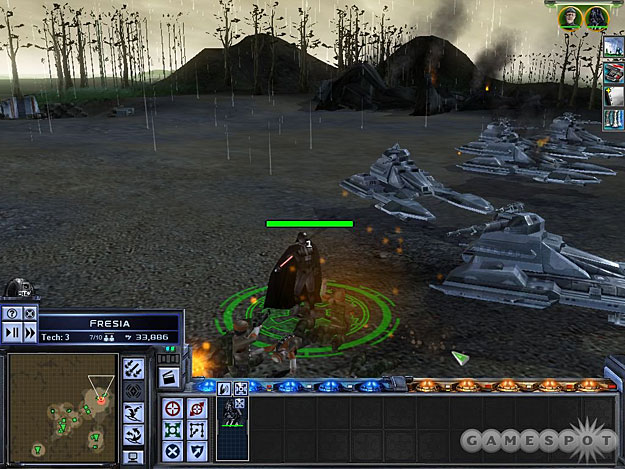
Regardless, in addition to his formidable defenses, Vader also has a pair of useful abilities. Force Crush will allow him to pick up most vehicles and destroy them by imploding them with telekinesis, while Force Push kills all infantry units near him on the map.
In space battles, Vader pilots what appears to be a squadron full of TIE Advanced x1 fighters, which are a bit better than the normal TIE Fighters that are flown by other pilots. He can take down most fighter or bomber wings without problems, but his squadron will get hit by fire when they’re engaged in large firefights. Luckily, Vader is always going to be the last fighter in the squadron to die, and as long as he’s alive, he can use his Call For Reinforcements ability to bring in more fighters to help him. This ability has an extremely long timer, though, so you won’t be able to use it more than once in a long fight. If you think he’s about to get clobbered, it’s best to remove him from the fight altogether and give his ability time to recharge.
Colonel Veers
Ground Unit
Special Abilities (Ground): Maximum Firepower, Deploy Stormtroopers
It’s not really truthful to say just «Colonel Veers» here; we should really say «Colonel Veers and ten tons of metal death», because Veers isn’t just any other infantry unit. He comes equipped with a fully armed and operational AT-AT.
Like other AT-ATs, Veers is capable of withstanding large amounts of damage, can fire from long range with excellent power, and can deploy stormtroopers to the ground from the belly of the beast. In addition, though, he has the Maximum Firepower ability, which can be used on either a vehicle or a building. When activated, Veers’ AT-AT spits out a steady stream of laser fire, damaging all units in a line around a target vehicle, or doing severe damage to the targeted building, usually destroying it outright.
Boba Fett
Ground/Space Unit
Special Abilities (Ground): Flame Thrower, Jetpack
Special Abilities (Space): Seismic Charge
Boba Fett? Boba Fett? The galaxy’s most feared bounty hunter is back in action for the Empire in Empire At War, and whether you’re on the ground or in space, he just wants to have a little fun. He’s roughly analogous to the Millenium Falcon in space, as he pilots around Slave I; he can do a number on enemy fighters and bombers, whether it’s with his laser cannon or his Seismic Charge bomb. He’s not so hot against enemy capital ships, and can’t take a lot of damage, but he’s uitable for attacking hardpoints after a capital ship’s shields have been dropped.
On the ground, Boba Fett is more than capable of dealing with enemy infantry. His Jetpack ability allows him to quickly move around the battlefield, and his Flame Thrower is similar to Palpatine’s Force Lighting; in that it can sweep across multiple infantry units and kill most normal Infantry or Plex Soldiers in a matter of seconds.
Mara Jade
Ground Unit
Special Abilities: Thermal Detonator, Force Corrupt
Although The Emperor’s Hand would eventually wield lightsabers, Mara Jade in the time of Empire At War is still reliant on blasters to get her message across, even if she does have some Force training, courtesy of Palpatine. She’s a ground-only unit, and roughly equivalent to Kyle Katarn in power (she even shares his Thermal Detonator power). Instead of Sprint, however, she obtains Force Corrupt, another borrowed power (this time from the Emperor).
Captain Piett
Space Unit
Special Abilities: Proton Beam, Tractor Beam
As the man who would eventually command Vader’s flagship, the Executor, Piett was always a capable officer, and during the time of Empire At War, he was in command of an Imperial Star Destroyer. Like General Veers’ AT-AT, this Star Destroyer is capable of the same functions of a normal Star Destroyer, but has a powerful Proton Beam attack that can swiftly disable most hardpoints or just do a whole lot of damage to enemy ships.
Planets
You’re going to be fighting on many different planets in Star Wars: Empire At War, but sometimes it’s difficult to know the properties of a planet until you’ve conquered or explore it. Since most planets are greyed out before you reach them, you might want to take a look at the chart on this page to get an idea of what’s in store for you before you conquer a planet — sometimes you might want to focus your resources on a seemingly insignificant planet to gain a benefit that will impact your forces throughout the galaxy.
| Planet | Weather Effects | Benefit |
| Abregado-Rae | Rain | Production Bonus: AT-ST |
| Aeten II | Volcanic Ash | Higher Credit Production |
| Alderaan | Rain | 50% Damage Reduction for Rebel Infantry Units |
| Alzoc III | Snow | Higher Credit Production |
| Anaxes | Rain | Production Bonus: Victory Star Destroyer |
| Atzerri | Clear Skies | Black Market: Credit Production Fluctuates |
| Bespin | No Surface | Higher Credit Production |
| Bestine | Rain | Production Bonus: Acclamator Cruiser |
| Bonadan | Clear Skies | Higher Credit Production |
| Bothawui | Rain | Reveals Tactical Information for Nearby Systems |
| Byss | Rain | 20% Firepower Boost for AT-ATs |
| Carida | Clear Skies | Production Bonus: Infantry Units |
| Corellia | Rain | Production Bonus: Corellian Corvettes |
| Corulag | Rain | Production Bonus: Infantry Units |
| Coruscant | Clear Skies | Higher Credit Production |
| Dagobah | Rain | Base Stealth: Ground |
| Dantooine | Rain | Base Stealth: Ground |
| Endor | Rain | Imperial Light Armor Upgrade (see note below) |
| Eriadu | Rain | Production Bonus: T-4B Tanks |
| Fondor | Sandstorm | Production Bonus: Assault Frigates |
| Fresia | Rain | Production Bonus: A-Wings |
| Geonosis | Clear Skies | Production Bonus: MPTL-2A |
| Hoth | Snow | Base Stealth: Ground |
| Ilum | Snow | Production Bonus: SPMA-T |
| Jabiim | Rain | Repulsorlift Vehicles Can’t Land On Surface (This Planet Only) |
| Kashyyyk | Rain | Base Stealth: Ground |
| Kessel | Clear Skies | Higher Credit Production |
| Korriban | Clear Skies | Production Bonus: 2-M Repulsor Tank |
| Kuat | Rain | Production Bonus: Imperial Star Destroyer |
| Manaan | Rain | Infantry Units Automatically Heal (This Planet Only) |
| Mon Calamari | Rain | Production Bonus: Mon Calamari Star Cruiser |
| Naboo | Rain | 25% Damage Bonus for T4-B Tanks |
| Nal Hutta | Rain | Black Market: Credit Production Fluctuates |
| Polus | Snow | Higher Credit Production |
| Ryloth | Sandstorm | All Stormtroopers Get 35% Health Bonus |
| Shola | Volcanic Ash | Infantry Take Damage Automatically During Ground Battles (This Planet Only) |
| Sullust | Volcanic Ash | Production Bonus: Tartan Patrol Cruisers |
| Taris | Clear | Production Bonus: T2-B Tank |
| Tatooine | Sandstorm | 25% Armor Boost for T2-B Tanks and Speeders |
| Thyferra | Rain | Infantry Units Automatically Heal (This Planet Only) |
| Wayland | Clear Skies | 15% Speed Boost for T4-B Tanks and MPTL-2As |
| Vergesso Asteroids | No Surface | 25% Damage Bonus for X-Wing, Y-Wings, A-Wings and Z-95 Headhunters |
| Yavin 4 | Rain | 25% Shield Bonus for X-Wing, Y-Wings, A-Wings and Z-95 Headhunters |
Notes
Imperial Light Armor Upgrade: All AT-STs, AT-AAs, and TIE Maulers get a 15% chance to reflect incoming laser fire.
Production Bonus: When you control a planet with a Production Bonus for a certain type of unit, all of your planets will be capable of building that unit for 20% less than they normally would. This bonus stacks with the added production bonus from Mon Mothma and Emperor Palpatine. Note that you’ll sometimes control planets that offer production bonuses for enemy units; this doesn’t net you any particular gain, but it’s still worth controlling the planet, to keep your foe from taking advantage of the bonus.
Weather Effects
- Clear Skies: No effect on combat.
- Rain: All Lasers take a 50% accuracy reduction during combat.
- Sandstorm: All rocket weapons take a 50% accuracy reduction during combat.
- Snow: Most units get a 50% reduction to their sight range.
- Volcanic Ash: Infantry units get a 50% reduction to their sight range.
Using Shield Generators
One of the ways Empire At War makes it easy for players to defend planets lies in its inclusion of shield generators for planets. If you take the time to build a shield generator, you’ll be able to fire at enemy units outside of it, but they won’t be able to fire into it until they walk through. So if you line up as many of your units near the edge of the shield as possible, you should be able to turn it into something of a shooting gallery. If you add Turbolasers to the planet, they’ll often be in just the right position to fire on vehicles as they come under the shields, as well.
The Highest Bidder
This video walkthrough for the Rebel mission «The Highest Bidder» shows you what you need to do: follow the pirate ship until it’s disabled (either by your fire or that of the Imperial forces), move the Sundered Heart to its location to retrieve the data, destroy or avoid the Star Destroyers, and then finally destroy the Interdictors to escape the system.
Heading to Carida
Late in the Rebel campaign, you’ll have to escort Han and Chewie through the Imperial stronghold on Carida in order to retrieve the plans for the Mon Calamari Star Cruiser. You’ll only have the two smugglers to defeat hordes of Imperial Stormtroopers and vehicles, but with a little ingenuity, you’ll be able to use Chewie’s «Capture Vehicle» ability to turn the tables a bit.
One In A Million
This video details the final battle above the Death Star and its eventual destruction, and shows the final cinematic for the Rebel Campaign. Victory here is somewhat easy; all you have to do to defeat the Death Star is destroy the small fleet that protects it, kill any space stations in the system, and have the Red Squadron hero unit alive at the end of the fight. If you do all that, then victory is automatic.
Commence Primary Ignition
At the end of the Imperial campaign, you’ll be able to use the Death Star to blow away numerous Rebel strongholds. When they’ve all been completely blown away, there’ll be no further threats to your rule, allowing Darth Vader and Emperor Palpatine to relish their victory in one of the Death Star docking bays.
The products discussed here were independently chosen by our editors.
GameSpot may get a share of the revenue if you buy anything featured on our site.
Got a news tip or want to contact us directly? Email news@gamespot.com
К сожалению, словосочетание «хорошая игра» не синонимично «увлекательному игровому процессу». Дебютный проект Petroglyph Games, на мой взгляд, получился весьма добротной стратегией, но, увы, ей вряд ли суждено на долгое время приковывать игроков к экранам мониторов. Тут бы и подметить тот факт, что и в реальной жизни без всяких там игрушек есть чем заняться. Это было бы забавно, не будь всё так грустно, ведь Petroglyph – суть реинкарнация Westwood, обескровленной в прошлой жизни всеядной ЕА. А от авторов Command & Conquer можно было ожидать много большего.
Star Wars: Empire at War
Déjà vu
![[IMG]](https://www.old-games.ru/forum/proxy.php?image=http%3A%2F%2Fstatic.old-games.ru%2Fuploadedimages%2F2011%2F03%2F19%2F1266924d83ffe9015f1.jpg&hash=7eef5e24e989c6f35fef17773de5df36)
Диверсионная операция на грани срыва:
на хвосте у сокола висит весь имперский флот данного сектора
Подружившись с LucasArts, новоиспеченная независимая студия, видимо, порылась на антресолях титана игрового мира, от которого в последние лет десять ветер игровых релизов все чаще приносит гнилостный запашок, и извлекла из запасников не звездную, но весьма неплохую стратегию под названием Star Wars: Rebellion. Воображение рисует картину того, как Petroglyph, заискивающе становясь на колено в голографическом проекторе, просит LucasArts поделиться Rebellion’ом. Да-да, берите, мы уже было совсем забыли о нем.
Наверняка всё было совсем не так, очень даже может быть, что о Rebellion никто и не вспоминал. Но определенное сходство, на мой взгляд, присутствует: глобальная карта с ключевыми точками – планетами, герои – известные по фильмам и «расширенной» вселенной, масштабные бои… В 98-ом разработчикам, на мой взгляд, не хватило исполнительского мастерства. В 2006-ом жаловаться на исполнительское мастерство не приходится, но чего-то всё равно не хватило.
I’m not a Jedi, I’m just a guy with a lightsaber and few questions
![[IMG]](https://www.old-games.ru/forum/proxy.php?image=http%3A%2F%2Fstatic.old-games.ru%2Fuploadedimages%2F2011%2F03%2F19%2F1266924d83fff0924b5.jpg&hash=99e071e1d6d9be6410b6c899a4e5c9ca)
Чубакку ждет неприятный сюрприз.
Да и я, честно говоря, был удивлен эффективностью огня штурмовиков по AT-AT.
И вновь начинается бой. Сюжетная кампания предлагает перенестись в далекую галактику в период, предшествовавший началу четвертого эпизода эпической саги Лукаса. Имперцы давят по всем фронтам, и у повстанцев вроде бы нет никаких шансов, но ряд успешных диверсионных операций возвращает Альянс к жизни. А там, глядишь, появится возможность подмять под себя несколько звездных систем, насадить там демократию, построить звено X-wing’ов и снова провести успешную диверсию на очередной имперской верфи. В самый неподходящий момент на сцену выкатывают первую Звезду Смерти, которая дает демонстрационный залп по планете повстанцев, но всё это никоим образом не спасает империю от неминуемого поражения: ведь звено крестокрылов и лично Люк Скайуокер уже на полпути к финальному сражению за галактику. Финальному для Empire at War.
Естественно, в случае с Империей дела обстоят наоборот, но общий смысл, думаю, понятен. Есть глобальная карта, на которой расположено определенное количество планет, захват которых позволяет возводить новые сооружения, причем не только на земле, но и на орбите. Соответственно, наземные постройки снабжают нас финансами и сухопутными силами, а орбитальные станции обеспечивают оборону планеты и позволяют строить космические корабли.
Следуя заветам Rebellion, разработчики запихали в игру несколько культовых персонажей вселенной, которых, увы, не так много, как того хотелось бы. Из «неосновных» в игре присутствуют разве что Кайл Катарн (действительно «не джедай», к тому же, недоступный в кампании) и Мара Джейд (пока еще «Рука Императора») – особого разнообразия ждать не приходится. Соответственно, каждый персонаж обладает уникальными способностями и по-разному влияет на игровой процесс. Дарт Вйедер – наравне с АТ-АТ является основной ударной силой Империи: он способен в одиночку разобраться с большим количеством пехотных отрядов врага. Люк Скайуокер на планеты не спускается принципиально, зато он обладает возможностью нанести *особенно* удачный выстрел, который причиняет огромный урон цели. Мон Мотма не участвует в битвах принципиально (до сих пор с улыбкой вспоминаю мультиплеер Jedi Outcast и Мон Мотму, прыгающую по платформам с лазерным мечом в руках), зато заметно удешевляет производство на той планете, на которой она находится в данный момент. И так далее. Ключевых персонажей нельзя терять во время прохождения сюжетной миссии, но обычно их гибель не особо страшна: главные герои обязательно возродятся после определенного времени пребывания в коме. Куда же без них – сюжет…
Never have been to a place so alive with the force… Yet so dead to it
![[IMG]](https://www.old-games.ru/forum/proxy.php?image=http%3A%2F%2Fstatic.old-games.ru%2Fuploadedimages%2F2011%2F03%2F19%2F1266924d83fff8abba2.jpg&hash=79d4ba0dd053fdd3b5087ff9cc2aa909)
Обгрызанные лихими атаками тяжелых кораблей повстанцев звездные разрушители беспомощно висят в пространстве.
Наземные сражения не отягощены каким-либо смыслом. Несмотря на то, что у каждого юнита есть список боевых единиц врага, против которых он а) эффективен и б) беспомощен, смотреть на то, как несколько отрядов пехоты, не вооруженных ничем, кроме лазерных карабинов, буквально разрывают на части АТ-АТ, согласитесь, по меньшей мере странно. Слава богу, что последний без проблем может раздавить наглых повстанцев, что он с удовольствием и делает, правда, маневренность этого вездехода оставляет желать лучшего. При этом он без проблем расправляется с целым выводком AT-ST. Комментарии, по-моему, излишни.
При этом те бои, что задуманы *по сюжету*, как правило, выгодно отличаются от своих безыдейных коллег. Шпионская миссия, возложенная на капитана Соло и его верного вуки, вырождается в натуральное избиение всего имперского гарнизона: Хан без проблем «отключает» противопехотные турели (интересно каким образом), а Чубакка способен угнать любую имперскую машину. В том числе, да-да, АТ-АТ. Жаль, что разработчики не позаботились о том, чтобы действительно разнообразных и интересных наземных миссий было как можно больше: значительная часть заданий сводится к бесконечному десанту многочисленных подкреплений, захвату точек, куда этот десант, собственно, и высадится, и попыткам каким-то образом побить врага не числом, но умением. Увы, друзья мои, идейная наследница Westwood выдавила из себя настолько скучные бои на планетах, что я даже затрудняюсь назвать игру, в которой последние были бы еще более унылы и однообразны. Но всё меняется, когда приходят *они*…
Может быть, я смогу помочь, если выйду и подтолкну?
![[IMG]](https://www.old-games.ru/forum/proxy.php?image=http%3A%2F%2Fstatic.old-games.ru%2Fuploadedimages%2F2011%2F03%2F19%2F1266924d83ffff9f65e.jpg&hash=4cfadf303294c9c40b570966a788d30d)
Еще б чуть-чуть, и этот скриншот можно было бы выдавать за кадр из фильма.
… бои в космосе. Нет-нет, никаких излишеств, не пугайтесь, великолепия Homeworld в Empire at War не поставляли. Более того, в блокбастере, а я уверен, что LucasArts предполагала эту игру именно как блокбастер, 2006 года выхода бои в космосе происходят в двумерном пространстве. Это, конечно, не мешает кораблям пролетать друг над другом, а останкам разбитых Star Destroyer’ов дрейфовать где-то на заднем плане битвы, но факт всё-таки прискорбный.
При этом именно этот аспект игры удался разработчикам больше всего: я бы даже сказал, что именно ради этих самых боев и надо поиграть в Empire at War. Хм… точнее, не надо, но если уж вас занесла нелегкая, то пропустить их никак нельзя. Как ни странно, именно тут во всей красе и раскрывается идея *противостояния* различных типов техники. Разработчики, надо отдать им должное, не стали лепить две стороны, отличающиеся исключительно названиями юнитов, а потому и герои, и сухопутные силы, и космические корабли у Империи и Альянса действительно разные.
Узурпаторы галактики полагаются в основном на огневую мощь своих тяжелых кораблей. Плохие парни частенько балуются притягивающим лучом и не стесняются выпускать из ангаров своих кораблей истребители поддержки. Альянс на это отвечает отчаянными залпами ионных орудий, переносом всей энергии на дефлекторные щиты или двигатели. Правда, назвать имперцев единоличными властителями космического пространства, как ни странно, не удастся. На вид хлипкие повстанческие корабли способны выдержать массированную атаку. Да и монструозный Star Destroyer, имеющий при себе десять истребителей и пять бомбардировщиков, как-то не особо выделяется на фоне флагмана адмирала Акбара. Ну а «тысячелетний сокол» так и вообще гроза TIE fighter’ов и истребитель TIE bomber’ов, а при случае может даже завалить какой-нибудь корвет, отбившийся от общей группы. На его фоне Дарт Вейдер со своей свитой из нескольких истребителей выглядит легкой добычей первого же попавшегося A-wing’а.
Вся соль в том, что у средних и больших кораблей имеются… сегменты, что ли, уничтожение которых выводит из строя какую-либо систему корабля. Так, например, подрыв ангара на фрегате имперцев не позволит последнему вводить в бой свежие истребители, а уничтожение двигателей вынудит его дрейфовать до самой кромки карты. На уничтожении подсистем главных кораблей флота базируется вся та скудная тактика, что присутствует в игре. Уничтожьте ракетные шахты — и враг не сможет пробить ваши дефлекторы, подорвите силовую установку — и наглые имперцы не будут подтаскивать ваши корабли специальным лучом. Да что там говорить: вид разваливающегося на части флагмана противника, а то и целой космической станции, производит сильное впечатление.
Beneath the surface there is the Force
![[IMG]](https://www.old-games.ru/forum/proxy.php?image=http%3A%2F%2Fstatic.old-games.ru%2Fuploadedimages%2F2011%2F03%2F19%2F1266924d8400074af34.jpg&hash=7da7dcf6ef62e8d7852d3b03c257666d)
Stand by. Stand by. Stan…
По такому случаю на пробел разработчики повесили «кинематографическую» камеру (хотя пауза была бы и логичнее, и удобнее). Не то чтобы данная камера выдавала действительно шедевральные ракурсы — обычно всё с точностью да наоборот, — но в целом, пощелкав клавишей, можно-таки добиться неплохого кадра. Графика, правда, не впечатляет совершенно. Из игры мог бы получится отличный Total War в космосе, но последнего не случилось как в плане игрового процесса, так и в случае с внешним видом игры. Сухопутные силы, особенно при максимальном зуме, вызывают не самые приятные эмоции. Более того, иногда создается ощущение, что дряхлый Force Commander ничем не уступает Empire at War. Как и в случае с игровым процессом, EaW держит удар за счет отличных боев на планетарных орбитах.
О звуках и музыке говорить ничего плохого не приходится: вы, в общем, в курсе что и когда там звучит. А вот о локализации можно сказать несколько не самых лестных слов. Бог с ними, с голосами актеров: с тем, что озвучка – не самая сильная сторона наших разработчиков и особенно локализаторов, я смирился уже очень давно. Но перевод терминов из вселенной Star Wars заслуживает гневных окриков со стороны фанатов. Настолько дилетантский перевод могли сделать люди, которые не в курсе, что такое SW, и никогда не встречали *официальных* переводов многочисленных книг по SW. Последние, конечно, тоже хороши, но *Кешииков* в них точно нет.
В целом игра производит целый спектр впечатлений, напоминающих масляную пленку на поверхности воды в грязной луже. Она вроде бы переливается всеми цветами радуги и иногда даже радует глаз красивыми бликами, но грязную лужу, как ни обходи, из *кадра* выбросить не удастся. Благодатная почва для стратегических экспериментов и неплохие космические бои чуть было не пали жертвами скучнейшего процесса освоения галактики и наземных войсковых операций. Вот сиди и удивляйся: отличная вселенная имеется – имеется, преемники орденоносного разработчика культовых стратегических игр присутствуют – присутствуют, играть интересно – не очень… Однако и бить Empire at War почему-то не хочется. Star Wars все-таки…
")
Star Wars: Empire at War стала одной из лучших игр о вселенной «Звездных войн». Но дополнение превзошло ее на голову. В нем не просто добавили новую расу, ее стиль ведения войны коренным образом отличается от того, что практикуют уже привычные нам соперники из повстанцев и войск Империи. И до тех пор пока они бодаются между собой за контроль над планетами, третья сила берёт и запугивает, похищает и пиратствует. Вы не готовы к честным битвам?
Преступная империя Тайбера Занна ожидает вас!
Начнем с того, что без внимания не осталось ничто. Практически все части игры были как-то перекроены, поменяны. Нет, главные правила остались в точности теми же — бой в космосе, бой на поверхности, захваты добыча и планет денег. Но по окончании бессчётных добавлений очень многое определить сейчас очень сложно.
Не смотря на то, что начнем мы все же с новой фракции в игре — Синдиката — и поведаем, кто это такие, и кого и как они едят.
Синдикат
Синдикат, конечно же, также не прочь захватить всю Галактику, забрав ее под собственный контроль. Но он предпочитает править «теневой» судьбой планет, коррумпируя их власти. Причем соперник видит, что на планетах идет теневой бизнес, но время от времени пресекать эту деятельность себе дороже. Так как чтобы коррумпировать планету, Синдикату требуется положить 1000 монет в «стервятника» (и сделать еще что-то в зависимости от видов коррупции), а для возвращения планеты к законности требуется уже полторы тысячи денежек, и далеко не каждый храбрец способен сделать это. К примеру, у повстанцев восстановлением закона на планете занимается Йода, а у имперцев — Палпатин (не смотря на то, что они не одиноки в этом деле). Но не всегда храбреца возможно оторвать от дел и отправить наводить порядок.
Вот и приходится следить за желтыми облачками бесправия около планет с ощущением безысходности. Действительно, при переходе планеты из рук в руки кое-какие виды коррупции (те, что зависят от государственныхы служащих, такие как запугивание, похищение, подкуп) пропадают самостоятельно.
Это весьма интересно: не смотря на то, что кампания по захвату Галактики и предполагает, что все вести войну против всех, но главный соперник Синдиката — Империя. Исходя из этого вести войну Империей сложнее, чем кем бы то ни было, — против нее боевые действия будут вести сходу два соперника.
Синдикат не занимается таковой ерундой, как изучение разработок. Он берёт необходимые разработки на тёмном рынке. Другими словами в цикл технологического развития добавился еще один элемент: Империя исследует, партизаны крадут у нее, а «теневики» берут необходимое на тёмном рынке у тех и у других. Основное — совершить соответствующую коррупционную акцию против обеих сторон, по окончании чего Тайбер Зан, Ураи Фен либо Силри смогут ходить за разработками к «поставщикам». Кстати, эта хитрость дает некое преимущество Синдикату на ранних этапах: его фабрики смогут сразу же строить любую технику.
Лишь применять способности, каковые должны прилагаться к данной самой технике, не окажется.
Коррупция
Что представляют собой акции по вовлечению планеты в преступную сеть? Мы произведенного во дворце Синдиката «стервятника», и тот проводит какое-то воздействие на планете, по окончании чего исчезает окончательно. Всего на каждой планете возможно произведено не более трех разных акций, причем, в один раз поставив планету на тот либо другой путь преступности, поменять направление возможно лишь по окончании того, как в том месте снова будет восстановлен закон. Напомним, что акции мы выбираем не из всего перечня, комплект для каждой планеты жестко фиксирован. Но в случае если для внедрения коррупции на планете требуются храбрец либо войска, то они неповторимы для каждой планеты.
Так, на одной какое-то воздействие может совершить лишь Тайбер Зан, а на другой его же обязан осуществлять Ураи Фен.
Это принципиально важно: на акцию вылетает лишь «стервятник». Храбрец «выдергивается» для собственной миссии с совсем любой планеты и возвращается на нее, когда все закончится. Наряду с этим храбрец не погибнет, в случае если его убьют на протяжении миссии, — он будто бы ничего не случилось возвратится на родную планету.
А вот войска, требуемые для задания, остаются на той планете, где оно проходило.
Запугивание. Это боевое действие, подразумевающее наземное сражение, исходя из этого требуются деньги и храбрец Синдиката. Нужно до запугиваемого, и тогда на планете будет заблокировано воздействие ее особых изюминок до конца игры.
Не смотря на то, что это и начальная миссия, но без хотя бы одного действующего запугивания нереально совершить ни один рэкет.
Это весьма интересно: не смотря на то, что с целью проведения миссий «второго уровня» и нужно хотя бы одно воздействие «первого уровня», но для некоторых миссий требуется большее число действующих акций, не смотря на то, что и не более трех.
Пиратство. Также боевое действие, но уже в космосе. Соответственно — снова деньги и храбрец. Линейные корабли мы на это задание вряд ли возьмём, но вот крейсера — свободно. Нужно что-то стереть с лица земли, и тогда цель будет достигнута. Наряду с этим мы сможем строить новый тип корабля (модель заимствуется, само собой разумеется, у вражеского судна).
В случае если же соперник гоняет собственные эскадры через эту планету, то мы будем приобретать деньги за проход. Да и с торговли будет некий навар. Пиратство дает движение таким миссиям, как «рабство и» чёрный «рынок».
Похищение. По своим чертям похоже на запугивание, лишь нужно прорваться к похищаемому, а в том месте уж его заберет шаттл. Наряду с этим мы приобретаем некую сумму денег (в большинстве случаев затраченное).
Но без похищения нет подкупа.
Рэкет. В случае если у вас где-то действует хотя бы одно запугивание, то возможно затевать использовать рэкет. Еще для него нужны деньги и штурмовые отряды наёмников на операцию.
Наряду с этим возрастает приток денег в Синдикат независимо от того, собственная планета либо чужая. Помимо этого, при уничтожении вражеских армий на этих планетах вы станете приобретать «проценты за уничтожение».
Подкуп. Требует денег и действующего похищения на проведение миссии, время от времени и войска. В итоге мы приобретаем данные о состоянии дел на планете (передвижение флотов около нее), и на протяжении атаки планеты силами Синдиката у нее не будет гарнизонных армий (а в космическом бою против Империи у имперцев не будет еще и истребителей).
Кроме этого наличие хотя бы одного подкупа позволяет создавать где-либо «пятую колонну».
Тёмный рынок. В случае если где-то процветает пиратство и у вас имеется деньги на операцию, то возможно совершить эту акцию. По окончании открытия тёмного рынка храбрец может залетать на планету с целью закупиться новой разработкой (по пять с повстанцев и Империи).
На различных рынках смогут быть разные цены на одну и ту же разработку. Вместе с тем никаких других благ от него нет, и это та форма коррупции, которую именно следовало бы позже поменять на другую.
Рабство. Нужно хотя бы одно действующее пиратство, деньги и войска на операцию. Но затем при конфликтах на планете местное население будет выбирать вашу сторону (либо бить обоих сражающихся, в случае если обе стороны — ваши соперники). Также, во всех ваших казармах возможно будет создавать ополчение из населения этих планет. Сходу увижу, что рабы, для которых достаточно всего одного пиратства, — плохие ассистенты.
А вот те, для которых необходимо как минимум несколько действующих пиратств, довольно часто владеют весьма увлекательными особыми свойствами.
«Пятая колонна». Требует хотя бы одного успешного подкупа, войск и денег. Местное население во всех конфликтах будет вести войну за нас.
Но в случае если кто-то додумается снять эту форму коррупции, то случится восстание, по окончании которого планета станет нейтральной, а все строения на планете будут стёрты с лица земли.
Еще один плюс от коррумпирования — флоты Синдиката смогут проскочить через эти планеты без сражения, только заплатив местным госслужащим. Так возможно и в какой-нибудь глубочайший тыл соперника медлено выйти. Основное — иметь деньги на проход.
Кроме этого при любой форме коррупции возможно замечать замысел базы на планете и определить обо всех армиях на земле и в космосе.
Строения Синдиката
В главной игре нам не слишком-то позволяли развлекаться постройкой. Главные строения были заблаговременно установлены и пересмотру не подлежали. Но Синдикат и тут умудрился отличиться, взяв пара уникальных построек. Во-первых, синдикатовцы очевидно из той породы зенитчиков, что сами не летают и вторым не дают.
Исходя из этого они обожают строить глушитель антигравитаторов, и тогда вражеские стремительные суда еле-еле ползают по полю боя.
Вторым отличием стали два типа пушек. Первые стреляют по всему, наряду с этим совсем игнорируя щиты. Вторые стреляют торпедами, и весьма на большом растоянии, но не стреляют по летающим целям.
Но за это все дополнительные постройки обходятся Синдикату очень дорого.
С космосом также собственные примочки — плазменная пушка строится не на земле, как у всех, а на космической станции третьего уровня. Что быстро повышает возможности выживания оной станции.
Космос
Космос — место, где случилось мельчайшее число трансформаций. Первое из них — Империя и повстанцы смогут строить на спутниках защиты ремонтные станции и восстанавливать собственные суда. Синдикат же вместо этого может ставить постановщики помех дальнего действия, каковые будут мешать ракетному огню соперника.
Второе — введение авангарда (имеется он и на земле, но в том месте эффект значительно меньше). Суть пребывает в том, что в космосе появляется лишь один заблаговременно назначенный корабль, а все остальные вызываются по перечню. Главная польза от этого пребывает в том, что ранее в бой легко выбрасывались и шаттлы с десантом, каковые занимали место более нужных судов, а толку от них не было никакого. Дополнительный вариант применения — поставить в авангард шустрого храбреца, что рывком окажется у вражеской базы и на месте приведёт к линейным кораблям, каковые еще пара мин. летели бы от стартовой точки.
Сюрприз!
Империя
Обновлений у имперцев выяснилось не так уж и мало. Главные вливания случились в героев и списки истребителей, нет ни одного нового корабля среднего класса. Вот их полный перечень.
TIE-перехватчик. Улучшенный вариант TIE-истребителя, превосходящий его во всех компонентах. Считается, что он превосходит стандартные истребители повстанцев по всем параметрам. В отряде, как и у предшественников, — 7 единиц.
Фактически, они заменяют TIE-истребители на всех судах, не считая «Миротворца».
TIE-фантом. Улучшенный вариант TIE-скаута. Владеют гипердвигателем (смогут путешествовать между совокупностями), и оснащены генераторами маскировки и щита. В один момент возможно включать лишь один из генераторов, но главное назначение «фантомов» пребывает в том, что они незамеченными путешествуют между совокупностями соперника и выполняют разведку.
В звене всего три фантома. На «Молоте» генерала Рома Мохка «фантомы» заменяют бомбардировщики.
TIE-защитники. Это малоизвестные ранее истребители-бомбардировщики. Другими словами, они смогут решать и задачи истребителей (не смотря на то, что трех для таких целей мало), но по большей части занимаются решением проблем посредством бомбардировки. Не считая простого оружия, «защитники» смогут переводить защитное поле в подпитку оружия, увеличивая мощь.
Еще одно оружие — ионная пушка, которая расстреливает щиты либо на некое время выводит из строя вражеские суда. Хорошее средство против космических станций и вражеских линкоров.
«Звезда смерти II». По чертям — то же самое, что и первая. Легко первая уже стёрта с лица земли и восстановлению не подлежит.
Очевидно, трудится лишь в режиме кампании.
«Палач». Единственный представитель класса суперлинкоров. Конечно, доступен лишь в кампании. У этого корабля имеется целых три точки силовых щитов, другими словами, стёрши с лица земли одну из них, вы все еще не лишите данный линейный корабль силового поля. Основная его свойство (не считая в полной мере привычного захвата вражеских судов силовым лучом) — постоянное производство новых истребителей (нужно лишь всегда нажимать кнопку их вызова), всего — 4 истребителя, 4 бомбардировщика, 6 перехватчиков и 1 защитник. Вызываются все принудительно, в отличие от вторых линейных кораблей, на которых новые заменяют погибших.
Не смотря на то, что на нем и без этого оружия — бесчисленное количество. Не считая всего другого, на этом корабле летает сам Дарт Вейдер.
«Молот». Еще один корабль лишь из кампании. Флагманский линейный корабль Рома Мохка. На нем данный адмирал создаёт чёрных джедаев. В большинстве случаев ни с кем не вести войну, не смотря на то, что по комплекту оружия соответствует «Миротворцу», а по броне — «Разрушителю».
Таковой вот вспомогательный корабль.
«Адмонитор». Флагман гранд-адмирала Трауна, единственный корабль, дешёвый не только в кампании. По броне и комплекту оружия не отличается от «Разрушителя».
Но ближайшие к «Адмонитору» суда наносят больший урон неприятелю. А сам гранд-адмирал может краткосрочно использовать свойство, при которой его линейный корабль стреляет по одной цели, наряду с этим его урон и скорострельность от попаданий удваиваются.
Партизаны
Партизаны взяли еще меньше, чем Империя. Но кое-что все же имеется.
В-крыл. Улучшенные бомбардировщики. Всего три в звене, но на каждом стоят аж по три торпеды (а на простых — по одной).
Еще одно преимущество перед несложными бомбардировщиками пребывает в том, что В-крылы смогут складывать крылья и быстро ускоряться, за счет чего смогут проскочить территорию зенитного огня и гарантированно ударить станцию либо линкорам соперника.
МС-30с. Скоростной охотник за вражескими линейными кораблями класса крейсер. На носу у него стоят две батареи протонных торпед, каковые он выстреливает залпом. С небольшими судами у него хуже, потому, что стрельба ведется веером и не все торпеды попадают в цель. Для защиты от истребителей помогают батарея легких лазеров и свойство «выпуск кластерных бомб» (около выбрасывается кольцо бомб, каковые взрываются, уничтожая все, что задели).
Только нужная и функциональная вещь, в особенности во втором последовательности.
Разбойная эскадрилья. Люк ушел из флота, и из новых пилотов было организовано это подразделение. 6 замечательных истребителей, каковые могут складывать крылья и летать стремительнее. Кроме этого на время смогут увеличивать урон и скорострельность, наносимый в сражении.
Лучшее (и единственное) средство против «Звезды смерти II». Само собой — храбрецы.
Синдикат
Эти бойцы сейчас новички на арене межзвездных битв, исходя из этого у них самое громадное прибавление в семействе. Не смотря на то, что общее число судов у них очевидно меньше, чем у других сторон. Но будем помнить о пиратстве, при котором Синдикат может позаимствовать чужие модели.
Итак…
«Звездная гадюка». Хороший маневренный истребитель, для которого возможно изучить технологии, снижающие урон от лазерных лучей соперника (что еще больше повысит его выживаемость). С любыми ветхими истребителями справляется весьма легко. С новыми — на равных.
В качестве дополнительной свойстве выбрасывает дроиды-мины, каковые действуют лишь против истребителей либо эсминцев. Но, в случае если удачно выпустить их на протяжении космического боя, утраты соперника смогут быть весьма громадны. В звене — 5 истребителей.
«Скипрей». Обычный бомбардировщик. Отличается от совсем уж начальных тем, что у него сходу две торпеды. Оружие находится в отдельной вращающейся башенке, что чуть увеличивает шансы против истребителей.
Может ставить радарные помехи, наряду с этим сопернику сложно найти ваши войска на радаре. В звене — три бомбардировщика.
«Крестоносец». На первый взгляд — обычный эсминец, предназначенный для борьбы с вражескими истребителями. Но у него имеется хорошая неизменно действующая свойство противоракетной обороны. Данный корабль самостоятельно отстреливает все ракеты, летящие лично в него и просто мимо него.
Исходя из этого истребителям совладать с ним еще тяжелее, чем с судами подобного класса, — брать возможно лишь крейсерами.
«Перехватчик IV». Данный корабль пришел из главной игры, будучи модернизированным. Представляет собой вспомогательный корабль для борьбы с обнаглевшими эсминцами соперника. На передовую его лучше не производить, поскольку при хорошем щите броня все же слабовата.
Одним словом — совсем не необходимый боец в эскадре. Из оружия имеются две батареи турболазеров и шахта ракет на носу. «Фирменное» отличие — на некое время ракетная батарея переходит в ракеты и непрерывный режим стрельбы льются потоком.
«Месть». Тяжелый крейсер, что считается охотником на суда подобного класса. Но, в силу наличия у него 2 батарей автоматических пушек, хорошо противостоит и истребителям с эсминцами (против последних имеется еще и 2 батареи турболазеров), так как пушки игнорируют все щиты. Но при хорошей броне у него совсем отсутствуют силовые щиты, исходя из этого с линейными кораблями ему лучше не связываться — зашибут и не увидят. Из свойств имеется маскировка, при применении которой крейсер невидим, пока не стреляет (крайне полезно, в то время, когда на поле боя выползли линейные корабли), и самоликвидация (в то время, когда уж совсем умирает, включает маскировку, подлетает поближе и устраивает самоподрыв).
Весьма нужный корабль, что должен быть в любом флоте.
«Захватчик». Линейный корабль, что предпочитает уничтожать вражеские линейные корабли. Не считая 2 батарей турболазеров вооружен еще и двумя спецоружиями. Первое вышибает щиты и портит электронику. Второе причиняет громадный урон, убивая ракетные суда на месте и снося башни у крейсеров с одного попадания. Владеет «объемным» эффектом, исходя из этого убивает все бомбардировщики и истребители, появлявшиеся в месте попадания.
С него рекомендуется стрелять в ангары, потому что около них неизменно кто-нибудь крутится. Против истребителей с бомбардировщиками совсем беспомощен, в обязательном порядке должно быть прикрытие. Спецспособность — самоликвидация, как у «Мести».
Может поддерживать своим огнем наземные операции.
«Кедалбе». Собственного рода вспомогательный линейный корабль, что в силу собственного оружия (2 автоматических пушки, 4 батареи турболазеров и 2 ионные пушки) универсален, но вместе с тем сильных мест у него нет. Самый органично сочетается с «Агрессорами», которых закрывает от всякой надоедливой мелочи, разгоняя ее замечательными залпами.
Может красть энергию вражеских силовых щитов, усиливая собственные оружейные совокупности. У повстанцев срывает свойство перезарядки щита.
«Безжалостный». Флагман Тайбера Занна. Это усиленный вариант «Агрессора», броня и щиты у него замечательнее. Отличается следующими свойствами: может маскироваться и усиливает первое спецоружие, которое кроме того может пробивать по паре вражеских судов одним выстрелом.
В остальном это все тот же «Захватчик», другими словами оставлять его одного не рекомендуется.
«Клык гончей». А это персональный корабль Босска. Обожает охотиться на бомбардировщики и лёгкие крейсера, с истребителями и эсминцами дела обстоят похуже, но данный кораблик легко уйдет от них за счет манёвренности и отличной скорости.
В качестве спецспособности ставит радарные помехи, скрывающие отечественные войска от взоров соперника.
«IG-2000». Летает на этом корабле робот с именем IG-88. Весьма стремительный тяжелый истребитель, что превосходно расправляется с вражескими истребителями.
Ценен спецспособностью «помехи в совокупностях», в то время, когда снижает точность огня окружающих судов, выкачивает энергию их щитов и блокирует спецспособности.
Почва у ног
А вот на земле, в отличие от космоса, показался последовательность достаточно больших трансформаций. Первое из них — мобильные оборонительные платформы. Они создаются каждой из сторон в собственном главном строении, по окончании чего отправляются на нужную точку.
В том месте они разворачиваются и потом стоят на этом месте до уничтожения либо окончания миссии (но возможно и реализовать содержимое платформы). У каждой стороны собственный комплект платформ.
Показались бункеры, в любой из которых возможно вложить по 5 пехотинцев. Действительно, его сперва нужно выстроить.
Любая сторона взяла войсковые транспорты. Не могу заявить, что они конкретно неизменно нужны, но время от времени и им с их возможностью перевозить в трюмах пехоту возможно применяеться. Кстати, они смогут перевозить и неразвернутые МОПы.
Кое-какие способности отныне употребляются в автоматическом режиме. Другими словами — их не нужно в обязательном порядке задействовать.
Показались участки ландшафта с характерными изюминками. Так, по лесу довольно часто может пройти лишь пехота, а лава снижает количество судьбы тех, кто по ней пробирается. Вода же замедляет передвижение.
С высот обороняющиеся смогут дальше стрелять по атакующим.
Показалась орбитальная бомбардировка. В случае если фракция имеет на орбите линейный корабль (у Синдиката — лишь «Захватчик»), то соперник на земле возможно обстрелян из его орудий.
В кампании показалась такая нужная вещь, как карта базы, где возможно перемещать строения, формируя более успешный боевой порядок. Но в отдельных миссиях показались аванпосты — платформы для постройки фабрик. Два из них, горностроительный завод (увеличивает доход) и дворец Хатта (создаёт болотные глиссеры, легкие шагоходы и скифы), может выстроить каждая сторона. Еще одно строение уникально для каждого «строителя».
Синдикат сооружает глушитель антигравитаторов, Альянс — терминал спутниковой связи (разрешает ненадолго открывать участки карты), Империя — магнитно-импульсную пушку (пушка, стреляющая на некое расстояние и отключающая вражескую технику). Не могу заявить, что хотя бы что-то из этого незаменимо, но время от времени не редкость полезно.
Империя
Империя взяла большое количество храбрецов в космосе, исходя из этого на земле ей нужно будет обходиться только старичками. Но показались увлекательные экземпляры вторых армий.
Чёрный солдат, проект I. В кампании, как и все другие чёрные солдаты, производится лишь на «Молоте». В отряде три штуки. Эти бойцы предназначены лишь для рукопашного боя, но смогут отражать нацеленные в них выстрелы бластеров щитками на руках. Двигаются не весьма скоро, что компенсируется свойством «спринт», разрешающей бежать в полтора раза стремительнее.
Но очень шустрые соперники все равно будут стремительнее. Как бойцы — достаточно плохи, исходя из этого к применению не советую.
Это принципиально важно: чёрные солдаты — дроиды, а не люди. Исходя из этого они чинятся, а не лечатся.
Чёрный солдат, проект II. Два бойца этого подразделения вооружены легкими пушками и превосходно стреляют и по пехоте, и по легкой технике. Если не кидать их на передовую, то собственные деньги оправдывают. Спецспособность — ракетный ранец, что переносит этих солдат на заданную позицию. В то время, когда летят — не стреляют.
Довольно часто употребляются в качестве разведчиков.
Чёрный солдат, проект III. В отряде всего один солдат. Может легко мощно стрелять, быть может укрепиться и открыть огонь сейсморакетами, каковые наносят урон по площади (пехоте не поздоровится). Как и прошлая версия — может летать.
Не крайне полезен из-за малого количества.
Ассасины ногри. Почему-то строить контрабандистов и убийц Империи сейчас не разрешается (багa), но в кампании при захвате планеты Хоногхр у них будут такие бойцы. Наряду с этим их эффективность возросла так, что ассасины смогут убить не только второстепенных храбрецов, но и простых (не считая фаворитов фракций, таких, как Йода либо Тайбер Занн). В наземных битвах это три человека, каковые каждым выстрелом убивают одного пехотинца (и стреляют весьма на большом растоянии).
В то время, когда же их начинают бить, они включают маскировку. Превосходно убивают и храбрецов (особенно в случае если тех хоть чуть-чуть отвлекают).
«Джаггернаут». Транспорт для пехоты, что владеет несколькими системой и пулемётами противоракетной обороны, уничтожающей направленные на него ракеты. Часто нужен в оборонительной войне, в то время, когда закрывает войска от летящих в них ракет.
«Ланцет». Сейчас и Империя может летать. Для этого у нее имеется отряд летательных аппаратов на антигравитаторах. Они собственными лучами зацепляют и замедляют цели, на танках отключают электронику, и те никуда не движутся. Заодно и жизнь страдальцам уменьшают. Против вражеских глиссеров в движение идут и лазеры.
Превосходно трудятся против шустрых вражеских храбрецов. В отряде три штуки, и это очень замечательное оружие.
Мобильные оборонительные платформы. У имперцев они смогут генерировать ЭМ-поля (отклоняют вражеские ракеты), стрелять из сейсмического гранатомета и разворачивать сенсорный узел, что еще может и отстреливаться энергетическим оружием.
Партизаны
А вот у повстанцев все именно напротив — одни целые храбрецы.
«Галлофри». Транспорт для пехоты от повстанцев. Его преимущество над вторыми в том, что он может летать.
Другими словами ему нипочем складки рельефа, перемахнет через каждые препятствия. На борту имеется легкий лазер — может причинить самую малость проблем сопернику.
Мобильные оборонительные платформы. Партизаны обучились делать мобильный генератор щита (на маленьком расстоянии силовым щитом прикрываются все войска), ремонтную станцию либо скорострельную лазерную пушку.
Люк Скайуокер. Стёрши с лица земли «Звезду смерти», Люк совсем подался из летчиков в джедаи и сейчас применяет Силу чтобы подлечиваться от огня бластеров соперника. Значит — против него нужно пускать каких-нибудь рукопашников либо стрелков ракетами. Может бросать собственный клинок на манер бумеранга. Наконец, свойство «плащ Силы» делает Люка невидимкой.
Средненький боец-универсал.
Йода. А данный магистр обожает пользоваться «атакой Силы», наряду с этим он прыгает подобно мячику и с свирепой скоростью рубит соперника на клочки. За время действия «атаки» возможно свободно нашинковать несколько отрядов пехоты, да и храбрецам не поздоровится.
При помощи свойства «око Силы» входит в транс и временно открывает карту. За сим направляться бомбардировка соперника из дальнобойного оружия. Весьма сильный храбрец, при наличии которого на карте решаются многие неприятности.
Гарм Бел Иблис. Разъезжает на огромном танке называющиеся «Гаргантюа». В случае если у соперника нет противотанковых средств, тогда как он позван, — возможно сдаваться. Потому что это ужасный любитель давить. И не только какую-то пехоту, но и легкую технику, к примеру, те же AT-ST. Не получается уничтожать лишь то, что выше него либо летает.
Переправив мощность со щитов, может произвести замечательный взрыв около себя. Но дальность действия данной способности мала, а сейчас соперник довольно часто причиняет урон самому «Гаргантюа». Исходя из этого к применению не советую. Лучше из всех его шести орудий и катайтесь по сопернику, а не занимайтесь ерундой со взрывами. Кроме этого может перевозить пехоту. В случае если вовремя ввести его в дело — приносит победу.
В случае если же соперник успеет собраться с силами — сотрут с лица земли этого храбреца сами.
Синдикат
Синдикат снова в роли новичков, исходя из этого у них и в этом случае комплект армий самый большой. Кстати, особенность армий Синдиката в том, что у них большое количество оружия, игнорирующего силовые щиты.
Штурмовой отряд наемников. Включает три отряда по три человека. Вооружены бластерами, каковые потом смогут быть усовершенствованы до дезинтеграторов. В этом случае становятся громадной угрозой для всего живого и механического.
Смогут использовать стимуляторы, каковые ускорят их и увеличат урон, но очень сильно повредят здоровью этих солдат.
Взвод наемников. Также 3 отряда, но уже по 4 бойца. Стреляют из гранатометов, другими словами смогут стрелять навесом и через препятствия. Также могут закладывать бесконтактные мины, каковые очень сильно уменьшают жизнь пехоте неприятеля. Ну, и все та же стимуляция.
Хорошие бойцы при обороне от пехоты соперника.
Дроид-разрушитель . Умная машинка, которая скоро перемещается, но наряду с этим свертывает щиты. В то время, когда дроид поднимается на нужную точку, щиты опять разворачиваются, и тогда его сложно стереть с лица земли. Вооружен двумя типами оружия — бластером (причиняет громадные повреждения) и ионной пушкой (уничтожает щиты), каковые необходимо поменять вручную.
Весьма удачны в плане долгосрочных защитных сооружений. И лучше гонять их раздельно, чтобы не двигались со скоростью толпы. В отряде три автомобили.
Стелс-транспорт F9-TZ. Транспорт-невидимка на антигравитаторах (может проходить над водой либо болотом). Свойство эта не постоянная, а подключаемая.
Стрелять не может.
Мобильный ракетный комплекс MAL. Тяжелая артиллерия, три штуки в отряде. Может стрелять, не «разворачиваясь», но лучше его все же установить на позиции, тогда стрелять будет дальше и замечательнее. Может поменять оружие на карбонитовые ракеты, каковые еще и немножечко притормаживают соперника.
Карбонитовыми выстреливает по одной штуке, а простыми — целыми пачками за раз.
Самоходная импульсная пушка MZ-8. Отряд из четырех самоходок. Медленные и слабо защищенные, но превосходно уничтожают вражеские строения и технику откуда-нибудь со второй линии.
Прекрасно подходят для взлома вражеской обороны, в случае если имеется кем прикрыть. Спецспособность — самоликвидация с громадным радиусом взрыва. Лишь вот успеете ли ее применить?
Штурмовой танк «Кандерос». Замечательный танк-универсал. Главная боевая единица Синдиката.
Стремительный и с замечательным оружием. Испытывает кое-какие неприятности с пехотой, поскольку вышибает ее поодиночке, но с техникой расправляется на превосходно. Превосходно стреляет и по воздушным целям. Спецспособность — приводит к огню на себя, отвлекая его от каких-нибудь более серьёзных целей (действует лишь на военную технику, турели и дроидов), наряду с этим стреляющие жутко мажут.
В подразделении — три автомобили.
«Ночные сестры». Боевики с планеты Датомир. Приезжают в битву на монстрах-ранкорах и погибают вместе с ними. Весьма действенны против строений и большой техники (мелочь, вероятнее, ).
Животные под управлением «сестер» разламывают все, что попадется под тяжелую лапу. Против пехоты имеется свойство «небольшой оттекание судьбы», наряду с этим «захватывается» до двух подразделений пехоты либо техники, из которых высасывается жизнь (а у ранкора она восстанавливается). В подразделении всего одна «сестра», но пара «сестер» на ранкорах — совсем ужасная сила.
«Ворнскр». Отряд из трех хищников, каковые превосходно ощущают Силу и отслеживают и загрызают джедаев и ситхов. Плюс к этому видят невидимое.
Исходя из этого, в случае если соперник увлекся храбрецами, напомните ему, что все может весьма кроме того измениться.
Дрессировщик эвоков. В кампании мы приобретаем его лишь в том случае, если захватываем планету эвоков в рабство. В отряде по одному дрессировщику, что тащит с собой мешок с эвоками. Когда дрессировщик видит соперника, он производит эвока с привязанным к нему динамитом, и тот бредет к неприятелю. Последствия взрыва в большинстве случаев ужасающи. Пара дрессировщиков создают сильный эффект.
Нужно лишь не забыть их прикрыть.
«Стервятник». Второстепенный храбрец, что в большинстве случаев распространяет коррупцию. На земле это простой стрелок с высокой скорострельностью.
Помимо этого, может кидать взрывчатку в соперника, по окончании чего нажимаем кнопку взрыва (сам «стервятник» нажимать не кнопку не обожает). Так что тяжелая техника их весьма опасается, да и пехота весьма кроме того уважает. В Галактике может кроме этого разрушать вражеские структуры.
Мобильные оборонительные платформы. Включают мобильный постановщик помех (отклоняет ракеты), ракетную турель (может стрелять и по авиации) и клетку с йаласамири (они создают радиус, в котором всецело блокируется Сила).
Тайбер Занн. Фаворит и самый замечательный из храбрецов. самая характерная для него свойство — подкуп. Всем, кого видит, он тут же предлагает деньги, и те переходят на его сторону.
Наряду с этим он может свободно превышать лимит армий. Не поддаются такому влиянию лишь дроиды и храбрецы. Второе умение — невидимость, так что на поле боя его так легко и не отыщешь.
Оружие — дробовик, из которого он легко выкашивает целые подразделения одним выстрелом. Как храбрец весьма силен. Основное — отключить непроизвольный подкуп, чтобы не брал всякую ерунду, и брать сильных бойцов вручную.
Ураи Фен. Равно как и Занн, может маскироваться. Сражается врукопашную и может регенерировать жизнь.
Характерная спецспособность — умение на время парализовать отряды пехоты в некоем радиусе от себя. В полной мере красивый храбрец, побеждающий у многих рукопашников (благодаря тому, что лечится).
Силри . Фаворит клана «ночных сестер». Как и у других ночных сестер, пользуется оттоком судьбы. Но сама на ранкоре не ездит, а вызывает его, и он бегает раздельно. Ранкор получается размером мельче, да и здоровье похуже, но он лучше расправляется с пехотой и не хуже вторых ранкоров справляется с турелями.
Эта свойство перезаряжается лишь по окончании того, как ранкора убьют. Сама Силри вести войну энергетическим хлыстом.
IG-88. Дроид-убийца, что стреляет из снайперской винтовки порциями отравляющего газа, причем это скорее какая-то зараза, которая травит все отряды, вступающие в контакт с пораженными. На собственных это также действует. Спецспособность — радиоактивное заражение, при попадании соперника в эту область тот скоро теряет жизнь.
В силу этих свойств очень действен в обороне. В галактических масштабах может разламывать «Звезду смерти», действительно, затем также выходит из игры.
Босск . Еще один наемный убийца, что в наземном бою поливает неприятелей из огнемета (причем достается кроме того технике). Вдаль стреляет или из бластера, или плазменными гранатами (наносят урон по области и трудятся некое время). Как храбрец — так себе.
Но в галактических масштабах может убивать храбрецов соперника.
Прохождение
Цели Синдиката весьма несложны — коррумпировать все планеты и сделать всю Галактику одним огромным Синдикатом. Сильно? А кто тут разменивается на мелочи?
Действительно, миссии обычно так несложны и малы, что легко диву даешься…
1. Колония
В действительности это далеко не первая миссия. Потому что по-настоящему первое задание проходит в обучающей кампании. В том месте на протяжении нескольких миссий мы трудимся на Джаббу Хатта, после этого похищаем у него артефакт и отдаем его Ураи Фену, а сами попадаем в колонию (исходя из этого весьма советую пройти обучающую кампанию).
В итоге Джабба Хатт присылает наемных убийц, и Занну приходится устраивать бунт в колонии. Нужно стереть с лица земли охранников и вырубить пульты управления, приобретая себе в помощь вторых заключенных. В итоге мы добираемся до «Тысячелетнего Сокола», на котором за нами прилетел Ураи Фен, и покидаем колонию.
2. Нужны «стервятники»
Выбравшись из колонии, мы взяли задачу завербовать «стервятника». Дворец у нас имеется, так что этого второстепенного храбреца.
3. Задача «стервятника»
Как словно бы мы не проходили обучающую кампанию! Нужно переслать свеженанятого «стервятника» на Хоногр и запугать местное правительство.
4. Вторая задача «стервятника»
Раз одно запугивание уже удалось, мы должны провернуть задачу по рэкету на Шоле, что еще и принесет нам некое количество денег.
5. Пиратство на Мандалоре
Коррупция распространяется по Галактике. Сейчас мы должны попиратствовать на Мандалоре, за что возьмём «Тартан» от имперских сил.
6. На обломках «Звезды смерти»
На Явине-4 случилась битва, в которой была стёрта с лица земли «Звезда смерти». Но перед ее смертью имперские офицеры должны были выкинуть капсулы с данными. Исходя из этого Занн отправляется в том направлении вместе с флотом на поиск капсул.
К сожалению, эта планета находится довольно далеко от нас, исходя из этого придется или вычистить планеты на пути к ней, или коррумпировать их. Не скупимся на флот, по причине того, что в том месте нас ожидает громадная битва сходу с повстанцами, имперцами и враждебной нам фракцией Синдиката. Для упрощения судьбы в одном месте (в случае если проходить карту по часовой стрелке) возможно подкупить 4 «Тартана», каковые ввяжутся в битву с повстанцами, и нам останется лишь добить выживших. На другой стороне карты нас атакуют враждебные синдикатовцы, но возможно не принимать бой и уйти, пускай они вести войну с повстанцами.
Когда мы отыщем все 4 капсулы — миссия закончится.
7. Тёмный рынок трудится
По окончании прошлой миссии Джабба Хатт устроит бомбардировку отечественной родной планеты, и чтобы отомстить, требуются войска замечательнее. Исходя из этого нам нужно осуществить миссию по организации тёмного рынка на Куате.
8. Разведка Тайбера
А сейчас на той же Куате нужно закупить хотя бы одну разработку Тайбером Занном (но лучше все три). Возможно заодно устроить тёмный рынок у повстанцев и выкупить их технологии. Одвременно с этим в отечественном флоте покажется «Крестоносец».
9. Коррупция на Салейками
Настало время мстить Джаббе. Для этого нужно коррумпировать его родную планету. оптимальнее совершить на ней рэкет.
Кроме того, что денежки возьмём, так еще и будем приобретать их за уничтожение вражеской техники.
10. Саботаж на Салейками
Высаживаться на эту планету еще рановато, исходя из этого сперва отправляем в том направлении «стервятника». Тот обязан совершить саботаж, стёрши с лица земли силовое поле.
11. Сбой связи
А сейчас наконец настало время мстить. Собираем отряд во главе с Ураи Феном и отправляем его на Салейками. Стереть с лица земли защитников достаточно легко, но самого фаворита в том месте до тех пор пока нет.
Но мы определим, что Джабба уехал на Хайпори.
12. Привидения прошлого
На Хайпори отыскана фабрика роботов времен войны клонов. Так что сейчас собираем армию под руководством Тайбера Занна (но не следует забывать про Ураи Фена) и высаживаем его в том месте. Завод трудится в совокупности автозащиты, и в некоторых местах всегда восстанавливаются роботы. Время от времени нам попадаются пульты.
В случае если их взрывать, то у нас за спиной будут закрываться ворота, и роботы останутся за ними, уменьшая армию сражающихся с нами. Мы должны добраться до главного пульта, где Ураи Фен отключит защиту, плодящую роботов. Затем покажется Босск, которого возможно будет перекупить. Но выясняется, что это была подстава и сейчас Джабба захватит беспомощный завод. Так что Фен обязан пробежать к запасному пульту и настроить роботов за нас.
Отбиваем первую атаку, Фен бежит к пульту, а мы двигаемся к площадке, на которой высаживается Джабба. А дальше захватываем контрольные точки (дабы Джабба не имел возможности высаживать собственные войска) и оставляем их под охраной роботов. Затем мы строим на каждой планете фабрики роботов.
13. Зачистка автострады
Империя через чур удачно применяет сканер на Датомире, и мы должны этому помешать. Устраиваем в том месте коррупцию, по окончании чего уничтожаем сам сканер.
14. Чёрный союзник
А сейчас продолжение на том же Датомире. Нужно высадить в том месте Тайбера Занна и Ураи Фена. На планете находятся «сестры», каковые смогут поведать что-то о похищенном нами у Джаббы артефакте.
Но «сестры» до тех пор пока сидят в колонии, и сперва мы должны пробраться к ним.
Идем на восток, не трогая по пути ранкоров. В итоге добираемся до оборонительного комплекса. Но в случае если в том месте развернуть на север, то возможно обойти данный комплекс и выйти в том направлении, где меньше защитников и имеется куча техники.
На карте имеется куча бочек с горючим, подрывая каковые, возможно сжечь вражескую пехоту. В итоге мы открываем колонию, откуда приобретаем троих «сестер» и кучу другого нужного народа.
Но высвобожденные «сестры» не сильный и говорят, что нам нужно высвободить Силри, которая одна способна на изучение артефакта. В случае если посадить «сестер» на ранкоров, то уничтожение вражеских упрочнений пройдет весьма легко. Возможно сходить на юг и стереть с лица земли шахты, за каждую из которых заплатят по 6000.
Сейчас возможно и взломать ворота. Действительно, затем правитель планеты начнет приводить к из космоса, но для прекращения этого необходимо подорвать три станции связи. Одна из них будет по пути к воротам, вторая сходу за ними, и ее будет защищать один АТ-АТ (подкупаем), а рядом будут находиться еще три таких автомобили, совсем ничейных.
Путь к колонии защищает куча пушек, но возможно подогнать АТ-АТ к генератору и уничтожить его, обесточив пушки, по окончании чего дойти до колонии станет очень легко.
Силри соглашается оказать помощь нам, но в обмен на смерть правителя планеты. По пути к нему обезвреживаем еще несколько АТ-АТ и уничтожаем третью станцию связи, и еще один генератор. Убрать самого правителя будет несложно.
Но по окончании данной миссии ожидайте несколько визитов имперских флотов на Мау и Хоногхр. Лишь позже стоит переходить к предстоящим действиям.
15. Стычка в Облачном городе
Силри расшифровала артефакт и поведала, что ничего хорошего в нем нет. Исходя из этого решено реализовать его Империи. Но за помощь нас просят слетать на Беспин и привезти оттуда порцию газа тибанна. Неприятность в том, что это любимая планета Дарта Вейдера и неприятности с ним не необходимы.
Но Тайбер Занн решает свалить вину на похищение на клиента газа.
Для скачивания газа у нас имеется 5 роботов, каковые ездят к компрессорам в одной стороне. Сейчас отечественные бойцы защищают роботов, не разрешая их стереть с лица земли. После этого нам нужно взломать 4 контрольных пункта, где осуществляем подмену данных.
Нужно подогнать в том направлении Ураи Фена, и он перепрограммирует компьютеры на точках. Перед посещением последней точки прилетит сам Дарт Вейдер. Тут стоит захватить АТ-ST и разрешить войти его бегать по кругу, и пускай лорд ситхов за ними гоняется, а «стервятники» сейчас сотрут с лица земли остальных ситхов. Осталось лишь IG-88 взломать сервер, и затем всех возможно отводить в точку отступления.
Мы же за эту миссию возьмём пара новых классов судов. А заодно — еще пара флотов мщения от Империи.
16. Наживка на крючке
Нас таки сводят с имперцами и предлагают передать им артефакт на орбите планеты Кариды. Перед миссией оптимальнее осуществить третье пиратство. Строим флот из крейсеров и отправляемся в том направлении. Конечно, это ловушка, и нас в том месте уже ожидает многочисленная армия Империи. На протяжении последовательности сюрпризов с обеих сторон Тайбер Занн приобретает собственный флагманский корабль. Но и это не последняя неожиданность — Босск ворует артефакт и сбегает на флагман Империи, что скоро прячется в гиперпространстве.
Нам остается лишь стереть с лица земли целый оставшийся флот Империи и уходить. Снова ожидаем к себе домой имперцев.
17. Погоня за артефактом
Занн все вспоминает про бункер, в котором куча сокровищ. Но для этого нужен персональный ключ императора. К счастью, сам император собирает силы для противодействия повстанцам в другом месте, исходя из этого мы практически безопасно высаживаемся на Корусканте.
Тут храбрецы разделяются. Занн обязан стереть с лица земли мониторы, с которых охрана следит за всем происходящим. Он идет от одного монитора к второму, уничтожая либо переманивая штурмовиков. В итоге он встретится с адептами Силы.
Тут принципиально важно сперва стереть с лица земли контейнер с бактой, куда те бегают лечиться. И тогда возможно будет легко убить адептов и отрубить совокупности безопасности.
Сейчас наступает время Силри, которая почувствовала артефакт и идет за ним. Убивая по пути имперцев, она таки стащит артефакт, но на обратной дороге нужно будет отбиваться от адептов Силы. Исходя из этого на пути к артефакту совсем не лишним будет выстроить на месте вражеских пушек собственные.
Под конец она доберется до закрытой двери, в этот самый момент вступит в игру Ураи Фен.
Фену нужно стереть с лица земли силовые кабели, в чем ему мешают адепты. Легко стараемся не собирать около себя толпу, и тогда Фен легко доберется до нужной точки.
Наконец, все храбрецы планируют совместно и начинают пробиваться в сторону транспортника. Но тут активизируется совокупность защиты, и нас атакуют чёрные солдаты третьего проекта. Неподалеку от помещения безопасности возможно развернуть МОПы (особенно нужна будет противоракетная). Отразив атаку чёрных солдат, выключаем совокупность безопасности и идем обратно к транспортнику, около которого встречаем ситха. Тут нам выделяют еще три МОПа, и возможно поставить несколько ракетных и один «против Силы». Тогда ситх не сможет телепортироваться, и мы легко его уничтожаем.
Добираемся до выхода и улетаем.
18. Новое оружие императора
По окончании битвы Империи с Альянсом погиб император. Тайбер Занн решает прилететь на Куатт и в том месте под шумок захватить корабль Империи «Затмение». Формируем флот и отправляем его в том направлении.
Но на Куатте уже идет война между имперцами и повстанцами. Мы заключаем временный альянс с Альянсом, а сами пробуем совершить десантный челнок к «Затмению». Но сперва стоит стереть с лица земли все ремонтные базы Империи, дабы они не могли чиниться, а после этого вывести из строя одну из баз.
С остальными двумя партизаны и сами справятся.
Но по окончании захвата «Затмения» партизаны начинают и нас вычислять неприятелями. Тут основное — стереть с лица земли «Тысячелетний Сокол», что и был фаворитом повстанцев. Но, когда партизаны сдаются, у нас ломается лазер на «Затмении» и подходит Дарт Вейдер со своим суперлинкором.
Нужно некое время продержаться, после этого лазер все-таки починят и мы сотрём с лица земли оставшихся соперников.
Но история не заканчивается. Учитывая то, что взяла Силри, изучив артефакт, — нас ожидает неминуемое продолжение. Грядет самая чёрная сторона Силы?
Создатель: Антон «Dash» Лысенко. Материал был ранее размещён в издании «Игромания». Размещается с разрешения редакции издания.
Star Wars Empire At War Forces Of Corruption
Занимательные записи:
- Прохождение игры Star Wars: Jedi Knight 2 — Jedi Outcast
- Прохождение игры Star Wars: Knights of the Old Republic 2 — The Sith Lords
- Прохождение игры Star Wars: The Force Unleashed
- Прохождение игры Star Wolves
- Прохождение игры Steppenwolf: The X-Creatures Project
- Прохождение игры Still Life
- Прохождение игры Stroke of Fate, A
Наиболе релевантные статьи, подобранные как раз для Вас:
-
Прохождение игры Earth 2160
Точно все те, кто на данный момент просматривает эту страницу, в юные годы игрались в солдатиков. Не смотря на то, что солдатики… Они все как-то понятнее и ближе, чем компьютерные игры. Куда желаешь — в том направлении и поставишь,…
-
Прохождение игры Age of Pirates: Caribbean Tales
Непроста участь фаната серии. Вместо игры грезы была взята незаконченная версия, в которой отключено множество возможностей, и на печальные крики страждущих разработчики лишь отвечают, что…
-
Прохождение игры Почва 2160
Точно все те, кто на данный момент просматривает эту страницу, в юные годы игрались в солдатиков. Не смотря на то, что солдатики… Они все как-то понятнее и ближе, чем компьютерные игры. Куда желаешь — в том направлении и поставишь,…
-
Прохождение игры Корсары 3
Непроста участь фаната серии. Вместо игры грезы была взята незаконченная версия, в которой отключено множество возможностей, и на печальные крики страждущих разработчики лишь отвечают, что…
-
Star Wars: Empire at War — Forces of Corruption: Прохождение игры
Star Wars: Empire at War стала одной из лучших игр о вселенной «Звездных войн». Но дополнение превзошло ее на голову. В нем не просто добавили новую расу, ее стиль ведения войны коренным…