Обновлено: 22.03.2023
Балластная флора это паразитический растительный организм, который приживается в балластных насосах и быстро врастает в остальную часть подводной лодки, что приводит к полному заражению корабля. При распространении может заразить подводную лодку и потреблять энергию из распределительных коробок и батарей. Заражение паразитами балластной флоры может попасть на подлодку при закачке воды, когда подводная лодка находится в колонии спор балластной флоры.
Забавный факт: если вся подлодка будет заражена, то она в конечном счете превратится в Таламуса
Просто нажмите F3, чтобы открыть и закрыть консоль.
Команды консоли Barotrauma — редактор подводных лодок
alpha 16: установить альфа-прозрачность
color 110 255 203: для установки значений RGB
load [submarine name]: чтобы загрузить подводную лодку.
multiplylights [R,G,B,A]: для умножения цветов и альфа-каналов
reloadsprite: перезагрузить спрайты
resetall: сбросить все элементы и структуры
resetentitiesbyidentifier [identifier]: для сброса элементов и структур с идентификатором
resetselected: сбросить выбранные элементы и структуры
save [submarine name]: чтобы сохранить текущую субмарину.
setentityproperties [property name] [value]: для установки свойств элементов и структур
Команды консоли Barotrauma — Настройки сервера
autorestart [true/false]: включает таймер автоперезапуска
autorestartinterval [seconds]: задержка между раундами
autorestart timer [seconds]: значение таймера
botcount 10: количество ботов
botspawnmode [fill/normal]: режим появления ботов
difficulty 12: устанавливает сложность
startwhenclientsready [true/false]: включает таймер автозапуска, когда игроки готовы
Barotrauma читы
Команды консоли Баротравмы — Модерация
ban [character name]: запретить персонажа
banendpoint [IP Address/SteamID]: запретить ip или steam id
banid [clientID]: заблокировать идентификатор клиента
clientlist: Список игроков
givecommandperm [clientID/SteamID/character name/IP Address]: разрешение на использование консольных команд
giveperm [clientID/SteamID/character name/IP Address]: для предоставления разрешений
giverank [clientID/SteamID/character name/IP Address]: для присвоения ранга
kick [character name]: чтобы выгнать персонажа
kickid [clientID]: удалить идентификатор
killdisconnecttimer [seconds]: игроки-разъединители умирают через [секунды]
mute [character name]: чтобы отключить звук персонажа
resetkarma [clientID]: сбросить карму
revokecommandperm [clientID/SteamID/character name/IP Address]: удаляет разрешение игрока на использование консольных команд.
revokeperm [clientID/SteamID/character name/IP Address]: для удаления разрешений
setkarma [clientID] 56: установить карму
showkarma: показать карму
showperm [clientID/SteamID/character name/IP Address]: для отображения разрешений
togglecharacternames: показывает имена над игроками
togglekarma: переключает карму
togglekarmatestmode: переключает режим проверки кармы
unban [character name]: разблокировать персонажа
unbanip [IP Address]: разблокировать ip
unmute [character name]: включить звук персонажа
Команды консоли Barotrauma — Отладка
В игре

- Как только аванпосты станут доступны, в них будут перемещены все торговые опции. А это значит – долой старую карту кампании и интерфейс магазина, да здравствует взаимодействие с NPC!
- Благодаря обновленной системе торговли станет возможным не только покупка товаров, но и их продажа.
- И, наконец, помимо покупки предметов, вам станут доступны.
Покупка и улучшение субмаринЧтобы сделать ход кампании более интересным и плодотворным, вы сможете улучшать свою подводную лодку, а также покупать новые субмарины по мере продвижения по кампании. Система улучшений также будет работать с кастомными подлодками, так что будь это ванильная субмарина или созданная игроком, вы всегда сможете провести обновление корпуса и внутренних устройств, соответствующих вашему прогрессу в игре.
Модернизация подлодок связана с улучшенной системой экономики, где цены покупки и продажи варьируются между различными аванпостами и даже будут зависеть от ваших действий в игре. Мы надеемся, что вместе со всеми остальными возможностями аванпостов, это придаст Баротравме дополнительную приятную глубину.
Не забывайте, что текущая версия обновления уже доступна в экспериментальной публичной нестабильной версии. Остерегайтесь багов и добро пожаловать на борт!
Ниже вы найдете краткий перечень наиболее важных изменений. Также не забудьте обновить свою игру до последней версии: это необходимо для того, чтобы хостить мультиплеерные игры и присоединяться к ним. Листайте ниже, чтобы увидеть полный список изменений.
- Садоводство и уборка. Заскучали? Растениям нужен полив, а подлодка сама себя не почистит, так что давайте за работу!
- Новая субмарина – тяжелый транспортный корабль R-29, спроектированный “Rav2n”. Мы, наконец-то, готовы добавить в игру победителя конкурса дизайна Big Rig!
- Переключение каналов гарнитуры. Теперь вы можете назначать разные каналы для разных целей.
- Переработанный Mudraptor – самое злобное двуногое существо Европы получило улучшенный внешний вид, дополнительную броню и новые вариации атак.
- Исправлено исчезновение ботов, улучшений и субмарин в режиме кампании после смерти или завершения раунда сразу после их приобретения.
- Исправлен широкий спектр сетевых ошибок, таких как “index out of bounds” или “missing entity”.
- Некоторые другие исправления и улучшения; больше деталей вы найдете в списке изменений ниже.
Пусть ваше плавание пройдет как по маслу!
Улучшения и исправления моддинга :
— Порядок всех установленных модов (а не только включенных) теперь сохраняется в файле конфигурации.
— Модификации Workshop теперь могут быть загружены и установлены автоматически перед присоединением к серверу с модами.
— Отключен тип содержимого Executable из-за проблем с кроссплатформенной поддержкой.
— Исправлена ошибка, при которой кнопка «Отписаться» иногда не удаляла содержимое мода.
— Исправлен сбой при попытке изменить текущий выбранный основной пакет, когда другие основные пакеты недоступны.
— Исправлен сбой, связанный с модификацией при запуске.
— Увеличен предел «SeverLimbsProbability» (для предметов) с 1 до 10. Значение умножается вместе с совместной настройкой «SeveranceProbabilityModifier», а ограничение значения до 1 делает невозможным повышение вероятности некоторых видов оружия / атак.
— Исправлена отрицательная скорость вращения, не работающая на декоративных спрайтах.
— Исправлена загрузка ItemPrefabs после AfflictionPrefabs.
— Предыдущие включенные моды восстанавливаются при выходе с сервера.
— Добавлена поддержка «периодических эффектов» (эффекты, которые выполняются каждые x секунд) для Afflictions. См. Пример использования нового недуга «тошнота».
Улучшения AI :
— Использование огнетушителя при пожаре больше не считается воровством со стороны NPC.
— NPC теперь создают кислородный баллон, если не могут его найти. Однако они не создают снаряжение для дайвинга.
— Охранники NPC теперь создают больше наручников, если у них их нет, и они пытаются арестовать цель.
— NPC теперь создают сварочный топливный бак, если не могут его найти. Они не порождают сварочные инструменты.
— Некоторые корректировки логики того, когда требуется водолазное снаряжение, а когда нет.
— Боты теперь избегают холостого хода в узких корпусах. Вместо того, чтобы учитывать весь объем корпуса, теперь они учитывают только ширину помещения.
— Боты теперь должны избегать простоя в затопленных корпусах, даже если у них есть надлежащее оборудование.
— Медики больше не пытаются спасать объекты, устраняющие утечки.
— Медики теперь пытаются заменить пустые кислородные баллоны для своих целей, прежде чем увести их в безопасное место. Им также следует снимать костюм, когда он не нужен.
— Офицеры безопасности и те, кому приказано бороться со злоумышленниками, теперь активно ищут новое оружие, если у них плохое оружие или кончаются патроны.
— Боты не пытаются двигаться, когда их схватил дружественный персонаж.
— Боты теперь обнаруживают и игнорируют утечки, на которые нацелены другие боты.
— Боты больше не пытаются освободить водолазные костюмы, когда путь к шкафам затоплен.
— Все члены экипажа теперь пытаются поддерживать реактор в рабочем состоянии, если игрок не прикажет кому-то выключить его или выключит его вручную.
— Боты больше не должны пытаться управлять предметами, на которые нацелены другие боты (раньше они ходили рядом с устройством и только потом продолжали).
— Удалены следующие автономные задачи у медика и офицера безопасности: устранение утечек, ремонт систем и откачка воды.
— Теперь боты должны отдавать высокий приоритет предметам, которые они ремонтируют в настоящее время, независимо от того, было ли решение отремонтировать этот предмет ими или игроком, контролирующим персонажа.
— Боты, которые работают / исправляют, теперь должны подождать несколько секунд, прежде чем приступить к своим делам (ранее только в состоянии ожидания). Им не разрешается ждать при некоторых обстоятельствах, например, когда они находятся под водой или когда вокруг есть угроза.
Команды консоли Кампании
campaigndestination [index]: для установки целевого местоположения
campaigninfo: текущая информация о кампании
setlocationreputation [value]: установить репутацию
togglecampaignteleport: возможность телепортироваться двойным щелчком
pause: приостановить игру (только для одиночной игры)
Читайте также:
- Как включить турбо кнопку на мтс без интернета
- Как установить call of duty modern warfare с диска
- Fallout 3 operation anchorage системные требования
- Как установить usb driver
- Как поменять значок варфейс
The Shipyard introduces Submarine customization and progression, which is available in every Outpost.
Submarine
The one in charge of selling Submarines wears the Boiler Suit and an unpowered Headset with the Sub icon above them. They have a Wrench, a Screwdriver, a Diving Mask and a Toolbox containing a loaded Welding Tool, a Welding Fuel Tank, and 1 Aluminum. Their station is the Maintenance bay, easily recognized from all the Submarine Blueprints hanging on the wall.
When interacting with them, an interface similar to the Outpost Terminal appears, showing all available subs for sale, with the fixed price and its class specified, along with the options to either Purchase or Purchase and Switch (This function is identical to the Switch option in the Outpost Terminal). There are 10 vanilla subs available for sale, plus any up to date modded subs the player/host may have installed.
| Sub | Class | Description | Price |
|---|---|---|---|
| Azimuth | Scout | Superior speed, sleek design, and quality-of-life systems make this submarine a favorite among wealthy Coalition captains who manage to make it to retirement. | 10,000 mk |
| Dugong | Scout | Compared to larger vessels, the Dugong series is overshadowed in all aspects except one: their reliability for their price is world class. They’re lacking firepower and speed, so smart maneuvering is key. | 6,000 mk |
| Orca | Scout | With a relatively high top speed and fantastic ascent and descent characteristics due to her 3 large ballast tanks, Orca class subs are agile vessels, let down only by their small compliment of weapons, unreliable engine and reactors with a greater than average hunger for fuel. | 9,000 mk |
| Humpback | Attack | A former military vessel, WH4-L3 ‘Humpback’ has been outfitted to withstand most of the dangers in deep Europa. Her relatively high velocity is offset by low maneuverability. As she’s still boasting an older model reactor, power needs to be supplemented by a backup battery array or the crew will find themselves unable to run all of the new equipment. | 7,800 mk |
| Kastrull | Attack | The Kastrull is a dependable attack sub class bringing plenty of firepower to any fight, and although it’s not very nimble, it does sport a drone gunship as standard. Keep in mind that with its experimental open ballast tanks, low tolerance to flooding and numerous crew stations, a large, experienced crew will get the most out of this sub. | 21,000 mk |
| Typhon | Attack | Typhon class subs are known for their brutish appearance, reasonable array of light and heavy firepower, and their general dependability. Any captain should be aware of their poor rate of descent and unimpressive top speed. | 11,500 mk |
| Typhon 2 | Attack | Typhon 2 is an overhauled version of the venerable Typhon class of sub. Serving as a heavy gunship, the Typhon 2 class subs remain slow and ugly, but with the benefits of better survivability for their crews. | 20,000 mk |
| Berilia | Transport | Berilia is one of the biggest cargo ships on Europa. Its two engines and three ballasts require a copious amount of power to operate, and keeping the machinery in good working condition is a handful for even a moderately large crew. | 15,000 mk |
| R-29 «Big Rig» | Transport | R-29 is a heavyweight transport ship. While not terribly well armed against Europa’s underwater denizens, it has been retrofitted with two powerful electric discharge coils. Original design by rav2n. | 14,500 mk |
| Remora | Deep diver | A range of customization options are available for Remora. In this model, some of the main hull space has been replaced by a detachable ballast and a remote-controlled drone. A large crew is needed to operate this submarine. | 16,000 mk |
Improvement
Subs may have their hulls and systems upgraded in a variety of ways to improve durability and effectiveness. These are purchased from the engineering crew chief at any station, who is usually in the station engineering section with the reactor and the oxygen generator, plus a fabricator can also spawn randomly in this area. They can be seen wearing the Crew Chief’s Outfit and an unpowered Headset with the Upgrade symbol above them. They also possess a Wrench, a Screwdriver, a Diving Mask, a loaded Revolver, and a Toolbox containing the same items as their sub selling partner.
The crew chief offers multiple Upgrades per Upgrade category to further improve them, but each additional Upgrade in the same category also costs more than the one before. Thus, more money buys more and nicer things. Each sub may be upgraded independently of all the other subs, so how many different subs the player chooses to invest their hard-earned marks in is up to them. The crew chief also offers sub Maintenance services to ensure the safety of the crew on their next trip, provided they can afford such services.
When purchasing and switching to a new submarine, it will only be delivered and available for use once the crew leaves the Outpost. During this period, the Upgrade interface will become inaccessible as the crew chief isn’t able to work on any of the crew’s newly purchased subs until they have been delivered.
The pricing of their Upgrades and Maintenance services is dependent on the RP of the current Outpost, specifically 1 RP is equivalent to 0.5% of the price. Therefore, the maximum discount is 50% off at 100 RP, and at -80 RP they will charge 40% extra. Much like Store, the price gets higher beyond -80 RP as the entire Outpost hound for the crew’s blood.
Upgrades
There are 13 parts of a submarine, each with different types of Upgrades and each Upgrade has multiple levels. There is a total of 22 different Upgrades across all parts. Once the first level of an Upgrade is purchased, the second level will cost more than the last by a percentage. Each Upgrade has a different initial and maximum percentage spike in price and depending on the number of levels, the percentage price spike of 2 consecutive levels is different between all Upgrades.
Upgrade Price Calculation
An Upgrade has Y levels in total and its first level costs X1 marks, then X2, X3,… then pre-final level costs XPre-Max and final level costs XMax. Its initial cost increase is A%, maximum cost increase for the last level is B% and Z% = (B% — A%) / Y is the cost increase between each level. Therefore:
After paying X1 money for the first level, the second one will cost X2 = X1 + (A% + Z%).
The third level will then cost X3 = X2 + [A% + (Z% * 2)].
Then the fourth level is X4 = X3 + [A% + (Z% * 3)], and so on…
Until the final level is XMax = XPre-Max + (B% — Z%).
NOTE: Some prices after adding the level’s cost increase become decimal numbers. However, the game doesn’t take the decimal part into account, but only the whole number part as the actual price, which is then used to add the next level’s cost increase. So for instance, even after doing the calculation and the price of a level is X.99 mk (decimal part being 0.99), the actual price that is also displayed in game is just X mk.
The following tables show all values regarding each Upgrade in different Upgrade categories at 0 RP.
Hulls
◎
| Upgrade | Description | Effect per Level | Level Maxed | Initial price increase | Max price increase | Base price | |||||||||||||||||||||||||||
|---|---|---|---|---|---|---|---|---|---|---|---|---|---|---|---|---|---|---|---|---|---|---|---|---|---|---|---|---|---|---|---|---|---|
| Increase submarine hull durability. Makes the walls less vulnerable to damage and allows the submarine to dive deeper without getting crushed by pressure. | 10% Additional Wall Health
5% Deeper Crush Depth |
10 | 15% | 25% | 2,000 mk | ||||||||||||||||||||||||||||
|
Junction Boxes
◎◎◎◎◎◎
| Upgrade | Description | Effect per Level | Level Maxed | Initial price increase | Max price increase | Base price | |||||||||||||||||||||||||||
|---|---|---|---|---|---|---|---|---|---|---|---|---|---|---|---|---|---|---|---|---|---|---|---|---|---|---|---|---|---|---|---|---|---|
| Decrease the probability of fires occurring. | -3% | 5 | 15% | 20% | 1,000 mk | ||||||||||||||||||||||||||||
|
|||||||||||||||||||||||||||||||||
| Resist damage from excessive voltage. | 2% | 10 | 10% | 15% | 1,500 mk | ||||||||||||||||||||||||||||
|
Pumps
◎◎◎◎◎◎
| Upgrade | Description | Effect per Level | Level Maxed | Initial price increase | Max price increase | Base price | |||||||||||||||||||||||||||
|---|---|---|---|---|---|---|---|---|---|---|---|---|---|---|---|---|---|---|---|---|---|---|---|---|---|---|---|---|---|---|---|---|---|
| Increase the speed at which water is pumped in or out of the sub. | 5% | 10 | 15% | 25% | 2,000 mk | ||||||||||||||||||||||||||||
|
|||||||||||||||||||||||||||||||||
| Decrease power consumption. | -1% | 10 | 15% | 20% | 1,000 mk | ||||||||||||||||||||||||||||
|
Supercapacitors
◎◎◎◎◎◎
| Upgrade | Description | Effect per Level | Level Maxed | Initial price increase | Max price increase | Base price | ||||||||||||
|---|---|---|---|---|---|---|---|---|---|---|---|---|---|---|---|---|---|---|
| Increase maximum energy storage capacity. | 5% | 5 | 20% | 25% | 2,000 mk | |||||||||||||
|
||||||||||||||||||
| Increase maximum recharge rate. | 5% | 5 | 20% | 25% | 2,000 mk | |||||||||||||
|
Batteries
◎◎◎◎◎◎
| Upgrade | Description | Effect per Level | Level Maxed | Initial price increase | Max price increase | Base price | ||||||||||||
|---|---|---|---|---|---|---|---|---|---|---|---|---|---|---|---|---|---|---|
| Increase maximum energy storage capacity. | 10% | 5 | 20% | 25% | 2,000 mk | |||||||||||||
|
||||||||||||||||||
| Increase maximum recharge rate. | 5% | 5 | 20% | 25% | 2,000 mk | |||||||||||||
|
Fabricators
◎◎◎◎◎◎◎
| Upgrade | Description | Effect per Level | Level Maxed | Initial price increase | Max price increase | Base price | |||||||||||||||||||||||||||
|---|---|---|---|---|---|---|---|---|---|---|---|---|---|---|---|---|---|---|---|---|---|---|---|---|---|---|---|---|---|---|---|---|---|
| Decrease the time needed to fabricate items. | 5% | 10 | 15% | 25% | 2000 mk | ||||||||||||||||||||||||||||
|
|||||||||||||||||||||||||||||||||
| Lower the skill levels required for item fabrication. | -3% | 5 | 20% | 25% | 2,000 mk | ||||||||||||||||||||||||||||
|
|||||||||||||||||||||||||||||||||
| Decrease power consumption. | -1% | 10 | 15% | 20% | 1,000 mk | ||||||||||||||||||||||||||||
|
Deconstructors
◎◎◎◎◎◎
| Upgrade | Description | Effect per Level | Level Maxed | Initial price increase | Max price increase | Base price | |||||||||||||||||||||||||||
|---|---|---|---|---|---|---|---|---|---|---|---|---|---|---|---|---|---|---|---|---|---|---|---|---|---|---|---|---|---|---|---|---|---|
| Items will be deconstructed faster. | 5% | 10 | 10% | 15% | 1,500 mk | ||||||||||||||||||||||||||||
|
|||||||||||||||||||||||||||||||||
| Decrease power consumption. | -1% | 10 | 15% | 20% | 1,000 mk | ||||||||||||||||||||||||||||
|
Weapons
◎◎◎
| Upgrade | Description | Effect per Level | Level Maxed | Initial price increase | Max price increase | Base price | |||||||||||||||||||||||||||
|---|---|---|---|---|---|---|---|---|---|---|---|---|---|---|---|---|---|---|---|---|---|---|---|---|---|---|---|---|---|---|---|---|---|
| Decrease power consumption. | -5% | 5 | 15% | 20% | 1,500 mk | ||||||||||||||||||||||||||||
|
|||||||||||||||||||||||||||||||||
| Increase the rotation rate of all guns when operated by insufficiently skilled crew. | 10% | 10 | 20% | 25% | 1,000 mk | ||||||||||||||||||||||||||||
|
|||||||||||||||||||||||||||||||||
| Increase the view range of all weapons. | 8% | 5 | 15% | 20% | 4,000 mk | ||||||||||||||||||||||||||||
|
Loaders
◎◎◎◎
Loaders do not have any unique Upgrades, only general Machine Repairs Upgrades.
Engines
◎◎◎◎◎◎
| Upgrade | Description | Effect per Level | Level Maxed | Initial price increase | Max price increase | Base price | |||||||||||||||||||||||||||
|---|---|---|---|---|---|---|---|---|---|---|---|---|---|---|---|---|---|---|---|---|---|---|---|---|---|---|---|---|---|---|---|---|---|
| Increase maximum speed. | 5% | 5 | 15% | 20% | 3,500 mk | ||||||||||||||||||||||||||||
|
|||||||||||||||||||||||||||||||||
| Decrease power consumption. | -1% | 10 | 15% | 20% | 1,000 mk | ||||||||||||||||||||||||||||
|
Reactors
◎◎◎◎◎◎◎
| Upgrade | Description | Effect per Level | Level Maxed | Initial price increase | Max price increase | Base price | |||||||||||||||||||||||||||
|---|---|---|---|---|---|---|---|---|---|---|---|---|---|---|---|---|---|---|---|---|---|---|---|---|---|---|---|---|---|---|---|---|---|
| Increase reactor power output. | 2% | 5 | 15% | 20% | 2,500 mk | ||||||||||||||||||||||||||||
|
|||||||||||||||||||||||||||||||||
| Decrease fuel consumption rate. | -7% | 5 | 20% | 25% | 1,500 mk | ||||||||||||||||||||||||||||
|
|||||||||||||||||||||||||||||||||
| Increase the time reactors can stay at critical temperature before meltdown. | 10% | 10 | 10% | 15% | 1,000 mk | ||||||||||||||||||||||||||||
|
Monitors
◎◎◎◎
Monitors do not have any unique Upgrades, only general Machine Repairs Upgrades.
Oxygen Generators
◎◎◎◎◎◎
| Upgrade | Description | Effect per Level | Level Maxed | Initial price increase | Max price increase | Base price | |||||||||||||||||||||||||||
|---|---|---|---|---|---|---|---|---|---|---|---|---|---|---|---|---|---|---|---|---|---|---|---|---|---|---|---|---|---|---|---|---|---|
| Increase the amount of oxygen generated. | 5% | 5 | 10% | 15% | 2,000 mk | ||||||||||||||||||||||||||||
|
|||||||||||||||||||||||||||||||||
| Decrease power consumption. | -1% | 10 | 15% | 20% | 1,000 mk | ||||||||||||||||||||||||||||
|
Machine Repairs Upgrades
These are available for all Upgrade categories except for Hulls and Weapons.
| Upgrade | Description | Effect per Level | Level Maxed | Initial price increase | Max price increase | Base price | |||||||||||||||||||||||||||
|---|---|---|---|---|---|---|---|---|---|---|---|---|---|---|---|---|---|---|---|---|---|---|---|---|---|---|---|---|---|---|---|---|---|
| Equipment will take longer to start deteriorating. | 5% | 10 | 10% | 20% | 2,000 mk | ||||||||||||||||||||||||||||
|
|||||||||||||||||||||||||||||||||
| Equipment will deteriorate more slowly. | -5% | 10 | 10% | 20% | 2,000 mk | ||||||||||||||||||||||||||||
|
|||||||||||||||||||||||||||||||||
| Decrease the amount of time needed to repair equipment when unskilled. | -5% | 5 | 10% | 15% | 1,000 mk | ||||||||||||||||||||||||||||
|
|||||||||||||||||||||||||||||||||
| Decrease the skill level required to repair items. | -5% | 5 | 10% | 15% | 1,500 mk | ||||||||||||||||||||||||||||
|
Maintenance
Keeping the sub and its installations in good condition is crucial for the crew’s survival when traversing the Europa’s ocean. Sub Maintenance can be done manually by anyone, preferably individuals skilled in those aspects, mainly Mechanics.
Manually repairing things can be a tedious and difficult task depending on the structure of a sub and the current state of a sub. The quickest way to maintain a sub is to just stop by an Outpost, spend money in Maintenance services, and get everything repaired automatically instead.
However, things like shuttles (drones) that come with certain subs can’t be recovered manually if they get destroyed or the crew happens to lose them along the way. The only way to retrieve the lost shuttle is to replace it for a new one in Maintenance.
There are 2 types of services in Maintenance: Repair and Replace. The repair service is available for purchase once per visit to an Outpost. The replace service is only available for subs with built-in shuttles that have lost said shuttles and also only purchasable once per visit to an Outpost.
The price of the services is shown below at 0 RP.
| Service | Price |
|---|---|
 Repair All Walls Repair All Walls
|
500 mk |
 Repair All Items Repair All Items
|
500 mk |
 Replace Lost Shuttles Replace Lost Shuttles
|
1,000 mk |
The Submarine Editor is a modding tool that can be used to expand the core game by creating your own submarines, wrecks and outposts (NEW!). The custom creations can be shared in the Steam Workshop. The submarine editor is included within the main game and is accessible from the main menu under «Customize». At the moment the editor is only available in English. The process of building a fully playable submarine or functional monster can be quite involved and, unfortunately, in-game tutorials or documentation are not available yet. Aside from this Wiki, you may be able to find help through the following links:
FakeFish guide to the Submarine Editor
Barotrauma Discord Server
Barotrauma Forums
Basics
In Barotrauma a submarine is constructed from rectangular Hulls, designating areas that are inside the submarine. Water will not «spawn» inside of Hulls. The next step is to surround the Hull with structural objects to give collision surfaces to walk on and stop water from entering the Hull. Usually a submarine is made up of multiple Hulls separated by internal walls and floors, with doors and hatches to travel between them, and the ensemble of Hulls enclosed by Shell structures.
From this bare minimum watertight structure, there are several vital systems required for a fully functional submarine.
Power
- See also: Nuclear Reactor
Almost all submarine systems require power. Currently the only power source available to submarines is the Nuclear Reactor, fed by Fuel Rods which must be manually loaded into the reactor. The resulting output power can be wired to other systems, usually via Junction Boxes
Oxygen
- See also: Oxygen Generator
While the Hulls are empty of water, they are not automatically full of air. To prevent suffocation within the submarine, an oxygen generator must be powered and connected to an immediately accessible vent. Vents must be connected directly to the oxygen generator by links. Vents linked to other vents will not transfer air or water as of v0.10.6.2 therefore they must be connected to an oxygen generator to work properly.
Navigation
- See also: Navigation Terminal
Submarine movement is controlled by the Navigation Terminal, and achieved by two separate components: the Engine and Ballast Pumps. The engine is required for movement in the x direction (horizontally), while ballast is required for movement in the y direction (vertically).
Docking Port
- See also: Docking Port
A Docking Port is required for submarines to dock at outposts.
Spawnpoints
- See also: Spawnpoint
At least one character Spawnpoint is required for a submarine to be useable.
Interface
Submarine editor interface in «Edit Mode».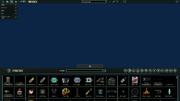
The buttons on the top part of the editor interface, from left to right, are Back, Open…, Save, Test, Toggle visibility, Previously used, (The name of your edit), Add submarine, Edit mode, Wiring mode, Generate waypoints, and Info.
At the top left, there is a panel listing the number of Items, Structures, Walls, Lights, and Shadow-casting lights in your edit. These numbers provide a general metric for the complexity of your file. The numbers will turn from green to red as they reach a level with significant (anticipated) performance impact.
Along the bottom is the Entity Menu, which can be toggled open and closed with the arrow button at the top of the menu. This is where you will find the components to create your edit. You can filter components using the textbox in the center of the Entity Menu and by selecting a category on the right. From left to right the categories are All, Structure, Decorative, Machine, Equipment, Electrical, Material, Misc, Alien, Wrecked, Thalamus, ItemAssembly, and Legacy.
After selecting an object, clicking in the editor window will place the object. Right clicking will cancel object placement. Clicking the name of an object will select it for placement.
Adjustment of an object’s position can be done by clicking and dragging the object. A finer degree of movement can be accomplished by selecting the object and using the arrow keys. Additionally, holding shift will ignore the grid when placing an object using the mouse.
Top Toolbar
Back
This button opens a dialogue box asking «Are you sure you want to return to the main menu? All your unsaved progress will be lost,» with the options of «Yes» and «Cancel». Selecting yes will bring you back to the main menu, cancel will keep you in the submarine editor.
Open…
This button opens the load menu, with the options to «Delete», «Load Autosave», «Cancel», and «Load» a selected file, with a textbox to search the list of available files. The available files are broken into «Submarine», «Outpost» (although this may be empty), «Outpost Module», and «Wreck». The files are all «.sub» files and are located at «…BarotraumaSubmarines», «…BarotraumaContentMapOutposts», and «…BarotraumaContentMapWrecks» respectively. Once a file is selected, it can be deleted to be removed from the game, or loaded into the editor to be edited. This is different from «Add Submarine».
Save
This button opens the save menu, with text fields «Name» and «Description», a dropdown menu for «Submarine type», the settings «Shuttle» and «Hide in menus», and the «Required content packages». The save menu also has a «Preview Image» which can be automatically generated using the «Create» button or can be picked from your files using the «Browse…» button. Finally, the save menu has «Cancel» and «Save» buttons, which cancel or confirm your save respectively.
Submarine Type
With the submarine type «Submarine» selected, the «Price», «Class», «Recommended crew size» and «Recommended crew experience» characteristics appear. Everything is determined by you except the price, which is automatically calculated by the editor itself (but you can still set the price manually if you are so inclined).
With the submarine type «Outpost module» selected, the «Module type», «Allow attaching to», «Location types», «Gap positions», «Maximum count», and «Commonness» characteristics appear. These options allow you to define what type of module you have created, the types of other modules it may be connected to, which types of campaign map locations this module can be generated in, where the gaps in the hull of the module are (defining where other modules connect to this one), how many instances of this module can be generated at one outpost, and how likely this module is to be found in an outpost.
With the submarine type «Outpost» or «Wreck» selected, you have no additional characteristics to edit.
Regardless of submarine type selected, your file will be saved to «…BarotraumaSubmarines» as a «.sub» file.
Test
This button allows you to test your edit by spawning you and 2 crewmates into the .sub file in an otherwise empty ocean. If there are no spawnpoints present in your edit, you will receive an error message. Simply type «spawnpoint» into the filter textbox in the Entity Menu, click on the Spawnpoint, and place it within your edit. You will spawn as a Captain with standard spawn gear, so make sure to put the spawnpoint in a safe location.
Toggle Visibility
This button opens a menu to allow you to choose which types of entities are visible in the editor. The options from top to bottom are «Lighting», «Walls», «Structures», «Items», «Waypoints», «Spawnpoints», «Links», «Hulls», «Gaps», and «Thalamus». This button can be useful when trying to fine tune different aspects of your edit, without disturbing other layers.
Previously Used
This button opens a small window which shows the history of previously placed objects.
History
This button opens a drop-down menu which shows the edits you have made and allows you to jump back to specific edits. The history is cleared when exiting the editor.
Add Submarine
This button adds another submarine into the current submarine file. This button is NOT equivalent to «Open…Load» as the added submarine is non-editable and will simply appear as a green outline with a cross at the added file’s origin. This tool can be used for adding things such as smaller vessels, escape pods, or detachable sections into your current edit. For example, if you open the Kastrull submarine file, you will see the Kastrull’s Drone at the bottom right of the editor as a green outline. The drone is attached to the Kastrull by clicking on the Kastrull’s bottom docking hatch and then holding space while clicking on the green cross of the drone. You can test the success of this addition using the «Test» button. The Kastrull spawns with its drone attached. Note that this combination requires docking hatches oriented in a matching way, ie. a ship with only a top docking hatch cannot be connected to a ship with only a top docking hatch,a ship with a horizontal hatch cannot be connected to a ship with a vertical one, etc.
Edit Mode
This button puts the editor into «Edit Mode» (default mode). In this mode you can spawn and delete items. You can open/interact with items by pressing «E» or right-clicking the item and selecting «Open». More on this mode in the Editor Tools section.
Wiring Mode
This button puts the editor into «Wiring Mode». In this mode you gain a new menu on the left which contains every color of wire available in the game as well as an inventory where you have a screwdriver equipped. This mode allows you to wire power and signals between devices in your edit. More on this mode in the Editor Tools section.
Generate Waypoints
This button will generate waypoints for AI navigation around the submarine based upon the layout of hulls, gaps, doors, hatches, and ladders. If you want your ship to be compatible for playing with bots you should double-check your waypoints after they have been generated. Every point on the ship you want the AI to access should be within character’s reach of a waypoint. Connect waypoints by left-clicking on a waypoint, holding space, and then left-clicking the waypoint you want to connect it to. Pay special attention to the waypoints outside of the ship, as the auto-generated waypoints tend to intersect with the collision boxes of the railguns and coilguns, as well as being dangerously close to the propeller.
Info
This button displays the information about the submarine and character editors. Hopefully someday in the future this will contain official documentation and tutorials.
Editor Tools
Edit Mode
In edit mode, the user can spawn and delete entities using the Entity Menu. Items can be selected and placed in containers by holding the item over the container, holding shift, then releasing the item once the desired container is highlighted. Additionally, containers and appropriate items can be opened by mousing over them and pressing «E» or right-clicking them and selecting «Open». Once the inventory of the container is open, items can be selected from the Entity Menu and placed in inventory slots. Individual items can be placed by clicking once, multiple items can be placed by clicking and dragging over the inventory slots. This is especially useful when filling items with the same item multiple times, such as with shotguns, harpoon guns, and revolvers.
The entity menu contains almost every item that can be found in the game. They are organized into different categories that can be selected via buttons in the top right corner of the menu. Users may filter items in the selected category by using the ‘Filter’ textbox on top of the menu.
All
The ‘All’ category displays items from all categories.
Structure
The ‘Structure’ category contains walls, fins and some decorative elements specific to a submarine’s hull.
Decorative
‘Decorative’ items include background walls, signs and decorations.
Machine
The ‘Machine’ category contains functional devices.
Equipment
‘Equipment’ are items that can be carried, handled and/or equipped by characters.
Electrical
Items that relate to storing and distributing power and signals are found in the ‘Electrical’ category. This includes batteries, wires, lamps and logic components.
Material
The ‘Material’ category contains items used primarily in crafting.
Misc
The ‘Misc’ category contains items that don’t fit into any other category.
Alien
The ‘Alien’ category is for items specific to the alien ruins.
Wrecked
The wrecked versions of items are in the ‘Wrecked’ category.
Thalamus
The ‘Thalamus’ is a special category comprised of items related to the Thalamus creature.
ItemAssembly
Multi-item assemblies saved in the editor are found under ‘ItemAssembly’.
Legacy
The ‘Legacy’ category contains legacy items that aren’t officially supported, but remain in the editor to preserve compatibility with older creations.
Linking
Links are used to associate two objects together within your edit. To link one object to another, select either object, hold space, then select the other. To unlink two objects, select one of them and repeat the process.
If an object can be linked with another object, the details will be presented in yellow text in the Object Properties underneath the object name. The object properties will prompt you to «Hold space and click with the mouse to link to another item» and will then specify «Allowed links». Sometimes you will attempt a space-click to link 2 objects together which are not allowed to be linked and no link will appear, while other times the link will appear in red. If you believe 2 devices should be able to be linked but you are not seeing the link appear, you may not have Links visible under the «Toggle Visibility» menu. When 2 objects are successfully linked, the link appears green.
Examples of items that can be linked are vents to oxygen generators (a necessity), coilgun, railgun, and depth charge loaders to their respective weapons (also necessary), and containers to nearby fabricators or deconstructors or other containers. Linked objects have a special object property called «Display Side By Side When Linked». This can be useful when trying to see if you have the material to craft a certain item in a fabricator. When done successfully, the link should turn purple. However, this property can also result in inventory menus overlapping and can be frustrating in practice, so best not to go overboard and link 3 large cabinets together. A special case of linking is when a room in your edit is not defined by a single rectangle. This can be overcome by placing many hull objects, linking them, and then placing gap objects between the hull objects to create one large hull.
Wiring Mode
- See also: Wiring
In wiring mode, you gain a new menu on the left which contains every color of wire available in the game as well as an inventory where you have a screwdriver equipped. Clicking a wire from the menu will add it to the other hand of the player, allowing you to wire power and signals between devices in your edit. Wire nodes can be created by selecting an existing, placed wire with left-click, then «CTRL»+left-clicking on a straight portion of the wire. These nodes can then be dragged around the ship to make your wiring look neater (or worse, it’s not a science). Right-clicking a wire node will delete it. Objects cannot be spawned or moved while in wiring mode. Unfortunately this includes very useful and commonly wire-dependent electrical components and sensors. Use «CTRL+1» to quickly switch to Edit Mode and «CTRL+2» to switch back. (More shortcuts in the Shortcuts section)
To (Re)wire a Device
Pressing «E» on a device in Wiring Mode allows you to rewire the device, opening up a new panel with various electrical input and output pins, depending on the device. When this panel is opened with a wire in your hand, the wire will appear on the panel. If not, you can click on the desired color of wire while the device wiring panel is open and the wire will appear on the panel. Click and drag the end of the wire to the desired pin to secure one end of the wire to the device. Right-click or press «ESC» to leave the device wiring panel. Now you can move to the device you want to connect the other end of the wire to, dragging the wire behind your cursor. Mouse over the desired device and again press «E». Again the wire in your hand will appear on the panel, drag the wire to the desired pin to secure the wire. When the wire pops into place, you will see a label generated beside the wire telling you the name of the device (and pin) the other end of the wire is connected to. To remove a wire from a pin, press «E» to bring up the wiring panel, then click and drag the end of the wire off of the undesired pin, but still on the panel. To remove the wire completely, drag the end of the wire off of the wiring panel.
Object Properties
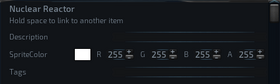
After an object has been placed, the user can select it and edit its properties. See items, and installations for more specific information.
Submarine Design Considerations
Flood Management
- See also: Maintenance#Flooding
Hull breaches are an almost inevitable occurrence in gameplay. Submarines can be designed to help manage flooding and mitigate its damaging effects. By designing a submarine to have several compartments, flooding can be localized, limiting damage to the power grid and disturbances to submarine buoyancy. Doors can be specifically wired to close automatically, or to have their state linked to a signal from a water detector. Indicators warning of high water levels on the opposite side of a door can prevent accidental flooding as well.
Bilge Systems
There are a variety of ways to set up a bilge system, but they always require a pump connected to a power source. Except for large submarines, only one pump is usually required. Effective bilge systems usually have the following characteristics:
- The bilge pump will be located near the bottom of the submarine, where water naturally tends to accumulate.
- The power source for the bilge pump will be elevated above the pump. This keeps the pump working even as water accumulates.
- The bilge room is separated from neighboring rooms by doors, or can only be entered from above.
More advanced bilge systems may feature automated bilging, remote activation, connection to the ballast system and/or flood doors.
Navigation
- See also: Connection Panels#Steering
Navigation is usually done via a Navigation Terminal. The navigation terminal must be wired to send signals to the engine and ballast pumps to be effective.
Engines
Engines are used to adjust the horizontal acceleration of the submarine. Engine power requirements and effectiveness can be specifically modified by changing the engine properties.
Ballast Systems
Ballast systems are used to adjust the rate of descent/ascent of the submarine. Ballast systems generally involve two or more pumps, connected to a power source. A larger ballast room means the submarine can ascend or descend more quickly. If the ballast room is too small or if there is not enough pumping power, the submarine will respond slowly to vertical navigation instructions.
Submarine weapons
- See also: Railgun
There are four components to a properly functioning submarine weapon system: the turret, the controller, a loader, and at least one supercapacitor. The turret should be on the outside of the submarine, with its range of rotation appropriately set to limit the potential for accidental hull damage (this can be done through changing the object properties). The gun controller is attached to the ceiling and is wired to the railgun. Submarine weaponry is powered exclusively by supercapacitors (rail- and coilguns have very high power requirements, which only supercapacitors can deliver). Generally, only one supercapacitor is needed per turret. Supercapacitors usually receive their energy directly from the power grid and must be charged like batteries. Weapon loaders must be linked to the corresponding turret in the same way that vents are linked to the oxygen generator in order for the weapon to use ammunition and work.
Hulls and Gaps
Hulls must be defined for every discrete space which can hold air or water in the submarine. If a space is not contained by the hull, the game will assume it is the outside ocean. The hull object is found under the «Structure» menu. The hull should be dragged to at least include the interior of a room and half of the space of the surrounding walls, floor, ceiling, and entryways (including doors and hatches).
Gaps connect hulls together and allow the game to determine how water and air should flow between rooms. Gaps should only be manually placed for cases where two hulls are adjacent to each other and will not be connected by a door or a hatch. Door and hatch gaps are automatically generated when a submarine is loaded into the editor, or at the start of gameplay.
Power Grid
- See also: Nuclear Reactor
Submarines are powered by at least one nuclear reactor, which must be connected indirectly to all of the powered objects within a submarine via junction boxes. If too much power flows through a junction box (or if the power delivered to a junction box far exceeds its load) for a sustained period of time, the box can blow a fuse or even explode and cause a fire. The power delivered by the reactor to all of the junction boxes it is immediately connected to is the amount required by the most energy demanding junction box. In general, power requirements for different paths in the grid should be about even, and the impact of power fluctuations when a machine becomes active or shuts down should be minimized.
Backup Power
- See also: Battery
Batteries are a source of backup power. Backup power can be used to keep critical systems (such as the oxygen generator) going for a short time when the reactor shuts down or fails. Batteries also can be used to prevent power outages by absorbing excess energy from a junction box.
Выбор подходящей подводной лодки для управления может увеличить или уменьшить шансы игрока на выживание в Barotrauma. Вот некоторые из лучших вариантов в игре.
Barotrauma, пожалуй, одна из самых инновационных и новаторских кооперативных игр в жанре ужасов на выживание за последние годы, Barotrauma.видит, как игроки формируют команду и берут на себя роль на борту одной из подводных лодок из названия, пытаясь пройти по Европе и не погибнуть в процессе. Это простая концепция, но легче сказать, чем сделать.
То, какие игроки в конечном итоге используют подводные лодки, формирует огромную часть их игрового опыта. Это не то решение, к которому игроки должны относиться легкомысленно. В Barotrauma есть широкий выбор сабвуферов, из-за чего выбор может показаться сложной задачей. Вот некоторые из баротравмлучшие подводные лодки, которые могут немного облегчить выживание.
Содержание
- 10 Winterhalter
- 9 Dugong
- 8 Remora
- 7 Orca
- 6 Херья
- 5 Typhon
- 4 Humpback
- 3 Kastrull
- 2 Azimuth
- 1 Berilia
10 Winterhalter
Одна из баротравмПодводные лодки класса Scout Winterhalter уникальны тем, что на их борту действительно есть исследовательская станция. Поскольку это единственная подводная лодка в игре, которая делает это, это делает ее отличным вариантом для кооперативных команд или игроков-одиночек, желающих максимально использовать возможности исследовательской станции. Это может помочь игрокам исследовать и использовать генетическую материю в игре.
Кроме того, Winterhalter — мощная подводная лодка. Это делает его хорошим выбором для игроков, которые ищут подводные лодки с большей мощностью двигателя (хотя это может затруднить эффективное управление).
9 Dugong
Dugong — удобный для начинающих и очень доступный сабвуфер. На самом деле, несмотря на относительно низкую цену покупки, многие игроки считают Дюгонь одним из Лучшие ванильные подводные лодки Barotrauma в целом (полезный совет, который следует помнить новичкам).
Из-за того, что Дюгонь меньше, он довольно легкий и маневренный. . Более того, сабвуфер имеет простую компоновку, в которой легко ориентироваться, что является еще одной причиной, по которой начинающим игрокам следует выбирать Dugong. Тем не менее, одним из его основных недостатков является то, что он имеет значительную слепую зону. Некоторые геймеры считают, что это слишком проблематично, чтобы обойти это.
8 Remora
Remora — одна из сильнейших подводных лодок в Barotrauma благодаря удобным, умным функциям, которыми он может похвастаться. Некоторые из этих функций включают дрон с койлганом, а также медицинский фабрикатор и шкаф с токсинами в его медицинском отсеке.
Более того, Remora на удивление шустрая, может похвастаться приличной максимальной скоростью 23. Это делает сабвуфер отличным выбором для игроков, которые ищут универсальный, маневренный вариант, но при этом большой и сбалансированный. Однако некоторым игрокам не нравится расположение сабвуфера, так что об этом стоит помнить.
7 Orca
Игрокам, которые ищут подводную лодку с элитной маневренностью и полезными боевыми функциями, не нужно искать ничего, кроме Orca. С катушкой электрического разряда и специальными койлганами опытный экипаж может стать грозным пилотом Orca.
Это также одна из самых маневренных подводных лодок в игре. Это делает Orca отличным выбором для самых разных стилей игры. Тем не менее, стоит отметить, что реактор Orca потребляет топливо на 50% быстрее, чем другие подводные лодки в игре, так что это не самый эффективный вариант.
6 Херья
Херья одна из баротравмболее универсальные и надежные сабвуферы, что делает его подходящим для агрессивного стиля игры. Многие игроки захотят чего-то жесткого, так как ответная атака — один из самых душераздирающих моментов в играх ужасов. С минимальными слепыми зонами и одним из самых прочных артиллерийских отсеков для любой из подводных лодок в Barotrauma, выбор Herja не должен вызывать затруднений для игроков, которые хотят сделать акцент на атакующей мощи своей обычной субмарины.
<р>Следует иметь в виду, что у Herja нет на борту аккумуляторов. В результате перезарядка должна производиться с помощью специального дока рядом с реактором, что может отпугнуть некоторых игроков.
5 Typhon
Одна из баротравмподводных лодок класса атаки, Typhon — отличный выбор для игроков, которые ищут наибольшую огневую мощь от обычной подводной лодки. Тифон является домом для двух отдельных больших турелей, Double Coilgun и Railgun. Это делает его великолепным выбором для сражения с Баротравмой множеством зверей и монстров.
Тифон может вместить экипаж из 4–9 человек. и является одним из самых медленных сабвуферов в игре. Команды или игроки-одиночки, желающие максимально увеличить скорость своей субмарины, захотят выбрать другую запись в этом списке.
4 Humpback
Для небольших экипажей трудно представить, что многие игроки возьмут проблему с Горбатым. Одна из самых быстрых подводных лодок в Barotrauma, Humpback обладает множеством отличных качественных функций, которые делают ее доступной и универсальной. Это отличный вариант для команд с разными стилями игры.
Конечно, идеальных сабвуферов не бывает, и Humpback не исключение. (В конце концов, даже у кораблей в некоторых из лучших игр о лодках и кораблях есть свои недостатки.) Некоторые игроки сетуют на то, что ее аварийные батареи требуют ручного запуска, а орудийное покрытие подводной лодки оставляет желать лучшего. Однако в целом это отличный корабль, который стоит рассмотреть большему числу игроков.
3 Kastrull
< р>Одна из подводных лодок класса Barotrauma Attack, самая сильная черта Kastrull — возможно, ее дрон. Подлодка также оснащена колоссальными восемью орудиями (одно из них находится на самом дроне), пятью из которых фактически могут управлять наводчики. С максимальной горизонтальной скоростью 20 км/ч Kastrull также является одной из самых быстрых подводных лодок Attack, что делает ее отличным выбором для игроков, которые хотят сочетать мобильность с огневой мощью.
< р>Как упоминалось выше, дрон Kastrull — фантастическая особенность, во многом благодаря его мощному койлгану. Подобные инновации ставят Barotrauma в один ряд с другими играми, которые обязательно понравятся любителям подводных лодок и морских сражений.
2 Azimuth
У Азимута один из лучших реакторов среди всех подводных лодок в Barotrauma. Кроме того, это подлодка с относительно низким энергопотреблением, что делает ее отличным выбором для игроков, которые ставят эффективность своих кораблей превыше всего.
Однако стоит отметить, что у Azimuth нет на борту Metal Fabricator. Отсутствие такой важной функции делает подводную лодку, возможно, более уязвимой, чем другие. Конечно, ощущение уязвимости в море — важнейшая часть опыта в хоррор-играх, в которых используется этот сеттинг, и это то, что игроки могут обойти.
1 Berilia
Игроки, которые ищут максимальное пространство для хранения, а также достойные защитные возможности, не должны искать дальше Берилии. Berilia — очень устойчивая подводная лодка, а также имеет самый большой грузовой отсек среди всех кораблей игры. Хотя это не самый быстрый корабль, заставлять игроков чувствовать себя медленными и неуклюжими — это то, что делали игры ужасов на выживание еще до появления Resident Evil.
В то время как игроки может в конечном итоге не использовать все грузовое пространство, которое есть у Berilia, приятно иметь возможность. И игрокам не нужно беспокоиться о том, что Berilia уязвима из-за ее размера; на корабле есть несколько катушек электрического разряда, чтобы скрыть слепые зоны.
Баротравма сейчас доступна на Mac, ПК и Linux.
р> <р>
Для тех, кто любит игры за возможность пострадать в компании друзей, имя Barotrauma, вероятно, не станет пустым звуком. Игра про коллектив подводной лодки, дрейфующей в глубинах инопланетного океана, пробыла в раннем доступе без малого четыре года и сколотила солидную по меркам столь оригинальной инди-инициативы аудиторию. Проект с первого же взгляда ощутимо выделяется на фоне прочих кооперативных выживачей: под одной крышей здесь уживаются survival-horror шутерной механикой, симулятор управления субмариной, социальная игра, RPG, адвенчура и даже элементы экономической стратегии… Многоликая химера, выведенная совместными усилиями студий Undertow и FakeFish, оказалась более чем жизнеспособной. Но вот разобраться во всем этом механическом многообразии новому игроку будет ой как непросто. Тем более, что разработчики ему в этом не особенно помогают.
Тайны океана
Местом действия игры становится Европа — но не привычная нам часть земного шара, а одноименный спутник Юпитера, покрытый бескрайним океаном и по сюжету давно колонизированный людьми. С годами колонисты все больше отдалялись от колыбели человечества, а в какой-то момент и вовсе утратили связь с Землей. А единственным способом сообщения между разрозненными аванпостами стали подводные экспедиции на укрепленных суднах с тяжелым вооружением. Ведь как выяснилось, в неизведанных глубинах водятся чудовищные существа, которые не прочь полакомиться свежей человечинкой. Именно управлением такой субмарины предстоит заняться игроку. И крайне желательно не в одиночестве.

Чего только не водится в местных водах
Геймплейную канву Barotrauma в двух словах не опишешь, но в качестве хоть сколько-нибудь близкого примера на ум внезапно приходят отечественные «Космические рейнджеры». У нас есть корабль со своими характеристиками и обмундированием, которое можно прокачивать — или подкопить деньжат на более мощную и вместительную подложку.
На нем нам предстоит курсировать от аванпоста к аванпосту, выполняя нехитрые по сути задания, вроде доставки, экскорта, добычи ресурсов или устранения особо агрессивной подводной фауны. В населенных пунктах можно брать квесты, затариваться товарами или нанимать помощников. При этом в наших интересах помогать развитию подводной цивилизации, делая неприветливый мир хоть чуточку более гостеприимным — врагов у нас тут всегда будет больше, чем друзей.

Рулевому по долгу службы 90% времени приходится залипать в этот экран
Но если в «Рейнджерах» главные события происходили во время визитов в поселения, то здесь куда важнее само путешествие. Посему на роль второго референса просится культовый космический рогалик Faster Than Light. Во-первых, в обеих играх нас постоянно подгоняют двигаться все глубже и глубже в неизведанное. Если в FTL нашу экспедицию гнала вперед армада захватчиков, то здесь эту роль выполняет агрессивная радиация Юпитера, понемногу проникающая в океан и делающая поверхностные воды непригодными к жизни. Правда, эта механика остается сугубо опциональной.
Во-вторых, обе игры сосредоточены на кризисном менеджменте и оперативном решении экстренных ситуаций силами экипажа корабля, разбитого на разные технические роли. То приходится тушить пожар, то справляться с разгерметизацией жизненно важных отсеков, то встречать на борту незваных опасных гостей, то лечить травмированных товарищей… За каждую их этих задач нужно иметь ответственного товарища. Только вот в Barotrauma любого участника экспедиции может — и в идеале должен — отыгрывать живой человек.

Течь в подлодке уравнивает всех членов экипажа. Будь ты капитан или юнга, берись за ремонт, пока не отдал концы!
Одиночкам тут не место
Справляться со всеми задачами по навигации, починке и защите корабля в одиночку или даже вдвоем будет трудновато, несмотря даже на помощь ботов. Местный мультиплеер вмещает до 16 человек, но для полноценного контроля над кораблем желательно иметь в команде хотя бы пятерых участников на главные роли. Во главе экипажа стоит капитан, задающий координаты движения подлодки, следящий за состояниями всех систем и раздающий приказы подчиненным.
Среди них ключевую роль играет подкованный технически персонаж: инженер и механик. Первый управляет реактором и чинит электронное оборудование, а второй отвечает за механические неисправности и крафт всяческих расходников. Венчают минимально компетентную команду судовой врач и офицер охраны, отстреливающий подводных монстров как за бортом корабля, так и на палубе — супостаты легко проникают сквозь обшивку подлодки.

В суматохе боя чудовищ бывает трудно разглядеть, отчего они становятся лишь более пугающими
Слаженная и координированная командная работа здесь ценится превыше всего. В отличие от той же FTL, в Barotrauma нет окна паузы, в котором можно спокойно оценить ситуацию и проработать план действий. И если что-то может пойти не так, то оно с огромной вероятностью уже пошло не так — вы просто не заметили. Поломки жизненно важного оборудования, пробоины обшивки, атаки морских чудовищ, перепады давления и температуры, физические и психические недуги… Потерять ценные ресурсы, провалить цель миссии и даже расстаться с жизнью в этой игре можно за считанные секунды, а почувствовать себя в безопасности вы сможете только состыковавшись с очередным населенным аванпостом.
С одной стороны, роли разделены во многом лишь номинально — никто не мешает врачу встать за бортовой рейлган, а офицеру охраны врачевать больных. Да и когда вода уже заливает корабль почти до потолка, становится не так важно, кто именно обязан заделывать пробоины. Важно, у кого в руках сварочный аппарат. На друга надейся, но и сам не плошай! А то ко дну пойдут все и разом. С другой стороны, придерживаться своих задач мотивирует система прокачки, дающая бонусы определенным классам именно в их основном деле.

Разобраться в работе ядерного реактора с кондачка не выйдет. Тот случай, когда присказка «Ну это же не ядерная физика!» теряет всяческий смысл
Разумеется, с такими требованиями к тимворку крайне желательно играть в компании друзей и с голосовой связью. Координировать действия можно с помощью внутриигрового интерфейса, но это гораздо менее удобно, а каждая секунда промедления может стоить жизни. И уж совсем нечего в Barotrauma делать геймерам-одиночкам. Авторы, конечно, обещают всячески развивать однопользовательский режим, но пока что он остается лишь жалким огрызком того опыта, что вы можете получить в кооперативе. И даже как тренировочную площадку его воспринимать не получится: сколько ботов не прокачивай, они останутся такими же тупыми, а раздавать им приказы — забот не оберешься.
Ужас из глубин
При этом Barotrauma остается крайне эффективным хоррором. Что на самом деле не столь удивительно, если учесть портфолио ведущего разработчика — ранее он отметился развирусившимся ужастиком SCP – Containment Breach. Практически весь игровой процесс происходит в полутьме, а во время вылазок за борт черный океан разрезает лишь слабый свет фонарика. И каким бы тривиальным на словах ни был очередной квест, вы никогда не будете знать наверняка, что или кто поджидает вас за очередным рифом.
Отдельно нагнетает обстановку тот факт, что вы почти всегда будете смотреть на вашу подлодку через интерфейсы бортовых приборов — подобное решение уже встречалось в другой жуткой игре про подводную лодку Iron Lung. Вот на радаре появилась какая движущаяся точка, направляющаяся в вашу сторону. Остается только отдать приказ команде взяться за оружие и гадать, что же это такое. Пока у вас есть на это время.

В подводных локациях обзор сильно ограничен, так что саспенс чувствуется постоянно
Океан Европы населяет множество живности: от мелкой рыбешки и относительно небольших ихтиандров до гигантских морских чудовищ, которым самое место на страницах Лавкрафта. И словно оттуда же авторы почерпнули блестящую идею механики безумия. Стрессовая работа в замкнутом пространстве и постоянный шок запросто могут вызвать у вашего персонажа психоз, и вам начнет мерещиться всякая жуть. При этом диагностировать психоз самостоятельно невозможно — нужно чтобы вашего героя осмотрели сопартийцы. Загвоздка в том, что сам безумец будет видеть безумцами всех остальных!
Из одной этой находки запросто могут родиться сценарии в духе фильма «Нечто»: никто никому не доверяет, никто не понимает, что происходит, при этом реальная опасность подстерегает совсем рядом. А если хотите добавить в свою игру еще больше ощущения паранойи, включите перед стартом новой кампании функцию «предателей» — тогда кому-нибудь из вашего экипажа будут тайно поступать квесты по саботажу подлодки. «Амогус», подвинься!

Скоро у этой посудины будет новый капитан
Двадцать тысяч рестартов под водой
Подобных мелких деталей в игре на самом деле море. Скажем, большинство болячек лечится исключительно тяжелыми наркотиками, которые неизбежно вызывают привыкание. Гуманоидные монстры могут заразить игрока трупными паразитами, и при отсутствии подходящего лекарства единственный способ остановить их размножение — передать инфекцию другому персонажу. Умелый инженер может менять проводку в электроприборах, создавая новые способы интеракции с окружением и автоматизируя работу отдельных систем. А куча всяческих модификаторов и настроек игры позволит не заскучать на долгой дистанции. Это по-настоящему глубокая игра, в которой можно копаться десятками часов и постоянно находить что-то новое. Беда в том, что разбираться во всем этом вам ни капли не помогают.
Для настолько нагруженной нюансами и механиками вещи Barotrauma слишком уж не торопится их объяснять. Авторы предлагают короткое обучение основам каждой из ролей, но оно и близко не способно подготовить вас к опасностям реальной игры. Вас толком не научат ни воевать с морскими гадами, ни делать вылазки за пределы корабля. Чего уж там, даже не расскажут, как брать и сдавать миссии. Неочевидное управление и довольно сложный для неподготовленного игрока интерфейс тоже не помогают. Как итог ваше первое путешествие имеет все шансы оборваться на первой-второй вылазке.
Вообще, игре не помешал бы какой-нибудь внутриигровой справочник в духе «Цивилопедии». А без него остается лишь осваивать все методом проб и ошибок, набивая шишки в виде проваленных миссий и мертвых героев. И далеко не каждый будет на это готов. Мне вот было приятно познакомиться с Barotrauma, но тратить десятки, и потенциально сотни часов на изучение всех неочевидных нюансов, которые авторы не удосуживаются объяснить? Извините, я уже нашел свой яд. У меня для этого уже есть Football Manager.

Лазерная пушка долго заряжается, но если попадет — мало не покажется даже Ктулху
Конечно, отчасти ситуацию спасают пользовательские гайды от уже набивших свои шишки игроков. А еще лучше завербовать такого знатока Barotrauma в свою пати, чтобы задалбывать вопросами, на которые по-хорошему вам должны были бы отвечать авторы. Но даже освоив все необходимые для прохождения основы, вы регулярно будете сталкиваться с элементами, которые просто никак не объяснены. Бывает, во время навигации корабль просто отказывается слушаться, и приходится думать, почему? Это у вашего персонажа не хватает скиллпойнтов в искусстве рулевого? Это механик-дебил не следит за реактором? Это на корабле вышла из строя какая-то второстепенная система? Может, сломался один из насосов в балластном отсеке? Может, вашего героя охватил психоз? Или это у вас слишком кривые руки для этой игры? Спойлер: скорее всего сразу несколько ответов окажутся правильными. И поди угадай, какие.
Обзорный трейлер Barotrauma. Источник: Daedalic Entertainment
Ради чего стоит играть:
- Концептуально уникальный кооперативный выживач на 16 игроков
- Крутой сеттинг — неизведанный, бескрайний и враждебный океан
- Необходимость слаженной командной работы
- Игра блестяще держит напряжение и готовит испытания на каждом шагу
- Куча настроек кампании и режимов игры не позволят заскучать
Что портит удовольствие:
- Очень высокий порог вхождения
- Узнавать, как и что работает, придется из фанатских гайдов
- Квесты довольно однообразны и быстро приедаются
- Без компании тут делать нечего
- Беспощадная сложность понравится не всем
Итог
Barotrauma — это одновременно и крутой необычный survival-horror для компании, и оригинальная площадка для ролеплея с множеством интересных инструментов и механик. Вот только вкатиться в нее сможет далеко не каждый — порог вхождения неприлично высок, и дело не столько в сложности, сколько в патологическом неумении авторов как следует преподнести и объяснить все свои идеи. А для полноценного опыта еще ведь потребуется найти несколько безумцев-единомышленников. Зато если получится сколотить крепкую команду подводников, не боящихся ни жутких монстров, ни длинных пользовательских гайдов, в местном океане можно утонуть на десятки, если не сотни часов.